Whether you’re hoping to spend more time outdoors with family or friends or you’re looking for a reliable way to beat boredom and stay active, a backyard sports court is a terrific upgrade for households where sports are popular. These days, people spend more time at home and looking for fun things to do around the house. With a backyard sports court, you and your kids can entertain friends, host tournaments, and simply enjoy exciting gameplay whenever you feel like it. The following guide will help you transform your property into a backyard sporting arena. We’ve outlined various types of sports courts for you to consider creating at your home. Keep in mind that some of your construction plans may require a building permit.
Turning your backyard into a golf course

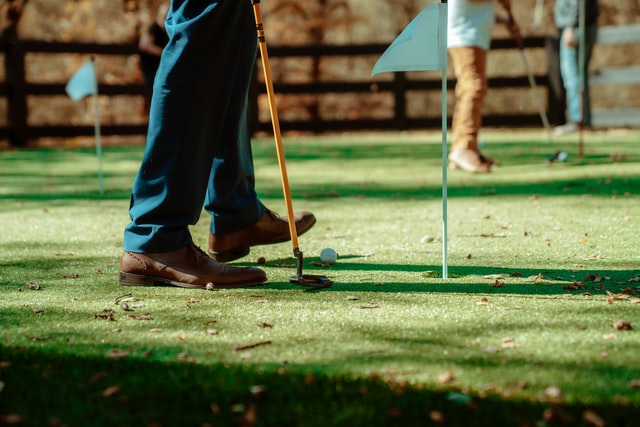
You can create an authentic golf experience when you create a backyard golf course. Even with a modestly sized yard, you can build a course designed to practice your putting even if long-distance swings aren’t suitable for your setting. To bring your golf course to life, you’ll need to do the following:
Make a plan
Scout around your yard and consider your golf course layout. The size of your yard will necessarily influence how many holes you include in your plan. As part of your plan, you should begin to gather the tools you’ll need for digging and installing drainage if required. You’ll need mainly gardening tools for digging. You’ll also need to purchase cups for your holes and flag markers. If you’re excavating a large portion of your yard, you may want to rent excavation equipment or hire a contractor to perform this task for you.
Select a site
After inspecting your yard, you should select your golf course site and formalize your course layout. Be sure the site you choose is from obstacles. However, there may be terrain features in your yard that will enhance your course. Natural ridges or plateaus can add interest to your design. If you have a large property with multiple acres, you might even include a water feature or sand trap in your layout.
Digging and contouring
Before building your course, be sure you mow the intended area, so it’s nice and short. You’ll need to maintain your short lawn to ensure your course is always ready for gameplay. When digging the course, you have the option of digging out the entire lawn and replacing it with seed or sod or simply leaving the lawn as is and digging out your holes. If digging out the whole site, you should opt to excavate to a depth of about 20 inches. Ideally, you should try to build in some soft contouring to add some challenge to the course if your terrain is flat. You can build in some unique features like slopes to make your course more distinctive.
Drainage
If your yard does not have good drainage, that can be a problem for your course. You can build in drainage by installing trenches that will drain water away from the center of your golf course. By excavating the site, you can more easily install this helpful trenching. Also, if you’re building a large backyard course, you might want to install an irrigation system at this point to ensure your green is routinely watered. Once you excavate your site, lay a layer of pea gravel on the bottom of the course. This will help with drainage too.
Sand
Sand is important in two ways. First, you can add a sand trap to your course for classic effect. You’ll want to size it proportionally to your course. Second, you’ll need to lay a layer of sand atop your pea gravel if you’re excavating your course. A two-inch layer of sand should suffice.
Seed or sod?
After installing your sand layer on your course, you’ll need a layer of topsoil. This layer should be about 14 inches and include no more than 20% clay. If you have time and aren’t too impatient for your course’s completion, you should plant seed instead of sodding. Sod will produce a visually handsome course, but it tends to produce an uneven green. Finally, when your green is installed, you can dig your holes, add your cups and flags, and start enjoying your backyard golf games.
Grab the right gear
Turning your backyard into a tennis court
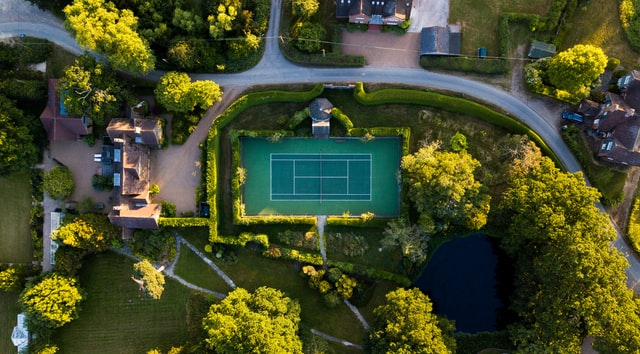
A backyard tennis court is an excellent feature for households with experienced or beginners tennis players. This type of feature can even add value to your home. Expense is an important factor in building a tennis court. Inviting a contractor to build your court can run anywhere from $22,000 to upwards of $65,000. You’ll also need to have plenty of property space to accommodate this type of court.
Key factors to consider:
Size
To accommodate your tennis court, you’ll need at least 7,200 square feet of space. A standard tennis court measures 27’ wide x 78’ long. Although you can alter the dimensions, it makes sense to stick to regulation size, especially if you have tennis players at home who’ll be practicing their game on the court.
Orientation
Your court’s orientation will depend on your yard, but if you have options, you may want to position it horizontally next to your home to prevent stray tennis balls from hitting the house. On the other hand, you can also top your court with netting to keep all the tennis balls on the court. You should strive to keep the court at least 10 feet from your home (or your neighbor’s home).
Drainage
It’s a good idea to invite a geotechnical engineer to your backyard to investigate its drainage. If your yard doesn’t have optimum drainage, you’ll need to invest in drainage solutions. Poorly draining ground can undermine your court’s integrity.
Soil conditions
You’ll need to examine your soil conditions before building your tennis court. Low-quality soils that don’t have good compacting qualities may not be suitable as the foundation for your court. You may need to amend the ground by adding asphalt or other granular materials to the soil.
Select a Court Surface
Do you prefer to play on clay, grass, or hard surface court? There are pros and cons associated with each type. Concrete, artificial grass, or hard surface courts require considerably less maintenance than grass or clay courts. However, grass and clay are easier on players’ knees. Also, clay and grass play do not produce the level of bounce that a hard surface does. You’ll need to consider your own preferences when making your selection.
Prepare the area and construct the court
To prepare the area, you’ll need to remove tree roots, stumps, grass, or other obstacles. Next, you should rent a steamroller (if you are installing an asphalt court, this is a must) to flatten the ground. Then, you’ll install your surface. After the surface has cured, you can tape your lines and paint. Measuring and painting your court are a project in themselves, so be sure to take your time if doing this yourself. Finally, you can install the net.
Choosing the right tennis court accessories
When your court is completed, you can add other must-have features such as your fencing. The fencing is key; otherwise, you’re apt to spend the afternoon retrieving tennis balls. Enclosing the space is a must. Other features you might want to install include:
- Lighting (check with your HOA or municipality about installing lighting for night play).
- Windscreens (these will help prevent wind from affecting gameplay and reduce visual interference)
- Squeegee (use a squeegee to remove water from your court after it rains).
Turning your backyard into a padel court
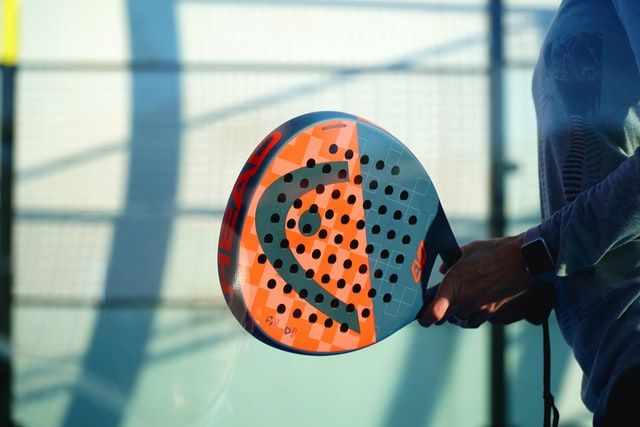
Padel is a mix between the games of tennis and squash. There are even elements of badminton involved in the game. A paddle court should be enclosed by a frame and walls that facilitate bounce. Tempered glass is the wall of choice. Frames are often constructed from galvanized steel. The following information will help you design and build your padel court.
Space requirements
According to padel regulations, your courts should be a rectangle of 32 feet and 10 inches wide and 65 feet and 7 inches in length. The court will be enclosed by the frame and walls.
Ceiling height
The minimum height of the ceiling for padel should be 19 feet and 8 inches. The frame should feature back walls and corners that are three feet above the sides.
Flooring/surface
Many people who install padel courts opt for artificial surf flooring. Before installing your surface, the ground should be excavated for perfect flatness. As with other court constructions, you’ll need to remove tree roots, stumps, etc. There are different types of synthetic turf you can choose from. Consider their maintenance needs when making your selection. All are designed to stand up to heavy wear and tear, which is why synthetic options remain most popular.
Lighting
Lighting for your court should be, at minimum, 20 feet from the surface.
Maintenance
To maintain your court, you should routinely remove any leaves or debris on your turf. You should brush away any debris with soft nylon bristles to ensure that you get rid of any seeds or organic matter that could cause mold or fungus to grow. Rain will help you keep your turf clean, but if it doesn’t rain for a while, you can use a diffuser to mist your turf before brushing it clean.
How to build a 9-wicket backyard croquet

9-wicket or long-grass croquet is a more informal game of croquet and highly suitable for backyard play. Croquet is a lawn sport that involves striking colorful balls with a mallet so that they, ideally, pass through a wicket. Here, we’ll explore the basics of building your croquet court.
Key court factors
When building your croquet court, you’ll want to lay it out in a rectangle. Regulation croquet courts measure 100 feet by 50 feet, but you can modify that measurement to suit the size of your yard space. The boundaries of your court can be marked by chalk or flags, which means there’s less construction and expense involved than with the building of enclosed courts. Maintaining short grass is a key to a successful croquet court.
What you need for 9-wicket croquet
Once your lawn is mowed, and your court is chalked out, you’ll need to gather your game supplies as follows:
- Six 35-inch full printed mallets
- Six colored HDPE balls (2.8 x 2.8 inches and 9 oz)
- Nine wire-wrapped plastic wickets
- Two stake posts
- One 600-D fabric carrying bag
Croquet set up
To set up your croquet match, you’ll need to perform the following steps:
- Measure 3 feet from the court center of the short bound side; then place a stake
- Measure 3 feet from the placed stake and install your first wicket (it should be in line with your stake and be at center court)
- Measure three feet from the first placed wicket and place your second (also in line with center court stake)
- Place the third wicket 16 feet from the second wicket
- Go directly between your first and third wickets and measure 9 feet toward the sides of the court and place wickets on either side (note the first diamond of the court is complete)
- Measure 16 feet from the bottom of the first diamond and place your 6th wicket (in line with center court stake)
- Measure 8 feet from the bottom of the first diamond and then 9 feet to either side of it. Install a wicket on either side
- Measure 3 feet from your 6th wicket; place the last wicket (inline with center court stake)
At this point, your court is ready for play. Visit the link to see a diagram of what your croquet court should resemble. As a tip, be sure to search for a set with sturdy wickets for more durability.
How to set up a badminton court in your backyard

Like croquet, badminton courts do not involve substantial expense in comparison to many other game courts. Once set up, they can also be taken down with relative ease. Badminton is a racquet game that can be played in singles or pairs. Follow the steps below to set up your backyard badminton court.
Badminton court dimensions
Your badminton court should be 44 feet by 20 feet. The net should traverse the center of the court and stand five feet tall in the center. You should opt for 30 feet of vertical clearance and remove any tree branches that could impede your gameplay.
What you’ll need for your badminton court
- Lawnmower (keep the court neat and trim to enhance gameplay)
- Hand mallet or hammer for pounding stakes into the earth
- 100-foot measuring tape so you can measure your court with accuracy
- Spray paint or chalk (to mark out the court)
- Stakes
- Badminton net, badminton set (including racquets and birdies)
Set up your badminton court
To set up your court, you should perform the following steps:
- Choose a flat area of your yard that will accommodate the dimensions of your court.
- Measure the court area using your tape measure. Place a stake in each corner by using your hammer to pound it into the ground. You can use chalk or spray paint to draw the lines of your court. Use a taut string to measure the court dimensions before spraying or chalking your lines.
- If there are obstructions in your court area, remove them. Large tree roots can be a tripping hazard. Once you remove them, be sure to refill any dips with earth and tamp them down flat. Then, mow the grass so that it’s no more than about 2 inches in height.
- Next, layout your centerline and install your badminton net. You can secure it with additional string or cable and stakes. Finally, add all of your boundary lines using your spray paint or chalk. Again, to achieve straight lines, be sure to measure first and use your string as a marker. The short service line should be 6 and 6 inches from your net on either side of it. The long service line should be 19 feet and 6 inches from the net.
If your family and friends are really into the game, it’s a good idea to invest in a professional-grade net; it will stand up better to heavy play. There are also various birdy styles and grades. Less expensive badminton sets such as those available at toy stores are less likely to hold up as well as more durably designed sets.
You can use this guide to create a worthy backyard that’s bound to add sportive fun to your home. The larger your backyard, the easier it will be to install additional features to accompany these courts, such as an area for spectators. For more elaborate courts, such as the tennis court, you may want to consult with a contractor (or several) to hire someone for the installation or the excavation. Once your court is installed, you can start planning your backyard fun.


