Insects are a big part of our life and can help us stop global warming, they’re some strategies like having a garden with native species that can help attract bugs, but that’s not the only way they can help reduce the impact of climate change. Bugs are also very nutritious and you can add them to your diet and help the planet. We gathered insects and earth lovers in this article to answer our questions and help you be bug friendly.
How to start beekeeping?
How to identify the different types of queen cells?
What types of beehives and bee boxes do you recommend?
3 ways to help our bees before and during Winter
Food: Making sure that our bees enter the winter period with enough stores of honey will allow them to survive the winter period. If you are overwintering your colony in a one-box 8f Langstroth hive, then a conservative estimate is to have 4 of those frames as a resource, capped honey frames. If you are overwintering in 2 8F Langstroth boxes you would increase this to 6 resources, capped honey frames. Opening the hive over the winter time is kept to a minimum if we are able to provide these resources to our bees when packing down. If the colony does not have these available resources entering winter, feeding might be necessary. The style of feeder can be internal (frame feeders and top feeders) or external to the hive (front feeders), but all provide the bees with the nectar replacement that they require to survive.
Wind: Winds can be a challenge during the winter time, but it is an easy element to change. Putting up a physical barrier in front of the hive, or reducing the hive entrance will help with eliminating chilling winds.
Temperature: Giving the correct space for a colony over winter, will allow them to spend less energy on temperature regulation, and subsequently see greater colony health as they grow in numbers coming out of Winter.
Colony Collapse Disorder: What Is It, and why does it matter?
Colony collapse disorder was the name given to a phenomenon that was first observed in the Southern United States around 2006. It was the occurrence of the apparent sudden disappearance of the large majority of the adult worker bees. At the same time, the queen was left behind as well as the young bees and brood. The bees were not found dead in large numbers in the bee yards, rather they were reported to have almost “disappeared”. To add to the mystery of what happened, it was observed that food stores in the hive were usually at a good level.
(It should be noted that in more northern climates, such as Canada or the American Mid-West we do not observe Colony Collapse disorder, but do experience very high hive loss some winters).
The survival of a honeybee hive is dependent on a strong population of adult worker bees and therefore within a short amount of time the remaining hive would die. This led to massive hive mortalities in the southern USA. Colony Collapse disorder resulted in three things, first, it received plenty of news coverage at the time, drawing the attention of the public. Secondly, It also spurred a large investment in research to find the causes of the collapse and to better understand the vulnerability of honeybees. Lastly, the observance of Colony collapse disorder allowed for significant public education on the importance of bees and pollinators as well as better beekeeping practices.
How can I keep my garden environment bee-friendly?
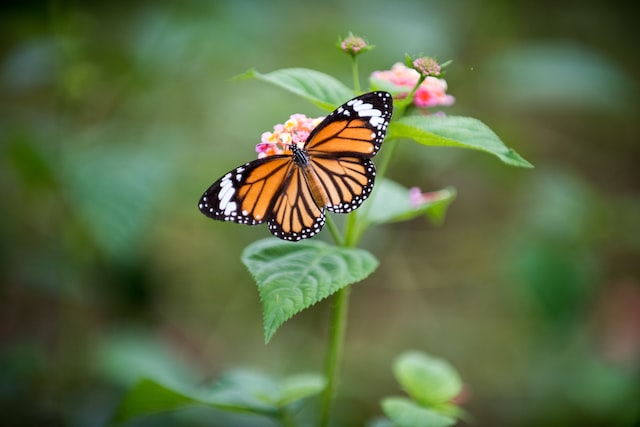
When it‘s the best season to start a butterfly garden?
In our northern region (Minneapolis, MN) fall is a good time to start a butterfly garden because it gives you more options. You can plant perennial plants if you give the root systems sufficient time to acclimate before the ground freezes…at least one month before the ground soil freezes. This gives you a head start on next season. In Minnesota, we’ve fall-planted plants as late as Halloween.You can also plant perennial seeds just before the ground freezes. if you plant sooner, you risk them being dug up by squirrels or other pesky garden diggers.in autumn, you’re most certain of where existing plants are located. In spring, you’re more likely to accidentally dig up prized garden plants.Spring is typically more cold, rainy, and muddy in many regions, which makes planting unnecessarily dirty and uncomfortable
How can people attract bugs to their gardens?
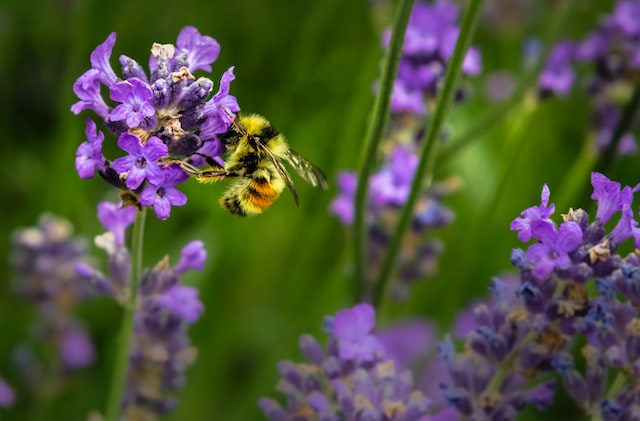
Generally speaking, we encourage people to focus on planting native species in their area and look for plants that offer the most benefits. Many prefer flowering species that offer pollen/nectar sources for a variety of invertebrates. However, it’s also important to look into the host plant species for many of our native butterflies. Some may not be as attractive but are important for the larval (caterpillar) stage to ensure the survival of all stages, especially those migratory species that are just passing through.
A second aspect that is important to many of our native insects/bugs is keeping the garden and surrounding habitats healthy and free of chemicals. There are numerous ways to treat pests/weeds without using insecticides or related chemicals. This will make your garden safer and healthier for all wildlife. Also, leaving natural areas with leaf litter, fallen logs, rocks, etc… are a great way of offering additional refugia to ensure the species are comfortable not only feeding in your garden but also staying there for an extended period of time. Maybe even call it home.
Tips when planting for beneficial insects in my garden
The majority of insect species that visit your garden are beneficial and deserve your attention and protection. To provide for their well-being, begin by thinking of your garden as their habitat. Provide for their needs and they will in turn become allies to help you manage the plant-damaging pests that thwart our good gardening goals. Beneficials include bees, butterflies and moths, beetles, and even flies, ants, hornets, and wasps. Each of these species has a niche in the garden you can enhance to keep them doing their good work. Tips on how to keep beneficial insects in your garden • Incorporate flowering plants into your landscape and vegetable garden for year-round bloom. • Use native plants; they are recognizable to native insects. • Use plants from the Daisy, Mint, and Carrot families – not only are they great food, herb, and flower plants that we enjoy, but they are very powerful attractors for bees, ladybeetles, parasitoid wasps, and other helpful insects. • Provide habitat for different phases of their lives. Many native bees are solitary nesters in twigs and holes in wood or they nest underground in social and semi-social burrows. Rock piles, snags, non-mulched soil, and leaving stems of dead ornamental grasses can provide a home. • Provide food for their young – brushy plants that the larvae of butterflies and moths can feed on will enable the adults to lay eggs in your garden. Be tolerant of some damage to the shrubs while their larvae grow. • Reduce or eliminate pesticide use; even “safe” oil and soap-based products can be harmful to beneficial insects.
What are the benefits of eating edible insects?
Bugs aren’t the only solution to our global food challenges, but they’re a BIG part of it. And they’re certainly a provocative way to steer the conversation back to the facts: what we eat impacts our bodies and the environment.
Insects are an underutilized alternative protein source that offers promising options for sustainable, nutritious, and delicious food. While eating bugs is a practice with a rich history across the world’s various cultures, very few Western societies are familiar with it today. For people who did not grow up with insects as normal ingredients, the wonderful world of eating bugs is a new discovery. Entomophagy – the practice of eating insects – will normally come up in the search results for anyone interested in topics like a) supplementing their daily diet with protein, vitamins, and fiber; b) finding alternatives to meat for protein; c) combating global food insecurity; or d) the future of animal feed.
-Aly Moore, Bugible
How to feed your worms and keep them safe?
Worms eat all sorts of organic matter including food waste, manures, and carbon-rich material referred to as bedding. We recommend non-dairy, non-meat food waste in a worm bin inside your home or near a living space.Worms especially love melons and pumpkins, banana peels, apple cores, and coffee grounds. Avoid oily, and salty foods and use onions and citrus waste in moderation. The most misunderstood aspect of vermicomposting is the concept of bedding. Unlike other animals, worms will consume their bedding and it’s a vital addition to a worm bin. Bedding can be shredded cardboard and paper, decaying leaves, peat moss, coco coir, or preferably a combination of the above. Proper bedding “mellows out” the contents of the bin, keeps pH closer to neutral, reduces the risk of fruit flies, and absorbs the water released by your decomposing food waste. We recommend adding bedding and food waste in a 2:1 ratio, by volume. In other words, two handfuls of bedding for every handful of food waste.The internet will tell you that worms can eat 50-100% of their weight daily. The true number is closer to 25% so be patient! Let your nose be the guide. When you smell foul odors, you have fed too much.
-Steve Churchill, Urban Worm Company
Tips on things to avoid in my garden if I want to keep the bees close:
A newer danger to bees is the practice of growing or spraying plants with neonicotinoid insecticides before they are sold to gardeners. These insecticides get into the nectar and pollen which can harm bees that visit the flowers. Read plant labels carefully, and ask the staff in the garden center or nursery to make sure you are buying plants that have not been pre-treated with insecticides. Neonic-treated plants won’t repel bees from your garden, but the bees may regret visiting after the toxins affect them
Most plants want to be visited by bees, but there are a few that have reputations for repelling them. Citronella (both the plants and candles containing the plant’s oils) can repel bees. Other strongly-scented plants like geraniums and wormwood may also repel bees, but will rarely keep them out of your garden if you also have attractive flowers.
How to make your own compost?
Composting is the natural process of recycling organic matter, eventually turning it into a valuable fertilizer or soil conditioner. Some composting processes are faster than others, but the most important thing is to choose a composting method that is practical for your individual situation.
There are two methods of making your own compost: Hot composting and cold composting
Hot composting relies on specific bacteria and fungi that thrive in temperatures up to 75 degrees Celsius, resulting in the whole process being usually completed in a matter of weeks. Firstly, you need a compost bin or tumbler to place your materials in. Secondly, the ingredients need to be alternating layers of a balance of about 75% high carbon ‘browns’ such as aged woody garden clippings, dead leaves, and cardboard, and 25% high nutrient ‘greens’ such as fresh lawn clippings, kitchen scraps, and animal manures. Thirdly, the heap needs to be turned at least once a week until it is fully composted. This compost has priceless nutrients, putting carbon back into our soils where they belong, and can be used to grow herbs, fruits, and vegetables.
Worm farming is a fascinating variation of cold composting where we create perfect conditions for special ‘composting’ earthworms that have been bred for their ability to process concentrated organics such as kitchen scraps very efficiently. A wonderful benefit of worm farming is the way it recycles your household organics to create one of the best-balanced organic fertilizers on the planet. Worms love a balanced diet, so it is best to feed your worms 50% nitrogen (greens) and 50% carbon (browns). Nitrogen creates heat and carbon helps cool it down. Combined with a regular water supply, carbon, and nitrogen balance the pH level and temperature in the worm farm, creating an optimal environment for your worms to break down waste efficiently. Once you’ve had your worm farm up and running for at least 3-4 months, it’ll be a good time to start thinking about harvesting the worm castings and using them as a fertilizer for your garden – your plants and veggies will love you for it!


