You’ve probably looked at a coffee table in a furniture store or maybe browsed through woodworking projects on a website and thought, “I could make that.” Maybe you were inspired enough to get started in woodworking right away, but you didn’t know where to begin.
Don’t worry. Everyone has to start somewhere, and a beginner’s guide to DIY woodworking is a good place to do it. Carpentry can be a therapeutic hobby that gives you hand-crafted furniture, but you can also make a tidy living with it.
Sounds pretty good, right? As with anything in life, you need to start with the fundamentals and move forward from there.
Fundamentals
Woodworking might make you think of furniture, but you can also make toys, ornaments, jewelry, boxes, birdhouses – almost anything.
As the saying goes, you need to learn to walk before you can run, so before you learn to make that coffee table, you need to learn a thing or two about your materials and tools.
Know your wood
Wood has a personality. That doesn’t mean your wood will strike up a conversation with you, but it does mean that certain woods are more accessible to dent and scratch, while others tend to be more challenging.
Softwoods, like pine, are cheaper than hardwood, but they get scratched a lot easier. These marks can give a unique appearance to furniture, which some people find attractive. Hardwoods, like oak, can take more of a beating. Hardwood is more expensive in woodworking, but using it will give you a better idea of how your tools behave.
No matter what the type of wood, learning how it behaves will prevent costly mistakes. For example, while most softwoods are used in making furniture, not all hardwoods are suited to that purpose. By learning about the grain, the absorbency of the wood, and other traits, you can avoid cracks and choose the right adhesives and finishes.
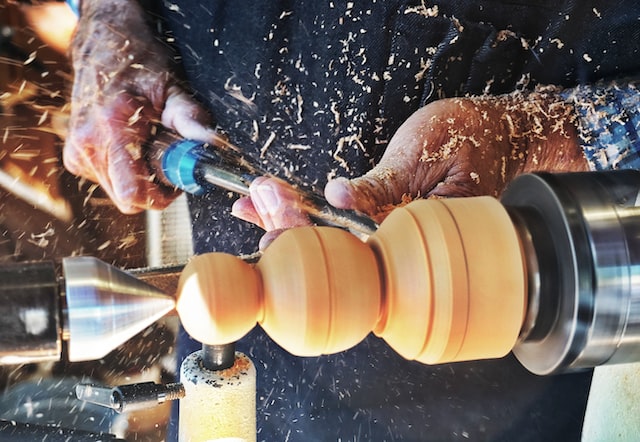
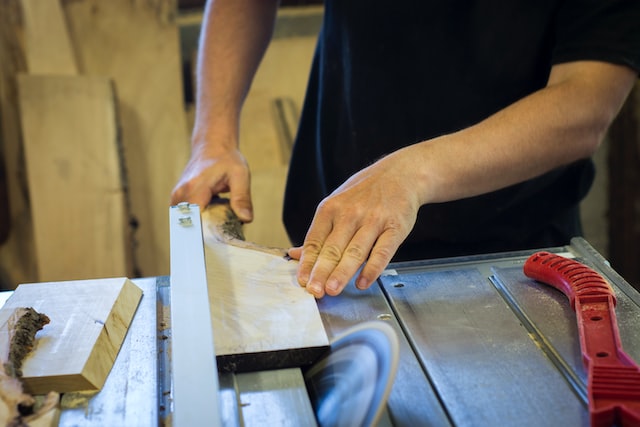
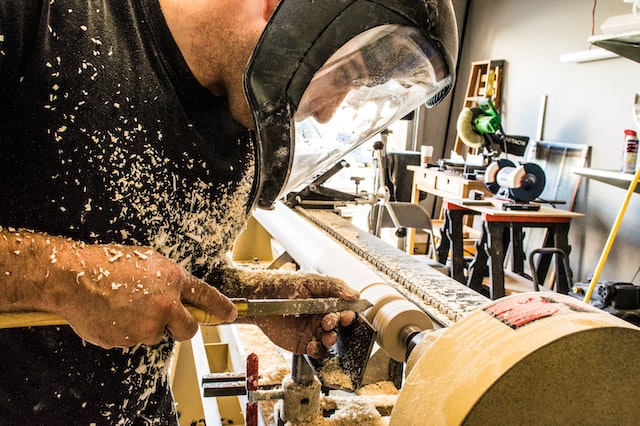
Know your tools
Choosing the right tools can seem a little daunting, and with good reason: hundreds of woodworking tools exist. The good thing is that you don’t need to have all the woodworking tools known to humankind. You only need the basic stuff to get started:
- Safety glasses – Proper eyewear will prevent debris from getting in your eyes.
- Earplugs – Power tools are loud. Wearing earplugs can save your hearing.
- Dust masks – Disposable dust masks prevent fine particles from entering your respiratory system.
- Respirator masks – Respiratory masks filter out carcinogens and other irritants from chemical fumes.
- Carpenter’s Pencils – These flat, thick pencils leave easy-to-see guide marks and won’t roll off your worktable.
- Tape measure – Measuring is easier with a durable, high-quality tape measure.
- Squares – Squares help you cut proper angles.
- Saws – One or two types of saws will help you cut accurately.
- Router – Routers create hollow areas for joinery or decorative patterns.
- Planes – Planes help you even out surfaces by shaving the wood.
- Palm sander – Palm sanders fit your hand for easy, fast sanding.
- Sandpaper – comes in different sizes and grit types for smoothing your surfaces.
- Mineral spirits/paint thinners – Paint thinners help clean up your tools after use.
- Finishes – Whether it’s wax, an oil, a stain, or paint, a good finish will help seal and protect your project.
- Masking Tape – Use masking tape to section off areas for finishing.
- Drills – A good drill with various drill bits will help you make holes for screws, knobs, and bolts.
- Woodscrews – Having the appropriate type of screw helps you create a solid finished piece.
- Mallet – A mallet is used to drive wood plugs into screw holes to cover the screws.
- Wood glue – Whether it’s PVA, liquid hide, waterproof polyurethane, epoxy or cyanoacrylate glue, using the suitable adhesive ensures a tight join.
- Clamps – Clamps can hold your project in place or hold pieces together while the wood glue dries.
From hammers to hacksaws, home improvement tools can quickly turn dangerous if misused. For novices and experts alike, a lapse in focus or preparation can have painful consequences. Be careful when using this tools.

Choose and create your project.
As a beginner, you might want to choose a simple project to start with. Most lumber or hardware stores will sell woodworking plans, or you can search online. Choosing a first woodworking plan that comes with a supply list and instructions will save you some frustration.
I went for a Bar Stool and followed this awesome article on how to do it!
Know your process
Once you’ve got everything you need and a place to work, you’ll need to figure out the process involved. Aside from a woodworking plan, you will also need to have a plan of action. This way, you outline what needs to be done and set yourself up for success.
A plan of action should look something like this:
- Pick the project – Choose a project that suits your skills and workspace.
- Pick the materials – What wood is best for your project?
- Read the plan well – Make sure you learn all the steps before starting.
- Make a cutting list – A list of pieces to cut will ensure you don’t miss any.
- Measure and cut – Measuring and cutting all the pieces at once will save you time and work.
- Assemble – When all the pieces are cut, assemble them all.
- Sand it – Once the pieces are assembled, sand your project until it is smooth.
- Apply a finish – Follow the instructions to create a beautiful finish.
- Clean up – Tidying up will prevent bits of sawdust from sticking to your finish as it dries.
Woodworking words
At some point, you’ll come across terms you aren’t familiar with. As a beginning woodworker, these are five commonly used terms that you may not know:
- Carcass – A carcass is the basic structure of a cabinet or other rectangular piece of furniture.
- Cupping – Cupping occurs when the edges of a plank bend to create a cup-like deformity.
- Dado – A dado is a trench that is cut into the sides of a cabinet for the purpose of fitting shelves.
- Flattening agent – A flattening agent is a compound you add to a glossy finish to reduce its shine.
- Mortise and Tenon – In this type of joint, a tenon (think of a tongue) is cut into one piece of wood and then fitted into a matching cavity (the mortise) on another piece.
Work safety
No matter what tools you’re using or how organized your space is, there’s always the risk of an accident. Using protective gear, cleaning up your space, and respecting your tools will reduce the risk of a bad accident.
Woodworking doesn’t have to be difficult, and it doesn’t have to be left to the professionals. With a little motivation, anyone can create something they can be proud of.
When picking your woodworking project, you should consider your skill level, workspace size, and how much money you want to spend. For your first project, try something simple. There are tons of projects for beginners, like toys, Christmas tree ornaments, storage bins, benches, and more.
To get started, try making a toy hedgehog or an embroidered ornament.
The toy hedgehog
You’ll need:
- 26 cm by 8 cm piece of wood
- Ruler
- Pencil
- Eraser
- Hot glue gun
- Sandpaper
- Paint (brown, yellow, and white)
- 2 pieces of wood dowelling for the wheel axles
- Sanding tool
- Jigsaw
Step 1:
Start by drawing the hedgehog outline onto the wood. You can trace a printed template if you like. When drawing the back of the hedgehog, don’t make the spikes too pointy, as that will make the shape tricky to cut out.
Step 2:
With your jigsaw, cut out the hedgehog. Once you are finished, trim off a ½” piece along the bottom. This piece will cover the wheel axles.
Step 3:
With your sandpaper, smooth the edges of the hedgehog’s body. For the spiky part, consider using a small sanding tool so you don’t destroy the shape.
Step 4:
The face should be a different shade than the body. Outline the face with your pencil, then paint the face light brown. Paint the body dark brown and the wheels yellow. After painting the whole toy, you may need to add another coating to get nice solid colors.
Step 5:
Draw two evenly spaced squares on the bottom of the hedgehog, big enough to fit the dowel. Cut the squares out.
Step 6:
Put some hot glue on the inside hole of each wheel before fitting the axel into it.
Step 7:
After you’ve connected the wheels to the axles, turn the toy upside down. Lay the axels in the square holes, then glue the ½”-thick piece over the bottom. Once the glue is dry, your hedgehog is done.
The embroidery wood ornament project
You’ll need:
- Some thin wood or plywood
- Pencil
- Jigsaw
- Masking tape
- Drill and small drill bit
- Embroidery needle
- Embroidery floss (two or three colors)
- Felt, for the backing
- Scissors
- Hot glue gun
- White paint marker (optional)
Step 1:
Download and print your template. Cut out the shape, place it on the wood and trace the edges. Once the shape is cut, tape the template to the wood.
Step 2:
Your template will have markings to show where the stitching holes should be. With your drill, make small holes where these marks are and include a hole at the top.
Step 3:
After you drill the holes, thread your needle with a piece of embroidery floss. Make a chunky knot at one end of the floss and create stitches following the pattern on your template. After the last stitch, remove the needle and close the thread with a knot. Make sure all knots are on one side of the ornament.
Step 4:
Cut a piece of felt into the shape of the ornament. This will form the backing and cover all the knots. Put a few drizzles of glue on the back of the wood, then firmly press the backing onto the ornament.
Step 5:
Using a 3-4” piece of embroidery thread, make a loop through the top hole and tie the loop closed. Adding a few details with a white paint marker will make the ornament prettier.
Setting up a workshop
It’s important to give thought to setting up your workshop. As a beginning woodworker, your needs should be simple. No matter the size of your space, you will need safe storage for your materials. Organizing your tools will help you locate the right tool when you need it. A large tool chest is great for keeping your tools out of harm’s way, but if you have a more extensive workshop, you could consider setting up shelving and a lumber rack for your wood.
These are some issues to address when setting up your workspace:
- What are your needs?
- Is there adequate storage?
- How will you get rid of sawdust?
- Are there enough power outlets?
- Is your workbench big enough?
Woodworking tips
Whatever you’re doing, it’s a safe bet someone has come up with a hack to fix whatever pesky problem you can think of.
One woodworking hack can save you money. If your wood glue is getting too thick to use, add a drop or two of white vinegar to the bottle. This trick may sound a bit far-fetched, but it works because white vinegar is often used to soften wood glue for removal.
Another hack involves making a sanding block. All you need is a palm-sized block of wood, a sheet of sandpaper, and a stapler. Take the sandpaper and staple it onto the block, rough side out. This hack makes sanding much faster.
Using tricks like these will make DIY woodworking more manageable and enjoyable. There’s some learning involved, but learning is how you go from being a beginner to an expert.


