Many people feel that home cleaningf is a never-ending cycle; by the time they finish cleaning one spot, everything else is once again out of place. It is true that not everyone has the time to tidy up in one single day and for that reason, we decided to gather up the best cleaning experts who gave us different cleaning tips and advice on which are the best methods to efficiently clean our homes.
How often do I have to clean my Robot Vacuum?
We recommend cleaning and maintaining your robot vacuum as often as once per month.
It could be as simple as giving it the vacuum body, charging dock and sensors a wipe, cleaning the brushes and washing the filter. This would ensure general cleanliness and maximize the cleaning performance of the vacuum, not to mention the fresher air coming through the clean filter.
Some robot vacuums may alert you when your input is needed, for example when the dustbin is full and requires emptying. The frequency varies from household to household depending on use case. The good news for Roborock’s customers is we are introducing an automatic emptying dock which will reduce the frequency of dustbin-emptying further.
For robot vacuums that also have a mop function, such as our newest model, the Roborock S7, we recommend washing the mop cloth upon the completion of each cleaning run as you wouldn’t want to have a dirty mop going across your floors.
Dan Cham at Roborock
How can I remove paint stains from my carpet?
Water-based or latex-based paints can be eliminated by using warm water or lukewarm water and dish soap to blot the paint into a fabric or paper towel. Make certain to blot up as much of the paint as possible and do not scrub or rub the cloth into the paint. Doing this will just cause the paint to stain the carpet even further and totally damage the fibers.
Try to prevent utilizing things like carpet cleaner or surface cleaners as this could likewise damage the carpet even further. Dish Soap and warm water are all that you require for this job. You may require to do this for rather some time if the paint has dried into the carpet.
Keep blotting up until the stain starts to raise and make sure to alter your cloth out or utilize fresh paper towels to prevent reapplying the paint back into the carpet. If the dried paint is too thick and will not respond to the service, you may need to scrape away as much of the dried paint as possible to get results.
This can be done with a scraper or perhaps a set of needle-nose pliers to remove as much of the persistent carpet fibers as possible. When you see the dried paint start to lift, continue blotting the stain till the entire stain lifts.
In addition, you can utilize an alcohol-based service such as nail polish remover or even rubbing alcohol to raise the stain if soap and water are refraining from doing the technique. Blot the nail polish remover into the stain and keep cleaning up the stain until all the paint is eliminated.
Make sure to use a dry vacuum to remove any staying dried paint from the affected location. A dry vacuum is vital to prevent perhaps harming a routine vacuum. Latex or water-based paints are thick and persistent but oil-based paint is a bit harder to address.
Oil-Based Paint Stains
The procedure is essentially the same for oil-based paint spots however unlike latex paint elimination, the process is a bit different. Blot the area to soften the paint and ensure to completely dry the affected area later. However, there are some distinctions when dealing with oil-based paint due to the heavy staining power of this kind of paint.
Oil paint has an oily and thick consistency when it binds to the coarse material in carpet fibers. To remove oil-based paint, you will need to first use a solution like paint thinner or turpentine to deal with the stain followed by soap and warm water to remove any excess paint.
Start by dipping fabric into the solution of your option and blot the stain until the paint starts to raise. Much like the very first procedure, continue blotting the location till all of the paint is gotten rid of. Unlike latex paint, oil paint will not clump as much and will likely not be as tough to remove once dried.
Go over the afflicted area with a fabric dipped in water and soap and after that completely dry the location. Vacuum up any staying dried paint.
Do not scrub the paint stain and if you are finding that the steam merely will not budge, you can try utilizing a portable cleaner to use heat to the stain.
Hossein at Local Expert Cleaning
How can I clean my reusable grocery bags?
Reusable grocery shopping bags are a great way to reduce waste going into our landfills. They are wonderful for the environment but it’s important to keep the reusable grocery shopping bags you use as clean as possible. Below are my best tips for doing just that.
Insulated Shopping Bags: Wipe down insulated bags inside and out using disinfectant wipes.
Cloth and Canvas Bags: Wash bags after each use following the care instructions for the bag. Washing is imperative. Wash in the hottest water temperature possible with detergent and dry thoroughly in the dryer.
Recycled Plastic Bags: Recycled plastic bags, the ones that are a heavier weight plastic and can usually be purchased for $2.00 or less, can be washed by hand in warm soapy water and hung to dry. Wash bags thoroughly inside and out paying special attention to seams and handles. Allow to dry thoroughly before use.
Bags That Are Not Washable: If the bag is NOT machine or hand washable, thoroughly wipe it down with a disinfectant wipe or sanitizing cloth especially along the seams and the handles.
Nylon Bags: Turn nylon bags inside out and wash by hand in warm soapy water or machine wash on the gentle cycle. Allow to air or line dry.
T-Shirt Bags: Homemade t-shirt bags are super durable and can be thrown in the washing machine and dryer just as you would any other t-shirt.
For All Bags: Spray all bags thoroughly with a spray such as Lysol.
Allow bags to DRY COMPLETELY before storing.
Pro Tips:
-Bags used for dry goods such as canned goods, cleaning products, or paper products can go several times longer between washing.
-Bags used for perishable items such as meat and dairy products, should be washed after each use.
-Do not wash bags with any of your other laundry.
Mary Beth Sharkey at The How-To Home
Which are the most forgotten cleaning spots?
With summer around the corner, use this time as an opportunity to (finally) tackle your home’s most forgotten cleaning spots.
Sometimes the most common areas that are often overlooked are things you likely use most frequently in your home. Yes, we’re talking appliances. You likely already wipe down the outside of your appliances to keep them looking fresh and fingerprint-free, but how often do you actually clean INSIDE these appliances?
Washing Machine
Soap residue, fabric softener, and other chemicals build up if not attended to in your washing machine. Front-load machines especially need to have the rubber seal around the door regularly wiped down to prevent bacteria from forming. The detergent drawer is another culprit for housing bacteria.
To combat this, run an empty load with hot water and distilled white vinegar and let it sit for about an hour before completing the cycle. This should be done at least once a month, or more often if you live in a hot, humid area where mold can form more quickly.
Dishwasher
If you are running your dishwasher daily, remember to check the filter and drain once a month. Next, fill a cup with distilled white vinegar and place on the top rack. Run a full cycle on the hottest water setting. Once the cycle finishes, sprinkle baking soda on the bottom of the dishwasher and run a half-cycle to deodorize if needed.
To help you remember to clean these often neglected areas, try setting a recurring calendar reminder on your phone once a month. The minimal effort it takes to clean these two heavily-used appliances will ultimately help ensure they continue to run smoothly and effectively for years to come.
Nicolette Borlaug Masiya at TurnoverBnB
What’s the best way to clean my oven?
Our customers rely upon us to clean their ovens effectively and quickly. So, at Emily’s Maids we’ve developed the PAWW method (Prep, Apply, Wait, Wipe) for tough jobs with hard to remove grime like oven cleaning.
The PAWW method:
Prep: Having the right tools for the job makes all the difference. You’ll need a) a good oven-grill cleaner, b) rubber gloves, and c) old rags you don’t mind ruining.
Spread rags on floor, covering the area underneath the oven door when it’s open. This will prevent damage from drippage – an absolute must if you have wood floors! Then put on rubber gloves to protect hands and have the oven cleaner ready.
Apply: Place oven racks in sink. Then liberally spray oven cleaner on racks and all interior surfaces of oven including door glass.
Wait: Let the oven cleaner soak into the caked-in-muck for a minimum of 15 minutes. At this point, our cleaners will turn their attention to other cleaning tasks. You may want to grab a cup of joe, sit back, and learn more cleaning tips from the cleaning pros at Emily’s Maids.
Wipe: Use a damp rag and wipe. Allowing the cleaner to soak loosens the grime, making muck removal super-easy with minimal muscle effort.
Voila! An easy and effective way to clean your oven with minimal scrubbing muscle required. With especially stubborn grime, just apply cleaner and wait another 15 minutes before wiping.
Don’t have an oven cleaner or prefer a green cleaning solution? That’s ok! Use baking soda and vinegar. Add a few tablespoons of water to a ½ cup of baking soda to form a paste. Apply paste to all surfaces and let sit overnight instead of 15 minutes. Use a damp cloth to remove then spray vinegar, wiping for final clean.
Greg Shepard at Emily’s Maids
How can I keep my desk clean?
Keeping your desk clean is a critical part of having a productive day. I recommend you consider the following tips and tricks:
-Clean up your desk of loose items before and after every working day. Use a quality surface cleaner that is made of natural ingredients and does not have a distracting fragrance.
-Create a system to process your paperwork. Try to reduce or eliminate any “leftover” papers at the end of every day. I know this is easier said than done, but creating this “system” is going to help you immensely in staying clutter-free.
-Have folders for every category and year. Folders are a great way to keep loose papers off of your desk. Also, be sure to label your folders.
-Try to eat meals away from your desk. This will not only ensure your desk stays clean of food debris, but will help you focus on your meal and take your mind off of work for a short while. Everyone needs a mental break from the day.
-Digitize paperwork that is not physically needed. I highly recommend investing in a two-sided scanner that can immediately convert your scans into PDF documents. I have used the same scanner now for seven years and it has more than paid for itself.
-Have a specific tray for your incoming mail and be sure to throw out junk mail immediately.
These are just a few tips and tricks to help you on your way to having a clean desk and workspace. Remember, a clean work space will lead to peace of mind. Until next time!
Andy Agrawal at Weekend Maids
How can I clean my dishwasher using natural products?
When it comes to domestic cleaning, the dishwasher is often overlooked. It seems that the appliance should be constantly cleaning itself, but that is not true.
There are dishwasher machine cleaning products commercially available, but their chemicals are not good for the environment. In this article, we look at the different ways in which natural products can be used to prevent build-up in your dishwasher.
Cleaning the Filter
The filter is one of the key components in a dishwasher and needs to be clean for sparkling dishes. The filter keeps bits of food from recirculating onto dishes and protects the pump from being clogged.
To remove the filter, turn it and pull it out. After taking the filter out, place it in a mixture of warm water with 1 cup of white vinegar and let it soak for about 30 minutes.
White vinegar is hugely acidic, which helps to break down the stuck-on food left and any other leftover grime. Once the filter is clean, ensure that there is no food stuck down in the hole of the filter and then put it back in the dishwasher.
Cleaning the dishwasher
Combine one cup of white vinegar with a few drops of lemon or grapefruit and pour the mixture into a container. Place the container on the top rack and run the machine on a hot cycle. Lemon is a great natural cleaner which contains citric acid that helps for removing hard water spots and buildup. Run the cleaning cycle monthly to maintain your machine.
After setting the dishwasher to run on a hot wash cycle, add baking soda on the bottom of the machine and run it through a short cycle. This will eliminate unpleasant smells and remove any stains.
Harry Peters at TidyChoice
How can I clean my dog’s bed?
There are many types of dog beds out on the market, so there is no one answer that would fit all. However, most pet owners get their pup a soft and plush pet bed where their dog can snuggle up comfortably.
The ideal dog bed is easy to clean because it has a removable cover that is machine washable and can be dried in the dryer to remove pet hair. The perfect pet bed cover is also waterproof to protect the filling from urine accidents and is made from a tightly woven fabric that resists pet hair and stains.
Cleaning your dog bed is easily done when it has a machine washable cover that you can just take off and throw in the washer. If the material is waterproof, it will protect the filling from getting dirty, and only the cover needs a wash regularly.
If the bed cover is cloaked in fur or there is loose dirt like soil or sand, you should vacuum or shake it off before washing the cover. This will prevent the dog hair from clumping and the dirt from damaging your washer.
When washing the cover, you should use high temperatures to kill bacteria. Always check the care label to make sure which temperature is recommended. Using a dryer after washing the cover will help you remove any remaining pet hair and dust.
If the dog bed is not machine washable, you can wash it by hand. Take the cover or and wash it separately when possible. If the cover is waterproof, there may be no need to wash the filling. However, if it has soaked up urine, drool, or other nasty messes, it should be thoroughly washed too.
Use a mild pet-friendly and scent-free detergent, and soak both the cover and the plush part in soapy water for an hour or so. Then, rinse both carefully with water to ensure you get all the soap off and dry them in an airy space.
Matt Clayton at PetHairPatrol
How can I make home cleaning easier?
With the right products and some planning, you can make cleaning easier and minimize the time you spend.
Decide on a system. Whether you prefer to complete the same task throughout the house, (vacuuming or washing windows), or complete an entire room before moving to the next, following the same routine will help speed the process.
Make a list. List the projects you want to tackle – no matter how small or large. This helps organize your time and keeps you focused.
Use the Right Products. Cleaners are designed for different purposes. Glass Cleaner works great on windows but does not cut grease. Multi-Purpose Cleaners may leave your counters sparkling, but won’t brighten the grout in you shower. Use the product designed for the surface you are cleaning.
Color Code Your Products. You can cross-contaminate surfaces when you use the same rag to clean multiple surfaces. To prevent this, match the color of the rag to the color of the cleaner. For example, use a blue rag with blue Glass Cleaner and pink cloth with your pink Multi-Purpose Cleaner.
Tackle the small jobs first. Start with the easy jobs that you can quickly finish. Completing a few small tasks can motivate you to tackle the larger tasks.
Think Daily Prevention. Be mindful of everyday measures you can take to make cleaning easier later. Spray the shower with a daily cleaner after each use to keep soap scum from building. Leave the shower door open after showering to prevent mold and mildew.
Stock Up on Cleaners. Avoid running out of cleaner in the middle of a job. With refillable cleaners, like JAWS, Just add Water System, you can store a year supply of refills in a drawer. When your bottle is empty, refill it with water, insert the refill pod, and twist on the sprayer to create another bottle of cleaner. It’s easy, convenient, and it reduces single use plastic bottles.
Jen Arbaugh at JAWS
How can I remove stains from my leather furniture?
When it comes to your furniture, nothing can be more devastating than watching spill after spill leave stain after stain. Leather furniture can be quite expensive, and the last thing that you’ll ever want is a stubborn stain that just can’t come out. Taking good care of your leather furniture means removing stains quickly, before they have enough time to really settle into the fibers and leave a lasting mark, and here at Long Island Maids, we want to help you learn just how to remove stains from your leather furniture.
Before we begin, remember that spills, marks, and stains are inevitable! We live with – and on – our furniture, and accidents are bound to happen! With that said, knowing the right steps to remove stains from leather furniture will be your saving grace!
Always Keep Leather Primer Handy
It’s important to remember that not all leather is created equally – in that there are different types of leather, and each piece of leather furniture you own might be made up of a different type of leather. For instance, there is semi-aniline leather, or pigmented leather – and there is also aniline leather, too.
Prime your leather furniture for cleaning with a non-ammonia or non-alkaline leather primer to ensure that the fibers are prepped for cleaning. Just a few dabs will do.
Basic Cleaning Supplies
Next, you’ll want to grab some basic cleaning supplies. Make sure that you have a nice-sized container of distilled water, along with some white microfiber cloths – the softer the better, some mild non-detergent soap, and a non-ammonia or non-alkaline leather cleaner. All you really need to remove stains from leather furniture are a few trusty and reliable products – this isn’t about reinventing the wheel, it’s just about having the right tools by your side.
Cleaning Protected & Non-Protected Leather Is A Different Process
Again, not all leather furniture is created equal! Cleaning aniline – or non-protected leather – is a different process than cleaning protected leather like pigmented or semi-aniline leather. Aniline leather does not contain a protective layer over its surface, which means it looks and feels much softer – which might appeal to the interior designer in you, but it’s surely not the most durable surface, especially when it comes to stains.
Because of this, you should be able to find some information on how to clean your aniline leather sofa in your manufacturer’s manual, guide, or website. From there, follow their recommendations and be sure to use the right types of products.
On the other hand, cleaning semi-aniline and pigmented leather furniture isn’t nearly as intensive. In fact, it’s quite simple! All you have to do is dampen that white microfiber cloth that you grabbed earlier with some of the distilled water that you have handy. Dab the spot and let it air dry – this is your first course of action.
If the stain remains after it finishes drying, it’s time to take things up a notch. Now, mix a little bit of that mild non-detergent soap with some lukewarm distilled water. Dab the spot with your microfiber cloth again, but then dry it with a different cloth.
That should do the trick! That is, unless the stain that you’re battling is an oil-based stain. In this case, you’ll want to begin with dabbing the stain itself dry with your white microfiber cloth. From there, sprinkle a little bit of baking soda on the area and leave it for a couple of hours. After a few hours go by, return back to it, wipe off the baking soda, and see your stain magically disappear.
And with that, you now know just how to clean stains from leather furniture! And as always, give Long Island Maids a call, and our team can come and pay you a visit to give you a hand.
Laura Xerri at Long Island Maids
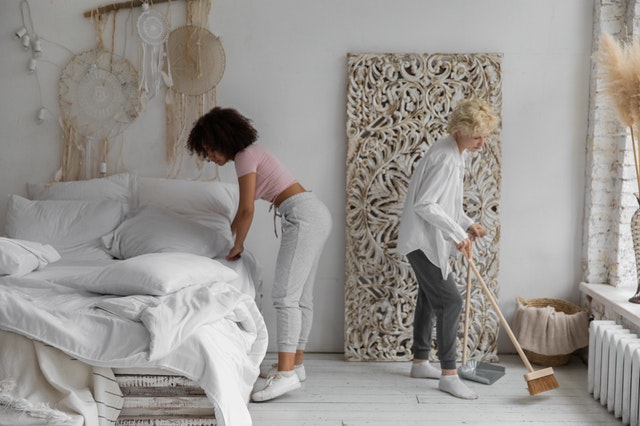
What’s the best way to clean my mattress?
Sleeping in a clean mattress after a long day is both healthy and relaxing. You don’t want to risk your sweet dreams in a mattress filled with body fluids, dust mites, dead skin, and allergens.
Maintain a fresh mattress by cleaning it every 3 months (or at least every 6 months) with the change of seasons which is also the best time to deep clean your bedroom for a complete room refresh.
You’ll need:
-2-3 cups of Baking Soda
-An empty container or strainer
-Hydrogen Peroxide
-Enzyme based Upholstery Cleaner or Dish Soap + Warm Water mix
-Microfiber Cloths
-Essential Oils (optional)
-Vacuum with upholstery attachment
Clean your mattress easily following these 5 simple steps
- Strip your bed sheets and wash them in the hottest setting (check the care instructions on the label)
- Vacuum your mattress thoroughly using the upholstery attachment.
- Remove any visible stains using a cleaning solution and a microfiber cloth or a soft brush. Make sure to follow up with a damp microfiber cloth to remove any soap residue. To remove tough stains such as blood, use a microfiber cloth with Peroxide to blot the stain. Let it air dry before moving on to the next step.
- Deodorize your mattress by sprinkling baking soda to all the surface (add 5-10 drops of Essential Oils to the baking soda mix to boost your cleaning). Let it sit for at least 20min while you clean other areas of your bedroom (the longer, the better!)
- Vacuum the baking soda from the surface of the mattress using the upholstery attachment. If you have a cordless Dyson, the filter may clog up fast so try to remove the gross of the baking soda with a hand brush first. Make your bed with fresh linens and enjoy!
Quick tips to maintain a clean bed
-Use a mattress protector and pillow protectors. Wash them every 1-2 months.
-Make your bed every day (shake your sheets to refresh them and release any debris and hairs)
-Wash your bed sheets at least once a week. Add a ½ cup of baking soda to the drum of the washing machine for the wash cycle and distilled white vinegar in the rinse cycle for clean and crisp sheets (it’s important that baking soda and vinegar are kept separated).
-For a hotel-style bed, iron your bed linens before making your bed.
Claudia Zimmermann at Cleaning Studio
How can I maintain my cement tile roof clean?
The best way to get the most life out of your cement tile roof is to clean it and keep it clean so you aren’t putting harsh cleaning chemicals on it or exposing it to pressure washing regularly. I have customers that ask me to come back every couple of years and clean their roof but I don’t recommend this strategy.
Clean the roof and then keep it clean with either an algaecide or a sealant. This will keep it clean for up to five years. Then just keep re-applying the algaecide or sealant to keep it clean. The other thing you can do is try and minimize the roof traffic. At Allied, we use one of our two 60ft articulating lifts that minimize or eliminate the need to walk on most roofs to clean them.
When we apply our algaecide or sealant we do walk on the roof but our technicians are trained on how to walk on the roof and our application methodology allows us to only be on the roof for a short period of time. The combination of keeping the roofs clean and minimizing roof traffic will allow homeowners to get the most life out of their roof.
Brian Basik at Allied Roof Cleaning
How can I clean my bathroom like a pro?
There is no doubt that the bathroom is one of the most frequently used rooms in the house. Did you know not cleaning the bathroom for a period of time, can expose you to harmful germs which can affect your health. Here are some tips:
The bathroom bowl should be cleaned from the top-down.
Start by cleaning the edge and work your way down to the opening at the base, utilizing your brush as you go. Spray a multipurpose cleaner into your bathroom bowl, along with a few drops of lemon juice for a citrus-fresh smell, onto the outer surfaces of the bathroom. Make sure you clean the bathroom seat on the other side and don’t forget to spray the base and the nearby floor area, too.
Cleaning from the Outside-In
Start by removing everything on or around your bathroom. Avoid adding extra clean-up to your task by moving anything that sits near the bathroom away. Also, remove anything that sits on top of the bathroom tank.
Get rid of the stains
Simply pour a cup of baking soda into the bowl and let it sit for five minutes, before using your bathroom brush to rub around the sides. Run a full flush cycle twice, holding the brush under the water stream to wash. Place some disinfectant in the bathroom brush holder, which will keep the brush sanitized and smelling fresh between cleans.
To disinfect just use a multipurpose cleaner over the space and permit it to absorb for ten minutes. Then, scrub to lift the dirt.
Pro Tip: If your bathroom smells bad, use an enzyme cleaner after you have cleaned and removed the build-up, which will remove any of the bad smell.
Carolina Rodriguez at Ecoverde Maids
Home cleaning doesn’t have to be hard! Start by cleaning one room, one space, or one item per day until you get the hang of it. Don’t forget the amazing physical and mental benefits living in a clean home bring. Follow the previous cleaning hacks and remember: you never know what you have until you clean your room!


