Life is full of amazing memories, and a photo book is a wonderful way to capture them and treasure them for years to come. With a few creative ideas, you can make your own custom photo book to commemorate a variety of special occasions. Whether you’re having a new baby, just returned from a fabulous vacation, or recently got married, these books help you capture and look back on these important times in life. Photo books are a great way to remember any special occasion, including birthdays, graduations, or just capturing some special memories with your friends and family. They also make great gifts too. This guide explores some tips to help you design a beautiful, creative photo book at home, so read on to learn more.
Tips for creating your photo book
Here are some tips to help you design a beautiful photo book you’ll cherish.
- Choose a theme: From weddings to new babies, think about the overall theme of your photo book. Keep this theme in mind as you choose the photos and design each page, pick out embellishments, and come up with captions.
- Choosing a software program: Many free or inexpensive software programs are available that can make the design process easier. Some of them are apps you can download to your smartphone, while others are available via your computer. A few examples include FlipHTML5, My Publisher, Blurb, and Snapfish. Find a user-friendly program that will save your templates as you go.
- User-friendly photo editing tools: You’ll also want to use a photo editing tool to help you crop and adjust your photo’s features like brightness and other details. Adobe Photoshop is a great option, but it’s a bit more complex than some other tools. Try a photo editing tool like Luminar 4 for outdoor and landscape photos and PhotoPea or Corel PaintShop to help you make any adjustments as needed.
- Pick your book’s cover, size, layout, and paper: Once your photos are edited and uploaded, you’ll need to pick out the size, layout, cover, and paper for your book.
o Size: If you’re making a single book, choose a hardback book with a larger size. If you want to design multiple photo books you can stack together or place on a bookshelf, consider soft-cover books in a somewhat smaller size.
o Orientation: The orientation of your book can be landscape, portrait, or square. This is a matter of personal preference but try a few different options to see which one works best for your layout and design. Landscape books are ideal for large, sweeping images or pages with lots of photos, while the portrait orientation is great for displaying images of individual people and events. A square orientation is typically smaller but looks nice for gifts and books with fewer photos and works well if you’re making a book based on Instagram shots.
o Cover: Photo books come in a variety of cover choices, including hardcover and softcover, which are both typically made of durable paper. You can also choose a beautiful fabric or leather book if you’re designing a book made for a gift or to make a more high-end presentation. A fabric or leather cover with foil embossed letters on the cover and spine adds a nice touch.
o Paper: The paper you choose affects how the images will look, so decide whether you prefer paper with a glossy, matte, luster, or textured finish. Some photo books can also be printed on smooth linen or silk for a stunning look. Luster paper combines gloss and matte, while glossy paper has a high shine and a bright finish. A matte paper looks professional and is typically less expensive than other options without sacrificing quality.
- Choose the layout(s) and curate your photos: Decide on a layout for each page, whether it’s a full-size print or a collage. Choose the best photos from the bunch that will help capture the moment and the people in it. Take your time curating photos and decide which ones should be grouped together on a page and which ones are worthy of their own full-size presentation. Mix and match the layout on each page to give the book a fun, eclectic look.
- Organizing and designing your book: Your book should tell a story, so think about how the photos will be organized. You can place them all in chronological order of an event or choose each group or page by color scheme. If you’re making a book based on your travels, arrange the photos in geographical order based on each location you visited from the start of your trip to the end. Wedding photo books are best laid out in chronological order to capture the moment before, during, and afterward in that order.
- What to write in photo albums: Adding captions and text will make your photo book more personal. You can include peoples’ names, specific locations, or text about special memories associated with each photo.
o Text adds some dimension and more detailed context to the visual images in the book. Select a font to use throughout the entire book or change it up based on each individual image or page to give it a fun touch.
o Captions are a great way to note each image by including the date, place, and names of the people in each picture. This is a good choice for new baby photo albums, graduations, or wedding albums.
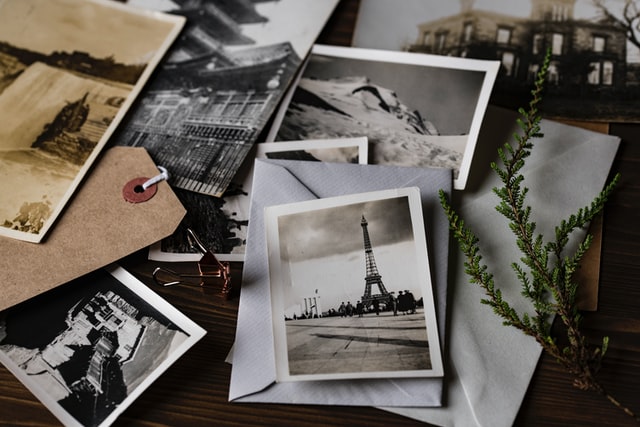
Add caption to your photo and tell a story to make your photo book even more detailed.
Scrapbooking
Think of a scrapbook as an artistic photo album with additional embellishments and details that give it a unique effect.
What is scrapbooking? This is a fun art form that preserves memories by arranging photos and images with a page title and usually includes a variety of fun embellishments like stickers and mementos. The album is typically more “three-dimensional” than a traditional photo book.
Basic supplies: To make a scrapbook, you’ll want to start by choosing different cardstocks and patterned paper for each page. Some pages have a solid color, while others are printed with fun images, patterns, and themes. You’ll also need a pair of scissors, glue and adhesives, a variety of pens and markers, and the actual scrapbook album. Fill the album with the paper you’ve chosen, then attach your photos to each page in a custom layout. Once you’re done with the basic layout, add fun embellishments like tags, ribbons, fabric, glitter, stickers, and more. You can even attach small mementos like souvenirs from a trip, ticket stubs, or a lock of a new baby’s hair to make it unique.
Steps
Here are the basic steps to help you design a beautiful and creative custom photo book or scrapbook:
- Brainstorm a theme: Think about the overall theme of your book, whether it’s focused on a wedding, a fun trip you took, your family and friends, or a special occasion like a graduation or reunion.
- Draft a list of stories to include: Come up with a list of stories that will give the photo book a cohesive flow. You can write this down on paper or type it out first, then add it to the pages as you go to help tell the story of the images and the event.
- Curate your photos: Go through all of your pictures and pick out the best ones. Make sure you include a variety of images like different people in various settings, landscapes or specific buildings and environments, and closeups of things like a wedding cake or a graduation cap that help to really capture the moment in the best way.
- Creative layouts for every page: Make each page’s layout different and creative. One page can be a single image, while another can be done in a grid or a fun collage with various photos grouped together. Switch things up by changing the layout, so the book is exciting and fun.
- Add your photos: If you’re using a software program to print your book, upload and add your images to each page once they’ve been edited. You may need to adjust the size to make sure that they all fit nicely on the page.
- Add your title or text: Include a title for the book itself and the pages or individual images if you choose. The title of your book will help to highlight and support your book and each page’s theme or main topic.
- Journaling and more: Aside from the main title, add text that will tell a story about the pictures and the pages of the book. Journaling about the images will help tell a cohesive story and add a nice personal touch to the photos.
- Décor and embellishments: Adding custom décor and fun embellishments is a great way to make your photo book unique. Now is the time to get creative and have some fun as you pick out different stickers, paper cutouts, ribbons, and small mementos you can attach to the pages for a fun finishing touch.
From weddings and new babies to vacations and graduations, designing a creative photo book is a beautiful way to commemorate any occasion. Keep these tips in mind to help you design a beautiful scrapbook or custom photo book that will be treasured for years to come. With the right design, layout, and theme, along with unique embellishments, you can create a stunning photo book that will become a treasured item you’ll enjoy looking through for a long time into the future.


