Who doesn’t enjoy a freshly brewed beer full of flavor and body, and even better, if you brewed it yourself! If you find the process of brewing your own beer interesting, keep reading because we have the experts’ advice on how to brew a beer properly from home, the equipment you’ll need, the ingredients, how to infuse it with flavor, how to store it, and all the basic principles to achieve different styles of a well-brewed beer.
What is the best way to get started as a homebrewer?
Before you decide to invest a large amount of money in homebrewing equipment, start out by brewing an extract recipe beer kit. These kits typically include a liquid malt extract, steeping grains, and the hop addition and require little equipment, most you may already have on hand. You can find these kits at your local homebrew supply store, or online, and most stores will walk you through the process and are happy to answer questions along the way. Starting off small will give you a taste for the brewing experience and decide which direction you want to take your homebrewing. In terms of what kit to start with, it’s always best to start with a style you like!
-Pam Catoe, Owner of Craft Beer Austin
What equipment do we need to start brewing beer at home?
A person doesn’t too need much to start brewing at home, and some of it they may already have. This equipment kit can be purchased at Camp McClellan and other homebrew supply stores:
Brewers Best BASIC Kit – 5 Gallon Batches. Contains the basics a beginning brewer needs EXCEPT for boiling pot, bottles, and caps:
- 5-gallon “Ale Pail” Primary Fermenter with Grommeted Lid,
- 5-gallon “Ale Pail” Bottling Bucket with Spigot,
- Easy Clean No-Rinse Cleanser,
- Siphon and Bottling Set-up,
- “Home Beermaking” Book,
- Hydrometer,
- Liquid Crystal Thermometer,
- Bottle Brush,
- Twin Lever Capper,
- Airlock,
- Auto-siphon
- and Equipment Instructions.
As far as the boiling pot, a large stockpot & metal spoon for mashing-this can be done on your stovetop. You would also need a larger boil kettle and a larger burner. A standard ‘turkey fryer set-up works fine; you just need a propane burner with at least 28qt/7gal pot.
It is OK to use an aluminum kettle as long as it has been passivated-(fill the pot with water, boil 15 minutes, then empty-the kettle should now be dull grey on the inside instead of shiny)
I would also recommend an immersion chiller to quickly cool down the wort so that the beer yeast can be pitched sooner, thus leading to less chance of infection by wild yeast.
Also, they should read the book “How to Brew” it’s available to read online for free! written by John Palmer-one of the top names in brewing.
– Karen Schaar, Home Brewer in the Quad Cities and member of the Powder Keggers (a women-only homebrew club in the Quad Cities)
What are the steps to follow for brewing beer from beginning to end?
What I am going to go over are important points I learned (some the hard way) beginning to brew beer. The steps to brewing beer vary so much depending on the type or style of beer you want to make, Lager, Pilsner, Bock, IPA. There are also extra steps for using flavors like lemongrass or raspberries. I can’t go over them all in a short article.
You need to start with a good brewing kit and/or a good how-to book on brewing and follow the written steps exactly. Two books I used to start brewing are: “The New Complete Joy of Home Brewing” by Charles Papazian and “Beer for Dummies” by Marty Nachel.
The single most important thing to practice in brewing beer is “Cleanliness”. The items you use from the Stainless Steel pot you brew with on the stove all the way to the bottle caps you use MUST BE clean. That means cleaning everything in soap and water followed by soaking in bleach and then rinse well. The only brewing issues I ever had I could trace back to having not cleaned something correctly and it brought in bacteria that fouled the brewing process. BLEACH is your friend when brewing. Just make sure you rinse well.
If you can find a good beer brewing store in your area, they can be a great reference and will have everything you need including experience and help for the novice brewer. Hint: the yeast you use in brewing is like the yeast you use in bread in the fact that the yeast for brewing must be fresh, must be alive or your batch will fail. That is why it is a good idea to get new yeast for each batch and not stockpile a lot of it. This is where a brewing store really comes in handy.
So, start with getting a book, or a kit, or both and choose a simple style of beer that you like and do it! Start up your brewing pot and 4 weeks later, you will be drinking your first Homebrew.
-Lance Larson, Master Engraver for AleHorn
How did you start brewing beer at home?
When I first started, I went to my local homebrewing store and had a great 101 chat with them! They helped me get everything together and prepared me well. Support your local homebrewing store!
Also, the book! ”How to Brew” by John Palmer was my guide for those first few batches. It’s a great overview of what you’re doing and why – and it really helped me get up to speed at the start of my brewing journey.
-Adam Robbings, Co-founder at Reuben’s Brews
What is the beer brewing process and what do I need at every stage?
Home beer brewing process :
1. Crushed malt. We need to crush malt to carry out the saccharification process. The biggest purpose of crushing malt is to separate the kernel and the husk, increase the surface area, precipitate more fermentable sugars, increase the utilization rate of malt.
Equipment selection: Manual mill malt grinder, Manual roller crusher, or Electric roller. Efficiency is proportional to the degree of automation. You can choose the device that suits you best.
2. Mashing. The purpose of the mashing process is to obtain the fermentable sugars which are fermented into alcohol and carbon dioxide by yeast. Malt does not contain maltose but starch. Mashing is to transform starch into sugar under the combined action of a certain temperature and time. So we need Insulation and temperature control.
Equipment: Insulation barrel (Stainless steel / Plastic)
3. Lauter. We need to filter the wort which includes impurities such as wheat husk after the saccharification process in case of producing bad taste.
Equipment: Filter Bag / Mesh. The filter bag is a common choice in homebrew. The advantage is cheap, easy-use, and easy-clean. After lauter process, we need to sparging the malt with water to obtain more fermentable sugars.
4. Boiling. The purpose of boiling wort is sterilization and disinfection. In the boiling process, we add the hops into wort to obtain the α-acid which influences the beer‘s taste.
Equipment selection: Gas heating barrel or Electric heating barrel. The gas heating barrel is cheaper, more easy-clean than the electric one. But it can’t control the temperature. The temperature control is to obtain a more stable flavor. You can choose the equipment according to your situation.
5. Whirlpool. The whirlpool process is to use reverse centrifugal force to coagulate impurities while the wort whirlpool away from the center. We choose the ladle to stir the wort to form a vortex for removing impurities and collecting the clean wort. The impurities will produce other bacteria in the fermentation process which will influence the flavor and taste.
Equipment: Ladle
6. Cooling. After boiling and whirlpool process, the wort is still at a higher temperature. The yeast suitable temperature is about 7℃ to 24℃. The higher temperature will kill the yeast. We need to cool down the wort to carry out the fermentation process. In this process, we choose the thermometer to control the temperature.
Equipment: Cooling coil & Thermometer. The cooling equipment includes: cooling coil, plate heat exchanger, and countercurrent coil. We choose the cooling coil in homebrew which is cheap, easy-use, and easy-clean.
7. Yeast inoculation and oxygenation. Before yeast inoculation, we need to activated yeast. The yeast is divided into dry yeast and liquid yeast. The yeast proliferates in the aerobic phase and undergoes the fermentation process in the anaerobic state. We need to use the oxygenation equipment to ensure that the yeast gets enough oxygen to proliferate.
Equipment: Glass container & Oxygen Pump
8. Fermentation. Fermentation is the most critical process in all home brewing processes which will greatly affect the quality of beer. The fermentation process is about 1 week to 4 weeks depending on the type of beer you want to brew. The previous process is to provide a suitable situation for the yeast.
Equipment: Plastic fermentation tank. The fermentation process will generate heat which will affect the taste to some extent. More advanced option equipment is the Temperature Controller + Freezer.
9. Bottling & Adding second sugar. After the fermentation process, we have already gotten the drinkable homebrew beer. The bottling & adding second sugar is the unique process in the homebrew compared to the brewing system since the homebrew is unable to achieve pressure-holding fermentation. Adding second sugar into the bottle will continue the fermentation to produce carbon dioxide which will provide a better taste. The brown bottle is the best choice to reduce the occurrence of photochemical reactions.
Equipment: Bottle + Bottle cap + Capping machine / Swing cap bottle
10. Disinfection. After using the equipment, the disinfection process is necessary. The homebrew beer’s quality is largely affected by disinfection and sterilization. The percarbonate-based cleaning agent is the best choice for equipment cleaning.
Choice: PBW (Powdered Brewery Wash). The PBW produced by Five Star Chemicals company is the best production.
11. Other equipment:
Siphon. It is used in many places such as transferring wort or liquor.
Graduated cylinder. It is used in fill water, wash lees, etc.
Grams. The grams is used to weigh hops, second sugars, and various reagents.
Alcohol hydrometer. The alcohol hydrometer is used to measure the specific gravity of wort which can be used to judge whether the process of washing the grains is adequate and calculate the alcohol content of the final beer.
The above is the equipment often used in homebrew beer. Of course, there are other options, which will not be listed in this article.
-Randy Tian, YoLong Brewtech
How much space do I need at home to brew my own beer, and how much money can I expect to spend to start brewing?
You do not need a whole lot of space to brew your own beer. Any normal kitchen will do, even a small or modest one. If you brew outside on a burner, a back patio or garage area would also be fine. Brewing is a lot like cooking. Most of the time you will be stirring on the stove or working around the sink, so again, almost any house or even apartment would have enough space to brew beer.
Expect to spend around $200 in supplies to get started home brewing. When I first started, I was able to borrow all the equipment I needed to see if I liked it and wanted to continue. Most cities at least have one home-brew club. Look into that and see if you can befriend someone that would help you get started.
-Shane Orr, Owner of Austin Brewery Tours
In your experience, what are the Do’s and Don’ts of beer homebrewing to achieve a good quality beer?
Follow the 3 S’s of success for homebrewing: sanitation, simple and sober. Making beer at home is lots of fun. Make sure all of the equipment you are using from start to finish is properly cleaned and sanitized. Cleanliness and sanitation will be your best friend. You wouldn’t cut raw chicken with a knife then use that same knife to chop veggies, right? That same mindset applies to brewing as well.
Keep the beers simple at first. Get a kit, follow the recipe, and branch out from there. Learning the fundamentals of making beer will lead to better quality and consistency down the line.
Finally, keep a sober mind. Brewing is fun but can easily go downhill if you are not careful so save the beers for the end.
– Isaac Peglow, Head Brewer & Tony Zappaunbulso, Assistant Brewer at Stable Craft Brewing
What types of beers can be brewed at home, and does the process differ depending on the type of beer?
You can brew almost any style of beer at home, but Ales are the easiest since they’re a bit more forgiving from a process standpoint, and they take less time to make than Lagers. Ales are top-fermented and are ready in 2-3 weeks, while Lagers use bottom-fermenting yeast and have a slower fermentation process (6-8 weeks at least). Some of my favorite Ale styles to brew are IPAs, Pale Ales, Stouts, and Saisons! The basic brewing process (milling, mashing, lautering, boiling, fermentation, packaging) is pretty much the same no matter what style of beer you’re creating.
The main thing that will affect the beer are the ingredients you choose. For example, different kinds of malt add body/color/sweetness. Hop additions contribute different levels of bitterness as well as a variety of flavors and aromas. The yeast strain you choose will impact the flavor and mouthfeel of the beer. Another thing to remember is to properly manage time, temperature, and pH during the brewing process. Take notes, and sanitize, sanitize, sanitize!
-Liz Kiraly, Co-Founder & Brewer at Bone Up Brewing Co.
Why is boiling so important in the brewing process?
Boiling the wort is essential for driving off volatile off flavors like acetaldehyde and DMS. It is also for adding bitterness through hopping. Most boils go between 60-90 minutes. It stops starch to sugar conversion if your sparge didn’t do it. The sterilization of liquid during the boiling part of the brewing process will stave off infection too.
-Jeremy Hylen, co-founder of Penultimate Brews (Brewery Finder)
What’s the importance of temperature control while brewing your own beer?
Temperature control is extremely important during the brewing process, and can critically affect many aspects of the finished beer. Importantly, it allows the brewer to control the yeast expression in the beer, whether for the ester/phenol expression or the reduction/elimination of off-flavors due to yeast stress from temperature fluctuations.
-Dan Reed, Director of Marketing at Modern Times Beer
Why is wort so important to make beer?
There are many parts of the brewing process that contribute to the characteristics of a beer. These characteristics include flavor, aroma, mouthfeel, and quite simply, the look of the beer visually.
The brewing process can be broken down into two major components, and while this may be a significant oversimplification of the brewing process, the major components are the creation of the wort and the fermentation of the wort.
I should mention that “wort” refers to unfermented beer and the wort is really the genesis of the resulting beer. Everything that goes into the wort from the more simple grains, water, and hops to the thousands of options to enhance flavor, aroma, and mouthfeel, the wort is where it all begins. Make a mistake in the wort, and no amount of corrections in the fermentation can change that, but get the wort right and choose the proper yeast for fermentation and you can create a great beer.
A beer is only as good as the ingredients you choose to create the wort, and the wort is probably the most important part of the overall success or failure of a beer.
-Bill, Producer & Co-Host WILK Friday BeerBuzz at mybeerbuzz.com
Why is the beer fermentation process important and how do you know for how long to do it to achieve a great quality beer?
Beer’s alcohol content and carbonation come from fermentation, in which yeast metabolizes glucose in the wort into ethyl alcohol and CO2. The fermentation process is started by adding yeast to cooled wort and you can only determine if your beer is finished fermenting by checking the sugar levels in the wort or beer with a hydrometer or refractometer.
-Karl Steinmeyer, Homebrew Academy
What is the most common type of malt used in the beer brewing process?
The most common type of malt we use, by far, is 2 row pale malt. It makes up a large percentage of all of our recipes. It is light in color and flavor and provides the necessary sugars and nutrients required for brewing. We order about 500,000 lbs of 2 row pale a year. In order to support our local farmers, we source this malt form Country Malt Group which allows us to use a significant portion of Maine-grown grain in each batch.
-Merritt Waldron, Quality Director at Baxter Brewing Co.
Besides malted barley and though wheat, what other things can beer be made of, and is it the same process in every case?
Beer is typically made with a base of malted barley or wheat but can also be combined with a variety of other grains to get different characteristics, colors, and flavors in the beer. Beer can incorporate Rye, Corn, Rice, Spelt and can even be made with sorghum. Often if the beer is being made with sorghum it is with the intent of making it a low gluten or gluten-free beer. The process of making beer with the other grains added to it is very similar to making a beer made out of 100% barley or out of mostly wheat.
-Jeff Poirot, Texas Brewing Inc.
Is it possible to brew 100% gluten-free beer, if so, would it be a different process?
To brew a 100% gluten-free beer you must start with ingredients that do not contain gluten. A few of the types of fermentable carbohydrates used in brewing that are gluten-free are: maize (corn), rice, millet, buckwheat, sorghum, teff, triticale, quinoa, and amaranth.
There are enzymes you can add to the traditional brewing grains of barley, wheat, and rye that brings the gluten content under 20 ppm, which is considered gluten-free by the FDA, but it must be labeled gluten-reduced if the grain has gluten to begin with. At Twisted Pine Brewing Company, we brew our beer with mostly traditional grains and then we add enzymes to make our lineup gluten-free. There are big flavor differences between all the grains listed above, so some brewers may want a gluten-reduced version of their standard beer recipes to keep a similar flavor profile.
If you have an extreme gluten allergy, then you would brew with 100% gluten-free grains and try to match flavors to your traditional recipe as best as possible. Commercial gluten-free beers have improved in quality and flavor drastically over the last few years as more brewers keep experimenting with gluten-free ingredients. Today there are many great options available to brewers if they want to make beer with minimal gluten, either through improved gluten-free grains with more flavor or by using enzymes to denature the gluten. Happy Brewing!
-Nick Wilson, General Manager at Twisted Pine Brewing Company
What is the difference between using liquid yeast strains and dry ones, and how does this affect the final outcome of the brewing process?
Traditionally, there have been more yeast strains available to homebrewers as liquid strains than dry, so you were able to get a more specific flavor profile from a liquid yeast strain than a dry one. This is changing as more manufacturers are expanding their lines of dry yeast, but more strains from specific brewery origins tend to be available in a liquid form as opposed to a dry form.
Dry yeast can be either sprinkled into the wort (unfermented beer) or rehydrated according to the manufacturer’s instructions. Rehydrating the yeast will generally give a higher viable cell count than sprinkling the yeast into the wort, but no matter how you use the dry yeast, it will generally have a higher cell count for less money than a liquid yeast strain, and this higher cell count can help fermentation go to completion more smoothly.
One of the drawbacks of dry yeast is that there are not as many varieties available. When you want a more specific flavor profile, you can use one of a myriad of strains of yeast available in liquid form. You can add the liquid culture directly to your wort to ferment it into beer. You can also make a yeast starter, which is a small starter batch of wort usually made with malt extract, and add your liquid yeast culture to this in order to increase the cell count before adding, or “pitching,” the yeast into your main batch of wort. Making a yeast starter with dry yeast is generally not recommended, as it is packaged with extra nutrients and is best used dry or rehydrated.
Both liquid and dry yeast have their advantages and disadvantages. To summarize, dry yeast generally has a higher cell count, is cheaper, and can be easier to use. Liquid yeast is generally ready to go out of the package, but depending on how strong of a beer you are making, you might want to use two packets, or make a yeast starter. However, liquid yeast tends to have more variety, and you can get a more specific flavor profile or find a yeast that had purported origins from a specific brewery if that is what you are looking for. Both will make beer in the end, but it is a matter of what kind of specific beer you are trying to make.
Cheers!
-Wes, Brewer at Great Fermentations
How do you select the right malt to use for the type of beer you want to achieve?
I always like to make parallels to food because that’s something everybody can relate to. Whether you like to cook or not, everybody eats! Choosing the right malt is the brewing equivalent to picking the protein your meal is going to be centered around. Even vegans and vegetarians have meat replacements that are central to a dish.
Do you want something heavy and hearty like beef, light and fresh like seafood, or a blank canvas like white meat chicken? You may start your recipe with an idea of the flavors you’re after and then work backwards from there, whether we’re talking dinner or brewing! The same is true for choosing the malts for your recipe. If you want a roasty, robust beer, a more hop-forward beer, or something clean and crisp, you start by choosing the malts that support that goal.
Hop selection, hop schedules, water profile, yeast, and fermentation temps are all other nuanced ways to amplify the flavors and aromas you have in mind, but the malt bill is really going to be the foundation.
-Anthony “Beer Chronicle Tony” Gorrity, Co-Founder of Beer Chronicle
How do you make Lager beer at home?
If the question is how to make Lager beer at home when you’ve never brewed any beer before, then my expert suggestion is you should attempt an Ale first then try your hand at Lagers, Pilsner, Helles, and other types of clean, refreshing lager are extremely difficult beers to brew properly.
Lagers need consistently cool temperatures to ferment, and without the proper equipment and knowledge, you’ll end up dumping more batches than you finish. Or, at best, you’ll brew a few batches that are barely drinkable, which some see as a rite of passage for home brewers(I’ve definitely had my fair share!).
My advice is to start with brewing some styles that resemble the profile of a Lager – brew a nice Blond Ale, then move to a Kolsch and eventually, once you’ve gotten the basic skills down, try fermenting a Lager in the winter, when the ambient temperature in some parts of your house is below 60°F. Other than that, read, read, read all you can about the scientific principles behind brewing and fermentation, and one day, you’ll be busting out triple decocted, step mashed Czech Pilsners like you’re Josef Groll (original brewer of Pilsner Urquell). If you are looking to start making beer at home, we recommend Brewvana’s Beer Making Kit with Online Class.
-Chad Brodsky, Founder & CEO at Brewvana
Why is it hard to brew Lagers at home, and what should be done to have a good outcome?
Brewing Lagers isn’t necessarily harder than brewing Ales, but it almost certainly requires more equipment. Unless you happen to have one spot in your home that maintains a perfect temperature for fermentation and another stop where you can keep your beer close to freezing for an extended period of time, you’re going to need the ability to adjust the temperature wherever you intend to ferment and then lager your beer.
In some climates, you may be able to get away with fermenting Ales in just the right spot in your house and then sticking them in a fridge, but with Lagers you’ll likely need a fridge for primary fermentation as well as lagering, and it will need some sort of adjustable temperature controller. Precise temperature control is essential to making good lagers.
Another key to achieving a good outcome homebrewing lagers is pitching enough yeast. You will almost certainly have to do a yeast starter, which will probably require even more equipment – like a stir plate and a large flask – that you might not already have. You will need to pitch multiple times the number of cells of yeast you would for an Ale. That creates an additional expense not just with potential new equipment, but also for the additional yeast and/or starter raw materials like malt, malt extract, and yeast nutrient that you might have to buy for each batch.
Having to do a starter also adds a number of steps to the brewing process, and it will likely mean that what might be a single day of brewing for an Ale becomes a multi-day affair for a Lager. That brings me to the second major thing about brewing lagers at home, which is that it takes more time. Patience is going to be a major factor if you’ve only brewed Ales before.
Lagers typically take more time to reach terminal gravity even if you’re pitching enough yeast, and the conditioning time is longer. Many Lager yeast strains throw off sulfur during fermentation, which can be concerning. It often takes time for that to go away. With lagers, you’re often stuck with a smelly fermentation and lots of time to fret about it, but you’re definitely rewarded for the extra time it takes for your lagers to condition. Nothing beats a crisp, clean, smooth, and elegant taste and mouthfeel of well-made lager!
-Matt, Tombstone Brewing Company
How do you achieve a good lager beer, brewed at home and without professional refrigeration?
With brewing a lager without Refrigeration, ice becomes your new best friend. I’ve seen it done very effectively, but this is something that takes a daily amount of hand-holding.
Usually, it will start with one of the giant tubs from a place like Home Depot, the right amount of ice, water, and salt to make sure you got the temperature right where you need it, and then keeping an eye on it on a daily basis to make sure everything stays good. Drain the excess when it needs to be drained, fill when it needs to be filled, and as long as you have the interest and the passion required, you will be good to go.
-David Butler, Florida Beer Blog & Podcast
How do you make a Brown Ale beer at home, and what changes from the regular Ale beer type?
Here’s a fun beer fact: back in the day, since they used the heat from actual fire to prepare barley for beer-making (in a process called “malting”), almost all malted barley would have been quite dark, and thus almost all beers were dark and smokey. Fortunately, modern malting technology allows us to make beers from practically eggshell white to pitch black, but there’s something ancient and ethereally comforting about brown beers, and Brown Ales are no exception.
We no longer use a single malt to brew these beers, but malt is absolutely still the soul of this style. Defer to whatever recipe you’re using, but my broad advice would be to spare no expense on the “base malt,” the light-colored malt that provides the bulk of the malt “bill” for Brown Ale recipes. You’ll almost always want a British Maltster’s pale malt, which may have a name like “Maris Otter” or “Golden Promise,” though I’m not too picky with the country of origin of the “Crystal” or “Caramel” malts which, as you’d guess, contribute a range of classically British notes to this beer, from toffee to toast to dried fruit, potentially. If your recipe calls for something dark like Black Malt or Roasted Barley, I’m even less picky, though if you want the color to be just right, you’ll want to find something that has a color rating (usually in ˚L or ˚SRM) that the recipe recommends.
Finally, you have hops and yeast. Again, defer to your recipe, but the obvious choices would be the two classic British hops: East Kent Goldings, or Goldings more broadly, and Fuggle. Your yeast choice depends on which type of Brown Ale you’re brewing (American or British), but whatever you pick, you want to grab a relatively new pack of yeast (say, two months old if it has a manufacture date), and that matches the style (and fortunately, most recipes give a few great options). Finally, you’ll really want to make your yeast happy since this style can pretty easily be knocked off balance by unhappy yeast-driven esters, so you’ll want to oxygenate your wort by shaking it around for at least a minute, say, and by fermenting it in a stable temperature corner of a room, ideally in the 68˚F plus-or-minus a few degrees range.
Good luck, and happy brewing!
-Adrian Febre, Operations Analyst at MacLeod Ale Brewing Co.
How do you make Stout beer at home, and what changes in the brewing process to achieve this type of beer?
The most important piece of brewing a Stout is the malt, you need a hefty dose of roasted barley to get the dark color and chocolate/coffee flavors that stand out in a well-made Stout. Adding chocolate malt, dark caramel malts, and a touch of black patent malt to the bill will do the trick. Adding some flaked barley and/or oats to the malt bill will result in a thicker and creamier body.
Stouts can range in ABV from a sessionable 3% to double digits, if you are brewing a bigger beer make sure you select a yeast strain that can tolerate a higher alcohol environment, so the fermentation goes to completion. Hops should be used to add balance but not a ton of flavor; adding some low alpha acid hops at the start of the boil is perfect.
If you like a sweeter Stout the addition of lactose, a non-fermentable sugar, will give a lingering sweetness to the beer, just make sure you warn anyone drinking it with that lactose included, as many people struggle to digest the sugar. If you are craving a bourbon barrel-aged Stout but don’t feel like brewing the 50 gallons or more needed to fill a used bourbon barrel, you can soak some oak chips in your favorite whiskey and then add them to the secondary fermenter, just remember that a little goes a long way! The best part about brewing is experimenting and having fun, so try some different things and enjoy the results.
-Ryan Brawn from HoppyBoston
How do you achieve an Oatmeal Stout style of beer brewed at home?
When brewing Oatmeal Stout you can get as creative as you want. I would suggest 5-20% oats of the total grist. Flaked oats will help bring a velvety mouthfeel. Some maltster’s offer malted oats that will bring different levels of color and nuttiness.
Speaking of maltsters, I would be remiss if I didn’t mention Admiral Maltings, who offer Clipper Oats, which I like to blend with other base malts to help create a nice toasty oat flavor. I would also suggest staying away from using roasted barley and sticking with chocolate and mid level crystal malts, which the former will help achieve ruby undertones in the color.
Hops? I would stick with the classics, East Kent Goldings or Fuggles from the U.K. Try to keep it to 25 – 30 BU’s. Don’t go any higher than 154.0 degrees on the mash temp.
The yeast strain I recommend is 001 because it’s neutral and let’s the carefully selected grist bill and hop schedule shine through. Ferment between 65-70 degrees Fahrenheit.
Most importantly, use the ABC’s of brewing: Always Be Cleaning.
-Jeff Kimpe, Head Brewer at Triple Rock Brewing
What are the ingredients and the process for brewing Rye Beer at home?
Rye beer is a wide category of beers that describes any beer that uses rye in its grain bill. The grain bill is the part of a beer recipe that prescribes the grains needed to create the fermentable sugars, color, and part of the flavor of the final beer. Barley is overwhelmingly the most used grain for making beer. Other grains such as wheat, oats, rice, corn, and rye can be used to make beer. When they are used they are usually a fraction of the overall grain used, with the majority being barley, and they are considered to be adjuncts that add characteristics to the beer that barley alone cannot.
In the case of rye, it adds a unique peppery and herbal spicy quality to the final flavor of the beer. Although the spicy flavor can become overpowering in a beer and this is why most rye beer recipes don’t use more than 50% rye as part of the total grain bill. Because of the bold flavor that rye can create it makes a nice addition to beer styles that already have strong flavor profiles of their own, such as IPAs, porters, and stouts.
You don’t need any special equipment to brew rye beer at home other than the equipment that you would use to brew any other beer. The only special ingredient you should consider adding, besides the rye, would be rice hulls if you are using the all grain method of home brewing. Rice hulls are not necessary if you are brewing using the malt extract, steeping or brew in a bag method of homebrewing.
This is because unlike barley, rye does not have a husk. The husk adds fiber to the mash which acts as strainer or filter when separating the liquid from the solid grains. If you use a high percentage for rye in your grain bill you can get what is called a stuck mash, which is when the liquid will not flow out of the grains. Adding rice hulls helps avoid stuck mashes by adding back in fibrous material to the grains. Rice hulls do not impact the flavor or color of the beer. Adding about 1-2% of the total grain bill is cheap and easy insurance against a stuck mash, which can quickly ruin a fun day of homebrewing.
Here is a 5 gallon all grain recipe for our Tramway Rye Pale Ale:
- 7# Pale base malt
- 1# Malted Rye
- 1# Vienna Malt
- 75# Malted White Wheat
- 75# Crystal 15
- 33# Crystal 40
- 2oz Rice Hulls
- 1oz Nugget hops (60 min)
- 67oz Cascade hops (30 min)
- 67oz Centennial hops (30 min)
- 67oz Chinook hops (30 min)
- 67oz Cascade hops (0 min)
- 67oz Centennial hops (0 min)
- 67oz Chinook hops (0 min)
- 2oz Chinook hops (Dry hop)
Mash grains with 3.5 gallons of water hot enough to bring the grains up to 150F. Let rest for 30 minutes. Separate the liquid from the grains and add water to bring the total volume up to 7 gallons. Bring to a boil and add 1 oz. of Nugget hops. After 30 minutes add 0.67 oz. each of Cascade, Centennial, and Chinook hops and boil for another 30 minutes.
After 60 total minutes of boiling turn the heat off and add 0.67 oz. each of Cascade, Centennial, and Chinook hops. Chill the beer down to 70F as quickly as possible. Transfer to a sanitized fermenter and add a clean fermenting American Ale yeast such as California Ale WLP001 from White Labs or American Ale II (1272) from Wyeast.
Ferment at 68F. Once fermentation has stopped, 7-10 days, add 2 oz. Chinook hops to the fermentor for 2 days. Then transfer the beer to a bottling bucket to bottle or to a keg to carbonate and enjoy.
-Ben, Brewer at Philipsburg Brewing Co.
What is the difference between the German techniques for beer brewing and the regular techniques commonly used in North America?
The biggest difference between German and North American brewing techniques would be adherence to the Reinheitsgebot, or German Purity Law. This law stated that beer can only be brewed with barley, hops, and water; yeast was added later, and this law is still followed today. North American brewers do not follow this, and it has allowed for great experimentation in the beers they produce, including the use of fruit and adjuncts (rice, corn). By using only natural ingredients, German brewers have focused on process and technique, which is exemplified through their Lagers.
North American Brewers, outside of the macro-breweries, have largely focused on Ales. This is a warm, top-fermented beer from a single temperature infusion mash. These brewing techniques were brought over from England with the early settlers. These Ales didn’t rely on temperature control or require a long lagering process and were well-suited for the climate. Early American beers were derivative of British beers and became their own unique style with the use of local ingredients like corn, rice, and sugar cane. Ales tend to be estery with big hop expression from late additions and dry hopping, and as the modern North American brewers experiment with ingredients and techniques, we are seeing a wide variety of new and unique beers: New England IPA, Hazy IPA, Pastry Stouts, fruited Ales.
German Brewers tend to focus on Lagers. These clean, crisp beers are cold, bottom-fermented beers that are lagered for an extended length of time to reduce off-flavors and improve clarity. German brewers will utilize techniques such as decoction mashes to enhance malt flavor and color, and to produce a wonderful foam. Decoction is removing a third of the mash, boiling it, then returning it to the mash tun for lautering; this process will be done one to three times. When German brewers started to emigrate to North America, they brought their yeast and techniques with them. These beers quickly gained popularity, and the North American brewers who focused on Ales, they responded with hybrid styles like Cream Ales and Steam Beer. These hybrid styles were typically fermented like an Ale then lagered like a Lager.
By adhering the Reinheitsgebot, German brewers have focused on perfecting techniques and the science of brewing, while the North American brewer has been able to more creative and to expand what the definition of what beer is. As a homebrewer, you can utilize many of the German techniques and American creativity without any special equipment. I’d love to try a single-decocted, American Pale Alee with a touch of citrusy hopped flavors and aroma on a nice spring day.
-Paul Liszewski, Head Brewer at East Brother Beer Company
What is an IPA beer and how do you brew this kind of beer at home, what makes it different from the other styles of beer?
The much celebrated India Pale Ale (IPA) has a long history dating back to the early 1800s in England where the style originated. British merchants found that beer being shipped on long ocean voyages, specifically to India, ended up less than fresh when they got to their destination. A little trial and error by British brewers led to the development of a new beer style with higher alcohol content and a significant increase in the amount of hops used in the brewing process. This improved the stale beer issue as both alcohol and hops have preservative properties but they also had the unintended consequence of dramatically impacting original flavor. This new style of beer was much hoppier than styles traditionally brewed, and thankfully for us it stuck around. And so, the IPA was born.
The IPA had a fairly stable existence through the 19th and 20th century, without much evolution or recipe tinkering. This all changed when American hop farmers started to grow hops with new intense aromas and flavors. Traditional English hops tended to be more subtle with earthy and herbal notes, while American hops were citrusy, piney, and fruity. This was a new toy that American brewers couldn’t help but to experiment with, especially as the popularity of craft beer began to expand in the late 1990s and early 2000s.
Today, the IPA has speciated many many times which has brought us beers like the ever popular Bell’s Two Hearted Ale (an industry standard for a damn good, spot on, American IPA) all the way to a sour hazy IPA brewed with doughnuts and edible glitter that I had recently (can’t recall the name). For the homebrewer, there are many routes one might take, so in the interest of brevity, I’ll focus on brewing an American IPA, like an excellent one we make at Beards Brewery called Green Hundo:
So you want to brew an IPA? Let’s start simple. You’ll want to keep the grain bill limited to a handful of ingredients as we’re mostly just going for higher gravity and a little bit of color. For a base malt, where you’ll get the majority of your fermentables, you’d go with Two Row barley malt or a Pale malt. For specialty malt, you’d add some Caramel malt, like a Caramel 60L for that nice copper color, and maybe some Munich malt for some bready, biscuity notes. Keep the specialty malts around 20-25 % and the base malts around 75-80% of the total grain bill and try to shoot for an original gravity of 17° Plato.
And now for the moment, you’ve been waiting for. You’re hopportunity, if you will. You could use anything for bittering hops, really, but it’s best to use something in the 10%-15% alpha acid range. The amount depends on the volume of wort you have but a good working ratio would be .25 oz of a 13% a.a. hop/gallon of wort. A great place to start would be CTZ. It’s a good dual purpose hop and works well for early additions. You pretty much now have a balanced beer and at this point, you can start to add hops of different varieties based on your personal preferences. Late hop additions are analogous to using fresh herbs while cooking. The later you add them in the boil, the more they will retain their aromatic compounds. Anywhere from the 15 minute mark to the whirlpool itself are good times to add aroma hops. Just remember that the longer you boil them, the more bitter they become, and the less aromatic they will be. There is no shortage of aroma focused hops out there but some favorites are Citra, Galaxy, and Mosaic. There’s lots to experiment with here so go nuts, within reason. Don’t overdo it or you’ll end up with something that’s too bitter and undrinkable. You can always add more hops next time if you want to.
Now you’re ready to knock out and pitch some yeast. You could get creative with any number of yeast strains out there that will impart all sorts of flavor compounds, from fruity esters, to clovey phenols, to funky barnyard Brettanomyces strains. I’d take it easy to begin with and use a neutral American Ale yeast like US-05 from Fermentis. Now just make sure you have a good place to ferment with an ambient temp of 65°- 70°F and away from any light. Give it a few days and then you can add even more hops if you want. This is “dry hopping” and you’ll get the most out of aromatic hops here as there is no heat involved. Keep letting it ferment like this until your gravity stops dropping for at least two days. And now you have an IPA, almost.
At this point, you’re going to want to package this sucker. Homebrewers typically will bottle this up and add a little sugar to carbonate and bottle condition. The best option would be to get this in a keg and on your kegerator, but best practices for carbonating and packaging is a tale for another day. The main thing here is to keep this beer, the fruits of your toil and great care, away from oxygen to the greatest extent that is humanly possible. Oxygen will seriously ruin your beer so keep it at bay.
Well, now that you’ve created a masterpiece, it’s time to kick back and enjoy a pint of (insert clever name that you surely thought of by now and may even be the reason you’re trying to brew an IPA in the first place) while you contemplate the mysteries of the universe. Just kidding. You’re going to think about how you’re going to adjust the recipe next time. The End.
-Justin Koziol, Head Brewer at Beards Brewery
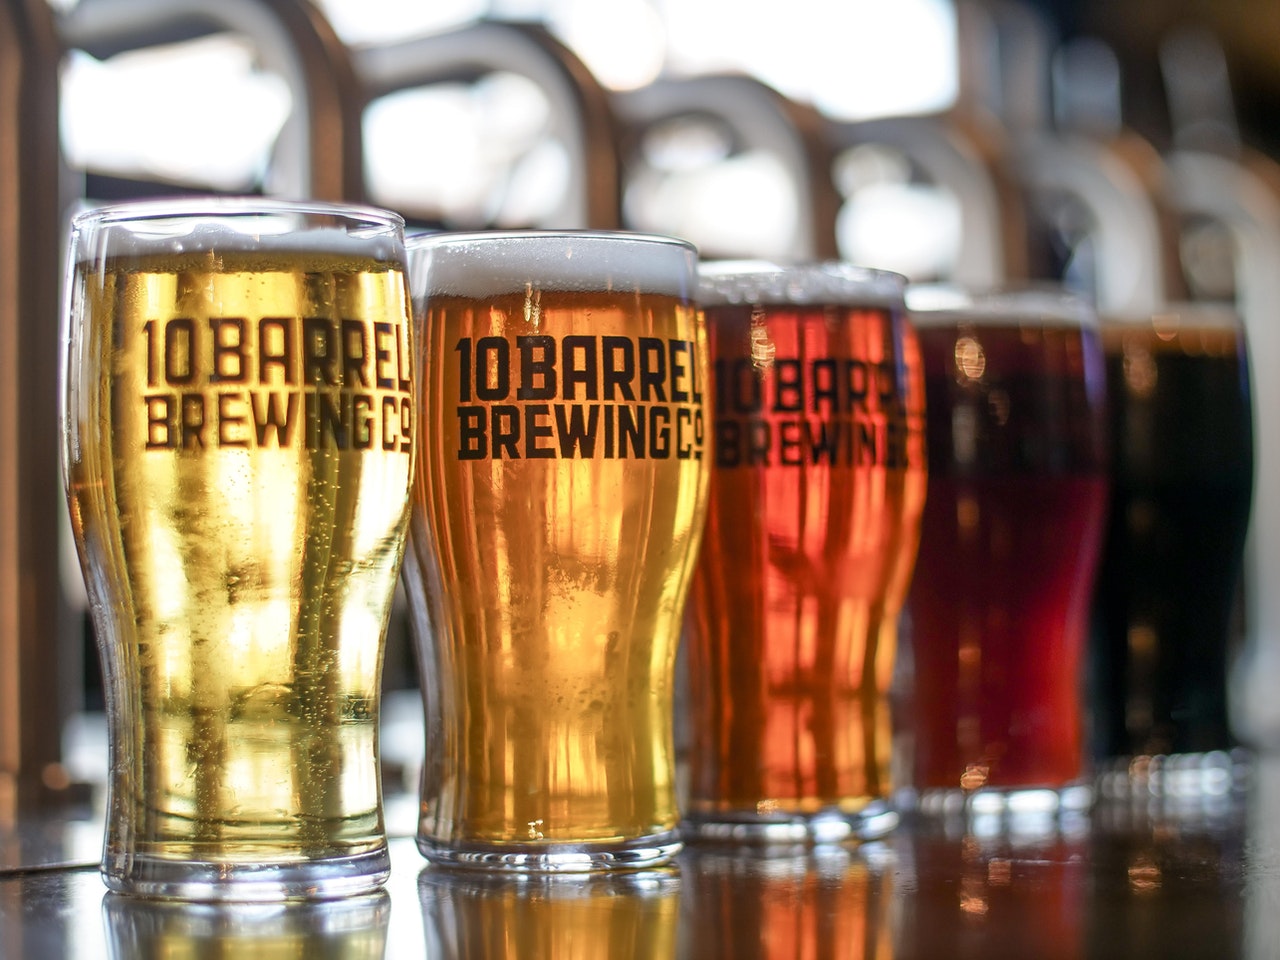
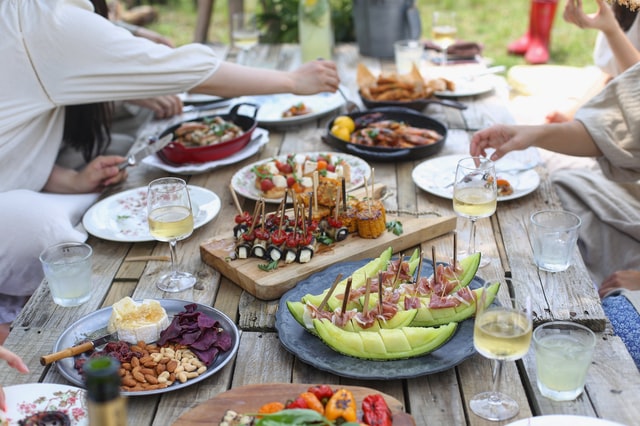
In terms of beer pairing, which type of beer goes best with what type of food?
Carlsbad Food Tours is a 3-hour guided walking tour in the village with 6 stops for food, wine, and beer tastings. One of our favorite beer tasting locations is Barrel Republic on State Street. Their Carlsbad location offers an unbeatable 52 beer taps and 6 wine taps. They have also created an excellent beer and food pairing menu to browse and enjoy.
Different types of beer go well with specific types of food depending on their primary flavors.
Indian Pale Ales (IPA’s) are better known for their bitter, tangy notes, making them the perfect partner for salty, fried foods, like their bacon wrapped pork belly, yum.
Hefeweizen have a wheat flavor as the base, which makes it a great match for salads. Their Mediterranean Chopped with tomato, cucumber, garbanzo beans, olives, pepperoncini, red onion, feta cheese, and lemon-tahini dressing is a delicious option.
Pilsners key attributes – body, sweetness, bitterness, and spiciness, all in perfect harmony. Asian dishes such as their, Thai Peanut Salad are great pairings for the Pilsner beers.
Amber Ales have strong malty flavors balanced with hoppy components. Chocolate, caramel, and toasty malts are common. Heavier foods go well with this type of beer, especially savory burgers or pulled pork sliders.
Stouts are dark and full-flavored ale made with dark-roasted malted barley, which gives it a distinctively coffee-like roasted taste that often features notes of chocolate. Their thick, creamy texture goes best with hearty meat dishes: burgers or tacos.
– Cherimarie Poulos, Carlsbald Food Tours
How do you add a fruity taste to a beer, what additions and changes do you have to make in which part of the brewing process?
At Jester King, we are surrounded by some really great Texas orchards. Throughout the year we receive fruits like blueberries, strawberries, peaches, plums, grapes, and figs from our grower partners. Our brewing team processes the fruit by hand, then we add it to a blend of barrel-aged wild ale. The microorganisms in the mature barrel-aged beer consume the sugars in the fruit until total dryness. The taste of the fruit is still prominent, but it has been transformed through the amazing natural process of fermentation.
-Jeffrey Stuffings, Co-Founder at Jester King Brewery
With a little bit of expertise and know-how, you can easily start brewing your first batches of beer at home and experimenting with your favorite flavors and types of beer; take advantage of the great tips we gathered from the most knowledgeable and experienced brewers in the industry and start brewing now!

