Live streaming is one of the fastest-growing ways to create and bring content into people’s homes. You record video, but rather than have it saved as a file somewhere, your video goes directly online as it happens. Your Zoom meeting? That’s actually a live stream. Most people believe live streaming is for gaming. This big industry brought platforms like Twitch to the forefront of streaming, but it isn’t the only live streaming happening that garners millions of viewers.
Many businesses stream their conferences and marketing campaigns live (especially gaming, but makeup, fashion, and tech are also big on this). Live streaming a product launch is a great way to engage an audience. Podcasts now live-stream their shows rather than record and release them after the fact.
Twitch’s most popular category for live streaming has gone from “gaming” to “just chatting,” where a popular channel will simply shoot the breeze with their followers about anything and everything. The “just chatting” category peaked in 2021 with 401 thousand viewers. It’s hugely popular and an excellent way for fans to personally connect with their favorite creators.
Even the 2020 Olympics saw the most social media engagement in its history, with 106 countries live-streaming their events. If you want to livestream, here’s what you’re going to need.
This article will go over everything you’ll need for a top-notch live streaming setup within your home. It’ll highlight what you’ll want to prioritize as a beginner, though all aspects should be considered for best results, from screen recording software and camera to room setting and lighting.
Live streaming setup
Now that you have audio and visual recording capabilities, you’ll want to consider what your set looks like. Your set – and you – are what your audience will see first. First impressions make all the difference, so put some time into what yours will look like. Your set is your brand, so you’ll want to add some personality to it. A high-quality live stream setup doesn’t need to break the bank or be overly complicated. You can also create your own radio station while you are at it; read how to create your radio station article!
What area around the house would look good? Keep in mind most art is copywritten, so unless you have permission to use it, it shouldn’t be in the background. Books in the background of television or movies are all fake. Most streamers turn the books around, so you see the pages but not the titles. With that challenge in mind, what can you use?
First, consider the wall behind you. What color is it? You want your wall and everything in the background to contrast your subject matter (which is most likely you). Choose a bright-colored wall if you tend to wear dark colors. A pastel yellow is not ideal for a background if you have blonde hair. Consider painting the wall so it adds to the furniture, the décor, and your personal style.
Beyond the wall, consider what else people can see. Potted plants, shelves, tables – what else is in the frame? Is it well-organized or a state of controlled chaos? What option suits you best? What doesn’t suit you at all? If you’re streaming corporate presentations, you’ll want a crisp, organized, functional background that says, “I am capable and in control.” If you’re a gamer, you’ll want a live streaming setup that’s designed for comfort and feels like home.
Soundproofing
Sound is the most crucial aspect of recording. It’s not the camera, the lights, or the fun or interesting content you’re creating- it’s all about the sound. People are extremely forgiving about bad visual quality, but they’re merciless when it comes to bad audio quality. You’re going to want your live stream space – also known as your set – as soundproof as possible.
External sounds are the bane of quality audio recording. Have you ever noticed an airplane, sirens, or a dog barking away in the background of a live stream? If you haven’t, the room was probably soundproofed. For film, television, and podcasting, they’ll simply do more takes if the sound is an issue. You’re going to be live, so you won’t get that option.
There are two benefits to soundproofing a streaming room. Sound doesn’t get in, and sound doesn’t get out. You won’t annoy your neighbors, family, colleagues, or anyone who shares a wall. Your windows are likely your worst culprit when it comes to noise pollution. In a perfect world, you’d replace them with triple-glazed windows, but that adds up fast. Another solution is thick window curtains – the thicker, the better. Sound struggles to pass through thick fabric. If one set of curtains isn’t doing the job, double them up.
Your walls are your next biggest challenge when it comes to soundproofing. Listen closely to where sound leaks into your set. You can buy a set of acoustic panels to dampen the sound. They come in packs of 50, and you’ll only need one pack to start. Cover the wall that’s causing the most problems, and find out what kind of difference that makes. If you need more, buy more, but don’t go overboard. Notice the difference each pack makes before you buy another. You can apply these to your ceiling if you have loud neighbors. For floors, use carpeting or thick rugs to dampen sound.
Cameras and mics
The most important aspect of recording is the audio, so you should prioritize your budget toward sound before all else. There is a large variety of mics to choose from, but not all mics are designed the same way. What you plan to do while living is going to inform your choice. You don’t have to break the bank on a quality mic if the mic you chose is designed for the job.
Since you’re live streaming, you’re probably recording your voice more than anything else. The best type of mic for this is a condenser mic, which picks up the frequency and nuance of a human voice better than others. There are two types – small diaphragm and large diaphragm. The small variety is best for acoustic instruments, while the large is best for vocals of all varieties.
Something else to consider is the directionality of the mic. Some mics only pick up what they’re directly pointed at, while others are better at catching a wider arc of sound. Consider a mic focused solely on what’s in front of it if it’s just you speaking. Interviewing someone and only having one mic? Consider getting a bi-directional or omnidirectional mic.
You can use a USB mic that plugs into your laptop directly. For best results, choose an XLR mic. These are more expensive and require an audio interface to use like a sound recorder called a zoom. Start small and build up depending on your budget.
For cameras, an extreme variety of options are available for you. You can use your smartphone, a webcam, or a DSLR camera (the kind of camera a photographer will bring on a job). For cameras, an extreme variety of options are available for you. You can use your smartphone, a webcam, or a DSLR camera (the kind of camera a photographer will bring on a job), or if you want to go above and beyond, you can even have a multi-camera live streaming setup. Whatever you choose, it should record in at least 720p, though 1080p is preferred. You can find something that streams in 4K or 8K, but that quality comes at a cost in both bandwidth and storage. Unless you have an exceptionally strong visual component to your stream, 1080p will serve you and most streamers just fine.
Internet
To stream over the internet, you’ll need to be well-connected. Be sure to have the best internet speeds possible. An ethernet connection is always preferable to a Wi-Fi connection so you don’t run into any interference.
Ask others in the household to refrain from using devices on the same connection. This includes gaming consoles, smart TVs, laptops and iPads, and anything that streams movies or television. It’s ideal if your house can go offline while you stream, but that isn’t often the case for most people. Consider getting a designated internet connection for the stream, or ensure your current connection is fast enough to support you and someone else simultaneously.
Streaming software
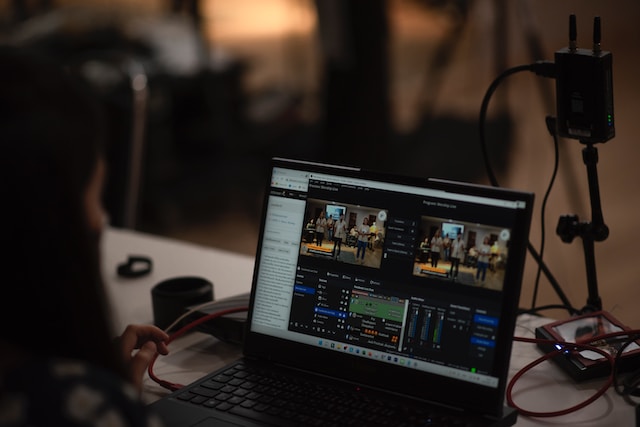
In order to stream, you’re going to need software that can understand and manage the job. A great streaming software gathers your audio and visual data together, compiles it into a quality feed, and streams that feed over the internet. Some great streaming software that can do this:
- OBS Studio – This common streaming software is open-source and free to use. It lacks some advanced features you’ll find in its competitors, but if you need to get online and stream, OBS does exactly that. Plus, you can find extensions that greatly improve the program. It’s extremely versatile, but the learning curve for using it can be quite steep.
- OWN3D Pro – This is an extension for OBS and comes with a free version. It gives you access to frames and art that you “overlay” over your video image to separate gaming from live streaming or to split your frame into multiple windows. With the pro version, you can customize it to suit your desired look.
- Streamlabs OBS – This is also free but only available if you’re a Windows user. It comes with overlay help and allows you to customize your design.
- OneStream Live – OneStream Live is a cloud-based service to schedule & live stream pre-recorded videos as well as real-time streaming to 40+ social media platforms, including Facebook Live, YouTube, Instagram, Twitch, or any Custom RTMP Streaming Destination.
- Blerp Sound Alerts – Blerp Sound Alerts is one of the best ways to increase viewer engagement and add sound donations to your stream with Blerp. Blerp lets your viewers share sound memes on Twitch, Kick, Youtube, and Trovo with money or channel points.
- Flutin – Flutin is a web-based live streaming platform that enables users to host their real-time live events, pre-recorded live streams to multiple profiles on different social media platforms without any hassle. With Flutin, you can simultaneously stream your virtual events to your Instagram, Facebook, YouTube, Twitch profiles and 30+ other streaming platforms.
Lighting
Time to up your game. Lighting changes a production from amateur to professional in a big way and is often overlooked in the early stages of streaming. Lighting focuses on your subject (you) and makes you stand out from the rest of the room in a way that captures our attention. Think of many people on a stage with a spotlight shining on one of them. Everyone watches that person without being told to.
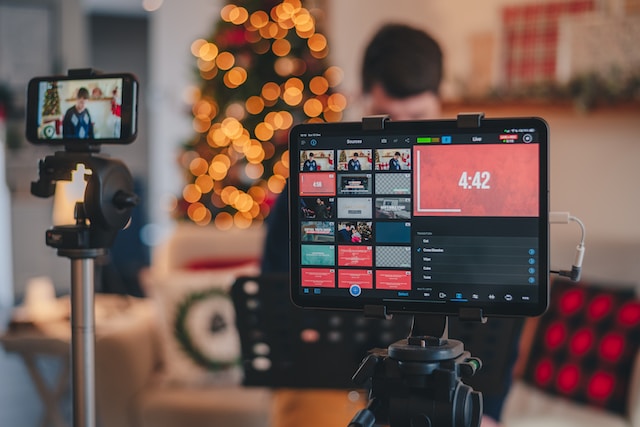
Two simple lights will work if you’re simply sitting and talking to a camera. Position them at 45-degree angles pointed at your face. One is the main light, or key light, which provides the light in the video. The other is called a fill light, which provides lighting to your shadowed face and is often dimmer or even another color. Ensure your key light covers your subjects and that fill lights chase away shadows on their faces. If you want to get fancy, consider a backlight. This is a light set out of frame, behind your subject, at a 45-degree angle.
Your light should be diffused, which means you don’t want bare bulbs shining on your skin. This creates a harsh visual aesthetic, whereas a diffused light offers a daylight-style feel that appeals to viewers. You can buy simple lighting kits on Amazon for a reasonable price, and they make a world of difference. For under $100, you can be professionally lit for your livestream.
Extras
There are several components that can improve your stream.
- A tripod – When it comes to your camera, a tripod is one of the most useful tools invented. Adjust your camera’s height, angle, and directionality while keeping it stable.
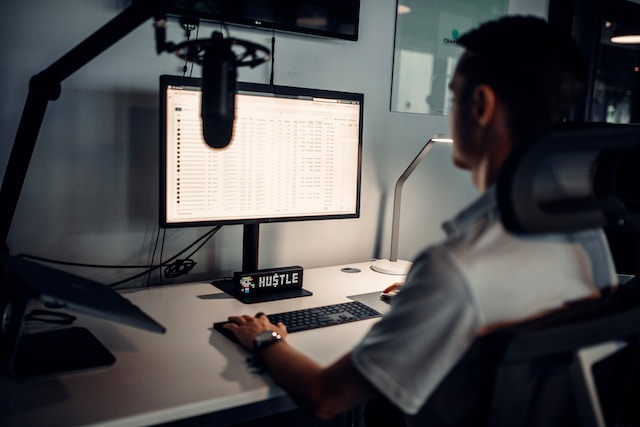
- A mic stand – A mic stand – or arm, depending on whether it’s attached to a desk or on the floor – is a great way to hold your mic out of frame while maintaining the direction you want it to point. Mic stands are designed to be placed out of frame, with the arm coming in under or over the camera, pointing the mic at your subject.
- Green screen – If you want complete freedom over your background, hang a green screen behind you. Utilizing this will require some editing magic, but once you know what you’re doing, your options are limitless.
- Headphones – A quality set of headphones allows you to hear your stream’s audio and adjust it as needed. Noise-canceling headphones keep out sound, so you can hone in on what’s important. A soundboard is a good alternative for playing audio clips or sound bites while streaming. Blerp is a great option when it comes to soundboard and sound alerts for your stream.
- Stream deck – This is a physical control panel with a few buttons you’ve set to alter your stream. Rather than edit or configure specific streams as you go (which takes time away from your stream), you can simply hit a button, and the stream deck applies those edits immediately.
In the realm of live streaming, capturing the essence of content creation hinges on factors beyond mere visuals. While cameras and lighting sculpt the scene, sound quality reigns supreme. Mics, particularly condenser types, elevate voices and discussions to a new dimension, making speaker transcripts resonate crisply with audiences. Crafting an engaging backdrop, whether it’s for corporate presentations or personal gaming streams, demands meticulous attention to detail. Soundproofing measures fend off external distractions, ensuring that neither airplane roars nor barking dogs find their way into live sessions or their transcripts. As technology intertwines with creativity, adept streamers sculpt captivating environments while producing content that reverberates in soundwaves and textual transcripts.
Protecting your live streaming equipment
Livestreaming equipment, such as cameras, microphones, and computers, can be a significant investment for content creators and professionals. To safeguard these valuable assets, it’s crucial to understand how your home insurance can help protect them. In this article, we’ll explore the steps you can take to ensure your livestreaming equipment is adequately covered by your home insurance policy.
Review your current home insurance policy
The first step to protecting your livestreaming equipment is to review your existing home insurance policy. Understand the coverage limits for personal property. Home insurance policies typically cover personal property, but they often have limits. If your equipment’s value exceeds these limits, you may need additional coverage.
Assess the value of your equipment
Compile a detailed list of your livestreaming equipment and its estimated value. This inventory will serve as documentation in case you need to make a claim. Include information like the make and model of each item, its purchase price, and its current estimated value. This step is crucial in ensuring that your equipment is adequately protected.
Consider scheduled personal property coverage
If the total value of your livestreaming equipment exceeds the standard personal property coverage in your home insurance policy, consider adding a rider or endorsement for scheduled personal property. This supplemental coverage allows you to insure specific high-value items beyond the standard limits. With scheduled personal property coverage, your equipment is protected for its full value, and you won’t have to worry about depreciation.
Evaluate perils covered
Home insurance policies typically provide coverage against specific perils like fire, theft, vandalism, and other common incidents. However, it’s essential to review your policy to understand what perils are covered. Some policies may exclude certain types of damage, such as accidental damage or loss. If you want comprehensive coverage for your livestreaming equipment, discuss your needs with your insurance provider and consider adding endorsements or riders for specific perils.
Choose replacement cost coverage
When adding scheduled personal property coverage, opt for replacement cost coverage rather than actual cash value. Replacement cost coverage ensures that you’ll receive the funds needed to replace your equipment with new items of similar quality, without depreciation factored in. This is particularly important for livestreaming equipment, which may lose value quickly due to technological advancements.
Notify your insurance provider of business use
If you use your livestreaming equipment for a business or income-generating activity, it’s crucial to inform your insurance provider. Many home insurance policies exclude coverage for business-related property. In this case, you may need to explore a separate business insurance policy to adequately protect your equipment. Your insurance provider can help you determine the right coverage for your business equipment.
Maintain proper documentation
Keep records of your equipment’s purchase receipts, serial numbers, and photographs. These documents are valuable in the event you need to file a claim. Proper documentation helps expedite the claims process and provides evidence of your equipment’s value.
Regularly update your policy
As your livestreaming equipment collection grows or the value of your current equipment changes, don’t forget to update your home insurance policy accordingly. Keeping your coverage up to date ensures that your equipment is adequately protected, even as your needs evolve.
Protecting your livestreaming equipment with home insurance is a matter of understanding your policy, assessing your equipment’s value, and customizing your coverage to suit your specific needs. By taking these steps, you can enjoy peace of mind, knowing that your valuable livestreaming equipment is safeguarded in case of unexpected events. Remember to consult with your insurance provider to ensure you have the right coverage in place.
Final thoughts
Live streaming has become a major way for people to create content, market and sell products, and communicate with clients. While it involves a fair bit of tech, that tech doesn’t need to break the bank to be useful and effective. There’s lots of advice about the best tech to use. If you’re just starting out, look for effective and inexpensive products. You can always upgrade as your audience grows. With some hands-on learning and a few Google searches to help you with your live streaming setup, you could be online sharing your content with the world in no time.
