
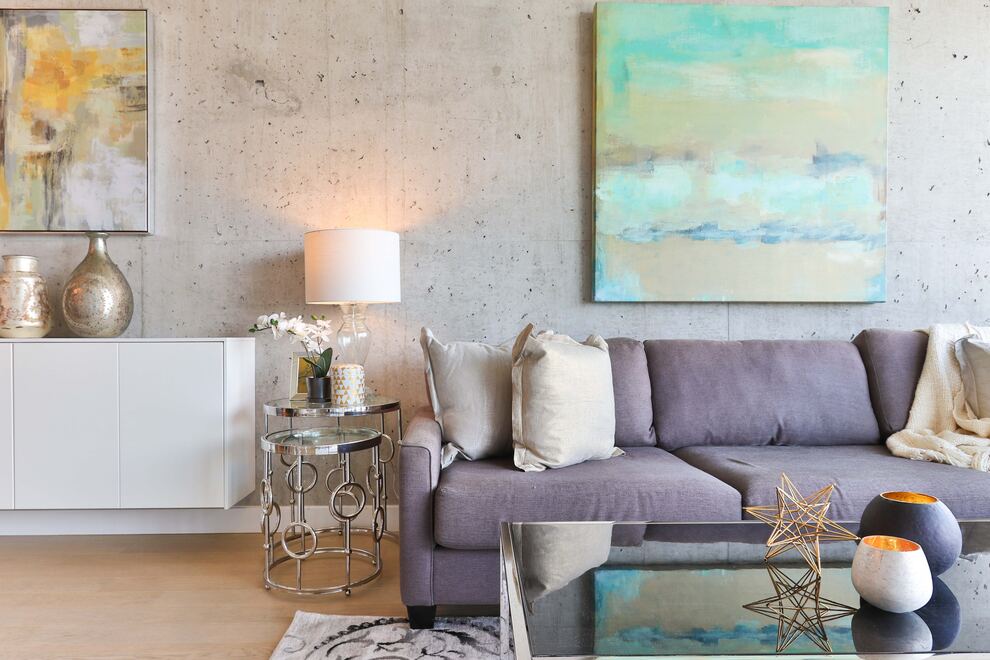
The kitchen can be challenging to organize. We typically don’t have a lot of space to store all the things we want to. Or even if we have the space, it quickly becomes chaotic and appears to be a mess.
Since we must eat, we frequently spend a significant amount of time in our kitchens. When everything is neat and organized, this time feels much more enjoyable. To help you organize your kitchen space, we asked a couple of experts for the best organization and design tips.
How can homeowners strike a balance between aesthetics and functionality when designing their kitchen space?
A great kitchen space requires a “homey vibe”, elegant style, and a reasonable layout. It’s not like a living room you could just deploy certain furniture items. The size of the kitchen cabinet needs to be precise, and the sink needs to match your plumbing system, the kitchen island needs to be centered. So, considering all the above, the first thing to designing a kitchen space is to figure out the layout, then let your inspiration flow!
Willy Kuo from Coohom
What Are Five Tips For Having a Well-Organized Kitchen?
Whether you have a large or small kitchen, it will only feel functionalif it is well-organized. Cooking will be more enjoyable and easier whenyour kitchen is set up efficiently. No more wasting time looking forthings or crossing the kitchen multiple times to grab something.Right now, you are probably thinking, “this sounds like too much work.”Don’t worry; getting organized is easy and doesn’t take much work.Tackle them one at a time, so you are not overwhelmed. Here are my topfive tips for having a well-organized kitchen.1 – Store Most Used Items Within Quick Reach – Start by placing pantrystaples at eye level where you will see them easily. This makes itemslike spices, oils, flour, and other favorites within reach in seconds.Store dinner plates and silverware where they are quick to grab. Youdon’t want to bend down or use a step stool to get them.2 – Kitchen Zones – Focus on the tasks that are typically done in eacharea of your kitchen and store equipment that way. For example, placeoven mitts by the oven, pots and pans by the stove, cutting boards, andknives near each other, and drinking glasses next to the refrigerator.3 – Annual Love it or Lose it – Once a year, sort through your kitchen toeither keep or purge things. If you have not used it all year, donateit. Also, check for expired foods, duplicate items, or empty foodcontainers. Don’t forget the junk drawer!4 – Labels – Labeling things really helps keep things fresh. It alsoensures things find their way back to the right place. This is importantfor large families where many people are moving things around. Placeeasy-to-read labels on shelves, baskets, and storage bins. Make sure todate things when transferring food to containers.5 – Clean – This may be everyone’s least favorite kitchen task, but it isso important. Keeping the counters decluttered and everything clean ismy top tip. It is hard to succeed in a kitchen organization withoutcleanliness.
Angela from The Short Order Cook
What Is The Best To Organize Your Kitchen Sink?
The best way to keep a clean kitchen is to have as little visual clutter as possible. I recommend having two glass containers holding your hand soap and your dish soap right by the sink to create a clean, unified look. It’s the perfect mix of form and function.
If you keep dishwashing sponges in the sink, use a sponge holder with a suction cup and put it inside the sink closest to you. That way, you only see it if you’re right at the sink. This helps your sink remain clutter-free.
How To Declutter Kitchen Utensils
Do you love to cook and bake? If you have been cooking or baking for any length of time you may have amassed a huge number of kitchen utensils by now.
I know I have.
I’m a sucker for a shiny new kitchen utensil or gadget that will save me time in the kitchen.
But, if you’re not careful, those helpful kitchen utensils can take over the available storage in the kitchen.
From the basic silverware that you will use every day; to the more obscure kitchen utensils like a cherry pitter that you might use once or twice a year but can’t live without during cherry season.
To keep the kitchen clutter-free, you will need somewhere to store them.
Everyday silverware, paring knives, and small serving spoons can be tucked away in divided trays in a drawer.
Wooden spoons, spatulas, and large serving spoons you don’t use every day but still need handy can be stored in large ceramic crocks or metal containers on the counter. Place them near the stove for easy access.
For bulky utensils like cheese graters, citrus zesters, measuring cups, and measuring spoons I have found the best way to store them is in inexpensive plastic containers. Tuck the containers away in the pantry or a kitchen cabinet that is nearby but out of the way.
By keeping the clutter of kitchen utensils at bay, you avoid the frustration of meal prep and cooking without having to deal with a cluttered kitchen workspace. Cooking in a neat kitchen saves time best spent enjoying a meal with the family.
Arlene Mobley from Flour On My Face
How Would You Define or Organize Your Zones in The Kitchen?
Everyone has their idea of a perfect kitchen. This may depend on family size, space, whether you require a breakfast bar or not, how much you entertain, etc. There are a few ‘golden rules of zoning’ that are useful to know, and I have over the years (due to moving home many times) discovered that it really does depend on your lifestyle. The concept of zoning can be very useful in helping with one’s organization.
Separating a kitchen into zones will define the kitchen areas for practical reasons and ease of use, allowing you to make the most of each space, with each zone having everything within easy reach, such as equipment and utensils.
The most typical or main zones can be categorized into areas for preparation, cooking, serving, and cleaning. You may have 3, 4, 5 or more zones according to your requirements and priorities.
In its simplest form, zoning begins with the triangle of 3 zones. This means prioritizing the 3 most important areas of use such as the cleaning, preparation, and cooking areas. Having these zones distanced just enough to separate them yet close enough to move between them makes the kitchen easier to use and more functional. Imagine linking the zones together to make a triangle!
For example, a cooking zone in one corner of the kitchen and a serving zone in another corner further away is not very practical if you have to carry a large pot of hot food. Logically, the serving zone should be closer to the cooking zone.
Zoning doesn’t need to be strictly followed, but it’s a useful way of being organized and maximizing the space that you have. Zones can overlap if there is a shortage of space; the main principle is that the kitchen works efficiently for you. I use a logical approach in each zone and have everything I need within reach. You can categorize zones in any way – my personal favorite – a hosting zone. In this zone, I keep my utensils for serving, tableware, silverware, etc.,. all ready to plate up and serve. Extremely practical when I entertain!
Whether you are designing a new kitchen, using kitchen design software, or reorganizing your current one, zoning is really practical, useful, and, best of all – flexible. Just decide what works best for you and your lifestyle.
Julia Esteve Boyd from The Etiquette Consultant
What is The Best Paint Color For Cabinets in 2022?
Please Advise the Best Kitchen Organization Ideas
When it comes to kitchen organization, it’s all about functionality. While everyone wants their kitchen to look nice and organized, it’s equally important to maintain functionality as well.
Make sure your most used items are always readily available. The last thing you want to do while you’re cooking is disrupt your flow and forget about whatever’s on the stove while you look for the nonstick spatula. When you organize your kitchen, be sure to set aside your most used kitchen tools and make sure they are stored at the forefront of your cabinets when you stow everything away.
Another effective way to organize a kitchen of any size is to remove the redundancies. Unless you’re a professional chef, you don’t need a blender and a food processor. You don’t need a toaster and a toaster oven. You don’t need a drawer full of hand-me-down knives that went dull in the early 2000s.
Simplify your space by removing your unnecessary and unused tools and enjoy a streamlined kitchen designed to make dinner time run more smoothly than you thought possible.
Carson Sperry from Rent.
How To Choose The Right Kitchen Island Size?
When determining island size, the main questions to answer are what size can fit in the space, what is its primary function, and how many people need to be seated. In general, between the perimeter cabinets and the island, we always try to have no less than 42” of space, but preferably 48”. Any less than this amount of space could cause crowding when more than one person is working in the Kitchen. In tighter spaces, sometimes these restrictions set the total size of the island given the surrounding walls and walkways. Most commonly, the island serves as both a workstation and seating. If it is just needed as a workstation and not for seating, a 3’ x 6’ island, for example, could be sufficient. For empty nesters, that size could also work as both seating and a workstation. If our client would like to seat 4 – 6 people to serve most family meals on the island in addition to using it as a workspace, we would usually try to push the size to 4’ x 8’ or 5’ x 8’ (if possible in the space). Islands larger than 5’ x 8’ are possible, but with most countertop colors, you would need to incorporate a seam in the countertop to go any larger. Some countertop colors are available in jumbo sizes to go up to 6’ x 10’, but both the top material and installation can be expensive because of the slab’s weight.
Ken Uhrich from Custom Home Group
How to Organize Dishes in Your Home?
The primary way for your kitchen to be functional is to create great flow. Flow is a combination of all the moving parts in your kitchen working together. Your dishes are one of those moving parts.
We break down household dishes into two, sometimes three, categories:
-
Everyday Dishes: Common items–plates, cups, etc.
-
Specialty Dishes: These are items pulled out for special occasions and holidays
-
Kids’ Dishes: Child-safe dishes made of sturdy materials
Organizing your dishes depends on how you manage the stations of use in your kitchen. These areas include food preparation, food storage, pots and pans, small appliances, serving, and clean-up/waste. In regards to dishes, we tell clients to keep every day and kids’ dishes in Zone 1 (the most frequented spaces). Specialty dishes and holiday wares should be in Zone 2 (close, but not taking up your prime real estate).
Store every day and kids’ dishes to fit the space and design of your kitchen. There will never be a “one size fits all” solution to organizing your home. Maximize the efficiency of your space by placing dishes in a spot that improves flow.
Some final tips about organizing dishes in your home?
-
Your Zone 2 doesn’t have to be your kitchen cabinets. Zone 2 storage can include a china cabinet or buffet in the dining room.
-
Use Montessori techniques by placing kids’ dishes in a lower cabinet for easy access.
-
Keep your everyday dishes in a spot about your dining space and near the dishwasher. This makes it easy to grab what you need before sitting for a meal.
Remember: creating flow in your kitchen space is an individualized experience. Organizing your dishes to fit your current lifestyle should always be a top priority, which means re-organizing as the seasons of your life shift is necessary.
Keli Jakel from Organized by Keli & Co.
What is the best way to organize glassware, cups and water bottles?
The best way to organize glassware, cups, and water bottles in the kitchen is by aiming to maximize both efficiency and vertical space.
Store drinking glasses and water bottles in a “zone” next to the refrigerator where the drinks are kept. Coffee cups can be stored in a coffee station “zone” with or near the coffee maker.
Help children help themselves by storing their cups in a lower cabinet that’s easy for them to access. (They can then be responsible for putting cups away after they’re cleaned, too!)
Focusing on efficiency reduces the steps you need to take in the kitchen and will save you both time and energy in the long run. A win, win!
Once you’ve established efficient zones for your drinkware, look for ways to add space. Shelf organizers, cup stackers, and cup hooks can literally double the space in a cabinet.
A helpful tip when buying cups and glasses: look for options that are made to be stacked or can be used for more than one purpose. For example, a stemless wine glass is also perfect for juice. Fewer glasses require less storage space.
Water bottles are best stored with their lids on (so you’re not searching for the right lid when you’re already running late). A stackable organizer that stores bottles on their sides will maximize vertical space on a cabinet shelf. The same solution also works well as a honeycomb-style organizer in a deep drawer and keeps bottles neatly upright.
Another great option for water bottles when space is limited: an over-the-door shoe organizer on the back of the pantry door works perfectly. Place your children’s bottles lower on the organizer so they can easily retrieve and replace them.
Lacking sufficient cabinet space for your drinkware? Look for countertop or under-cabinet organizers that allow you to hang wine glasses and coffee mugs. Add some floating shelves to the backsplash or kitchen wall for glasses and cups. There’s always a way to find more space if you’re willing to get a little creative.
Jen from Organizenvy
What are the best kitchen tools for short people?
If you’re on the shorter side, working in a kitchen can pose a unique set of frustrating challenges! The tools you need will be specific to your kitchen, so first, figure out which parts of your kitchen are most frustrating to use as a short person — this will help you figure out what tools you need! It’s also worth thinking through how you organize your kitchen, not just the tools you use. Make sure you keep things that you use regularly lower down and things you use less often higher up. Generally, however, the best kitchen tools for short people are ones that make seeing, using, and reaching for items in the kitchen easier from a lower point of view. A long set of tongs with grippy silicone ends can help extend your reach; it’s worth having a pair that’s just for reaching. And a sturdy, lightweight kitchen stool is a must-have; if you can find one that easily folds away, even better. And when it comes to organizing shelves, especially higher shelves, and cupboards, look for kitchen organizers that help elevate things that would otherwise get lost in the back. There are lots of well-designed cupboard and shelf organizers and spice racks with graduated step designs so that items further back in the cupboard are raised above items in the front. These are great if you’re short — you can actually see deep into the cupboard without having to take everything out! If your cupboard shelves are too short for raised organizers, consider using lazy susans to organize your shelves; they’ll make it easy to see what’s in the back! When it comes to storing cans or jars, look for inclined can organizers that tilt forward, allowing cans in the back to roll forward as cans in the front are removed. If a standard 36″ kitchen counter height is uncomfortably high to work at, consider investing in a 30″ high rolling kitchen work cart with a butcher block or stainless steel top. Alternately, no rule says you have to stand while working in the kitchen — consider a high bar stool or tall chair to sit on while working at the counter.
Rebecca Eisenberg from The Practical Kitchen
How To Organize Kitchen Utensils
Pull all your kitchen utensils out into one area. Don’t just empty one drawer of utensils at a time—find ALL the kitchen utensils you have, whether in drawers, cabinets, on countertops, etc.
Why? This helps you first see what you have—and how much you have!
You may have doubled (or more!) some items, so this is a great time to “trim the fat!” For example, do you really need three vegetable peelers? (We didn’t.) Do you really need eight wooden spoons? (I thought I did, but I could cut that in half when it came down to it.)
Decluttering your items first will not only help you get more organized but will give you more breathing room to do so!
Next, group your utensils by function and task. For example, you may have had several certain utensils near your stove, but chances are there are at least 1-2 you haven’t used in awhile while actually at your stove. Why is that? Perhaps you no longer need them, or perhaps you use them more often when you’re in another area in your kitchen. Set those aside to go somewhere closer to where you use them, which brings us to the next step…zones!
Think about the different spots in your kitchen as zones. Where do you cut your fruits and veggies? Where do you ladle out the soup? Where do you prep lunches? Start organizing your utensils so that they’re placed near the zone where they are most frequently used!
Now, place your utensils in the spots you have available. Whether it’s in a drawer, a countertop canister, or another container, your goal is to have the tools you need right where you need them—and use them most!
Your least-used items (for example, the turkey baster I use maybe twice a year) should not be taking up your prime utensil storage spots! Save these least-used items to go in a least-used spot, such as a special holiday-labeled box in the back of a cabinet, in one of your highest, hardest-to-reach upper cabinets, or even the back of a lower drawer.
Jessica from The Brain and The Brawn
How To Set Up A Coffee Station at Home.


