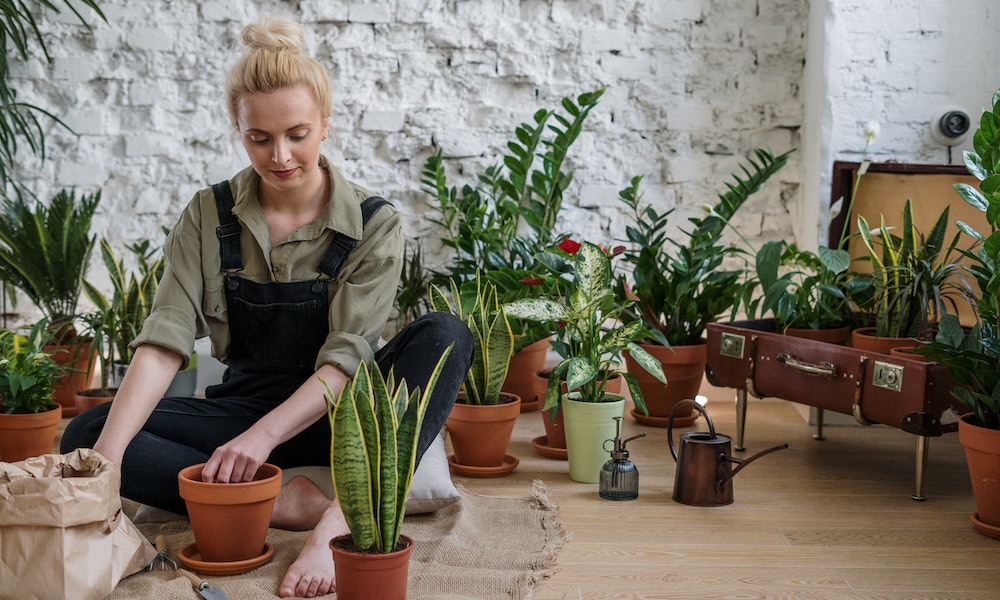
Gardening is one of the most fun and relaxing hobbies there are. But did you know that you can do it indoors as well? You don’t need to have a back or front yard to get involved in gardening. Indoor gardening is a great option for people who live in apartments or small houses without much outdoor space. But it’s also great, if you’re just a passionate plant lover.
Indoor gardening comprises a wide range of options that go from growing microgreens, potting decoration plants and succulent propagation to green walls, starting crop seeds and vertical farming.
We asked indoor gardening experts to provide their advice on how to get started with this increasingly popular way to care for plants at home and the garden supplies you may need. This is what they said:
What is ‘Biophilic Design,’ and what would you advise to get started with it at home?
Biophilic design just means designing architectural spaces for living and working that incorporate our natural environment more naturally. One simple example is introducing natural air circulation, but more ambitious projects have included full indoor gardens that allow trees to root into the soil beneath foundations and grow into atriums.
A more down to earth way to get started (and one of the first things we did on our house) is to introduce an internal living wall. You will need to install good insulation behind any wall-mounted indoor planters to protect plaster, and for any brickwork to remain breathable and protected from humidity but with water tanks at the base and simple pumps you can create jungles of native plants in your home that help connect your inside space to outside.
Personally, I think these spaces look best as a space to pass through to the garden, especially with full height windows or sliding doors.
Gary
Aussie Green Thumb
What are the five top tips you would give to someone who wants to get started with indoor gardening?
- Make sure you use a potting soil that matches the plant. For instance, Orchids, Succulents, and Ivy all have different requirements for potting medium.
- Don’t give your plants too much water. One of the most common ways that people kill their indoor plants is by watering them too much. Most plants hate “wet feet”. For most plants, especially begonias and succulents, allow the soil to dry out in between watering – not Death Valley dry, but dry to the touch. Each plant has different water requirements, so keep an eye on them for any signs of struggle.
- Match the plant to the indoor light. This is one of the trickiest. New gardeners might believe that every plant likes a bright window. That’s not true. Depending on the variety, it might like subdued light a few feet from a window, or no direct light at all. If you’re unsure, position the plant near the window and see how it responds over the first few weeks. If it quickly browns and looks like it’s dying, move it to where there is less intense light. Conversely, if the plant looks like it’s “stretching” towards the window, it wants more light – move it closer.
- Careful with drafty windows. If you live in a house with drafty windows, some plants will react poorly to that zone of cold air near the window. This can actually kill a plant pretty quickly. If the window is drafty, back the plant up a foot or two so they’re less exposed to it.
- Don’t overfeed your plants. Believe it or not, most plants need very little fertilizer indoors. A gentle organic feeding every other month is about all they need, assuming the plant is healthy and the potting medium is correct (see #1). If you potted the plant in potting soil that contains fertilizer, you won’t have to feed it all for about 6 months.
Todd Heft
Big Blog of Gardening
What temperature and humidity range is best recommended for an indoor garden? (Does it change from an indoor crop garden to decoration plants?)
At IGWorks®, we provide our customers with indoor gardens that can grow almost anything. Temperature and humidity are not major concerns for most indoor gardeners, and we will explain more on each topic here.
Temperature:
Most of our customers keep their homes at or around 70˚F all year, but others have much more diverse indoor temperature ranges. I live near the coast, where I and many others do not have air conditioning. My indoor temperatures can spike to 80 degrees or more during summer afternoons. Some of our customers prefer their indoor temperatures to be significantly above or below 70 degrees. Others want to grow in a basement that they do not condition as much, and may be cooler than the rest of their home.
Ultimately, I tell all my customers that you can grow anything you want indoors, as long as it is a comfortable temperature for them. However, some plants will prefer those temperatures over other plants. For instance, lettuce generally prefers cooler temperatures. At temperatures consistently above 75˚F, many lettuces will become prone to flower (or bolt) more quickly, and this will reduce the tastiness of your lettuce. But not all varieties of lettuce are the same. Romain, Butterhead and many other lettuces will grow quite well up to 80 ˚F, so always take a look at your seed package to find the preferred growing conditions. The fact is that you can almost always find a variety of the plant you want to grow, that will grow fine at your indoor living temperatures.
Another great example is hot peppers. I LOVE hot peppers, which generally prefer temperatures between 70-85˚F for growing peppers. But, they continue to grow well (although less prolifically) at slightly lower temperatures.
These same principles hold true for decorative plants.
Humidity:
At IGWorks®, where we focus on growing both edible and decorative plants with hydroponics, we never have to focus on humidity indoors. And, similar to temperature, any comfortable indoor humidity should be comfortable for most plants as well. Some plants prefer higher or lower humidities of course, just like some plants prefer higher or lower temperatures. But with few exceptions (like air plants that collect moisture from the air) they will grow well if they are properly watered and fed, as well as have a proper amount of light. Grow lights can be wonderful for folks who don’t get ideal sunshine from their windows.
Summary:
Long story short, nature and most plants in it prefer (or at least tolerate well) the same conditions that we enjoy to live in. So, if your home is comfortable to you from temperature and humidity standpoints, it will be comfortable to most of your plants, with few exceptions. Focusing on proper amounts of water, lighting, nutrient and pH conditions will provide you with the greatest results. And, once you get those dialed in, there’s nothing wrong with stepping up your game to show off the added benefits of optimizing temperature and humidity for finicky plants
Dave StevensFounder/President
IGWorks ®
Which home areas would you recommend best for indoor gardening and why?
Any area is suitable, but the best area depends on what you are growing and the light available. If you love to grow herbs indoors, for example, the kitchen windowsill is an ideal place – as long as it receives bright, direct sunlight. The key to successful indoor gardening is to select the right plant for the spots you have available inside to grow it. The most important element is light; you need to ensure that the plant receives the appropriate amount of light. Some plants, such as the peace lily (spathiphyllyum) tolerate low light, so if you have a northern-facing window, you can still grow beautiful plants. If you’re not sure if your plant will tolerate the location you’ve selected indoors to grow your plant, look up the plant’s light requirements online or ask at your local garden center. And remember – any location can be transformed with indoor grow lights, which provide plenty of light that plants need!
Jeanne Grunert
Award-winning Writer & Gardening Expert
Home Garden Joy
What are some beneficial houseplants I can grow at home, and what are their benefits?
There are tons of benefits from aloe vera, the most well known one being a healing gel for burnt, bitten, dry, and irritated skin. What most people don’t know is that there is a variant of aloe vera that is more edible/ingestible than the common aloe vera, called chinensis. These are often used in cooking and digestive drinks. Whether used internally or topically, there is a yellow latex component that oozes from the leaf that should be drained out before using, and avoided if one is allergic. Once usable, this gel is made into many healthcare products, beauty products, and found on shelves in grocery stores. This is all thanks to its anti-inflammatory properties, as well as antibacterial, antifungal, and antiviral properties. As long as it has moderate to bright light and watered well when fully dry, it is an extremely handy and easy to grow houseplant.
Chrissy Parker
Tropicals and Annuals Manager
B. B. Barns of NE Columbia
What is the best soil for houseplants, and how can I know if it’s making well to my plants?
As home to houseplant roots, the right soil is critical to healthy houseplant growth. Choose the correct soil for your houseplants, and you will have healthy root growth and a vibrant indoor garden.
Most houseplants thrive in soil that is water and nutrient retentive, yet well-draining. This means using houseplant soil that has moisture and nutrient-holding ingredients such as coir or peat moss and compost, as well as draining agents like perlite or pumice. Such soil will feel soft to the touch (except for the added draining agent) and slightly on the heavy side.
If the soil feels very rough, lumpy and barky, that is generally not good soil for most houseplants. Such soils are comprised of mainly ground-up bark, and this soil type does not hold nutrients or water. It is also much too quick to drain and won’t keep plants well-hydrated.
There are some houseplants, such as cacti and succulents, that require soil with a greater percentage of a draining agent like pumice or perlite. For such plants, which are native to arid reasons, it’s important that moisture doesn’t remain at the root zone for any length of time.
Orchids, which grow on trees in their native habitat, rather than in soil, also require their own special type of “soil,” which is comprised of what is known as orchid bark.
Julie Bawden Davis
Master Gardener, Author & Publisher
Healthy Houseplants
What is a soilless medium, what are their advantages for indoor gardening, and how can I make my own mix with stuff found in my household and yard?
Soilless medium is a substrate alternative that does not contain the typical components of soil; sand, silt, and clay. It can be chemically inert, such as fired clay pebbles, providing little capacity to “hold on” to the nutrients that plants need. Or, it can be composed of processed organic matter, such as sphagnum peat or coir. Soilless media like peat can maintain a nutrient concentration in the root zone, but over time will further decompose, changing its characteristics as a medium. When using a soilless media for indoor gardening, make a selection based on the fertilizer requirements of the species in question. Slow-growing, low-light species often benefit from lower fertilizer concentrations. High-light, fast-growing species may respond better to the peat or coir mixes. It is not recommended to create your own soilless substrate from household materials but leftover supplies such as washed gravel, crushed stone, or dye-free wood chip mulch can make for good bulking materials in a soilless mix.
Christopher S. Imler
Consumer and Veterans Horticulture Educator – Michigan State University Extension
Soil Health Nexus
Please explain what container gardening is, and what would you advise to get started with it at home?
1. Position
Look for a spot in your house or yard that gets at least 6 hours of sunlight a day, but preferably avoids the hottest part of the day. A little shade is fine and the closer to a window if you are inside, the better.
Usually, a pot will be filled with potting mix from the store. This comes with a slow release fertilizer designed to feed your plants for 3 months, after this time you can refresh the potting mix by feeding the plants. There is a wide range of options for this, compost, manure, or bought products from the store. Potting mix needs to be well draining while also retaining moisture well.
Plants need water, and will usually send their roots out far and wide accessing the moisture in the earth. In pots they do not have this option, so you need to keep your plants well watered. How often will depend on what you are growing, how much rain there has been (if outside) and how hot it has been. To check if you need to water, check the moisture of the soil about 1/2 an inch down. If it is starting to get dry, give it a good soak. Water your plants 2-3 times a week to keep the soil evenly moist but not sodden. Very wet soil can promote root rot and kill off your plants.
Fantail Valley Homestead
What is vertical gardening, and what would you advise to get started with it from home (indoors)?
Vertical gardening is an excellent way to utilize wall space and transform barren areas into beautiful living décor and even food! Going vertical saves on floor space, and when you need more plants in your life, why not go up? Hanging baskets, hydroponic systems, and living walls are all examples of vertical gardening.
Before starting a vertical garden, there are a few things to consider:
- What are the light conditions in your space? This will help you choose the right plants for the job. There is a stunning variety of creepers and trailing plants for every environment. Your Garden Centre assistant will help you choose the perfect fit as well as which soil mix and fertilisers to use.
- Are you growing for décor or food? Indoor hydroponic systems allow everyone to enjoy homegrown produce without an actual garden with soil. This method is great for growing herbs, leafy greens, and other yummies like strawberries and cherry tomatoes. In addition, water-based growing is super trendy and will certainly make a statement in your home.
- How much time do you have to spend on maintenance? If you have little time, hanging baskets will work perfectly. If you have more time, living walls are simply gorgeous. These are created by securing multiple vertical planter bags in a grid shape. Over time, plants will grow to cover any open spaces, creating a lush green wall full of texture and freshness.
Shahnee Stockigt
Life Is A Garden
What are microgreens, and how can I start growing and caring for them (indoors) from home?
Microgreens are tender, immature seedlings of edible vegetables and herbs with two developed embryonic leaves. They are young plants that haven’t grown to maturity. Microgreens grow to one to three inches in height. They are small and come in various robust flavors, bright colors, and crunchy tastes. They offer a powerhouse of nutrition.
Think of sprouts, seeds germinated in water, as babies. Microgreens are the stem and first leaves of a plant; they look like green two-leaf clovers. They are the embryonic leaves of seeds that appear after they pop out of the ground. They are white at first. But when exposed to light, they undergo chlorophyll biosynthesis and become green.
What’s exciting is that you can also grow microgreens from many plants. They include herbs, root vegetables, edible flowers, and an assortment of exciting and highly flavorful greens. The next time you get your hands on some raw peanuts or beans, peel the coat and split the seed in two. Inside, you will see these two tiny leaves—embryonic leaves. The inside of a seed’s skin or coat is called a cotyledon. According to the Encyclopedia Britannica, it’s the “seed leaf within the embryo of a seed.”
Cotyledons are the first plant parts to show up above the soil. They look like fat leaves. These embryonic leaves appear from a germinating seed. Cotyledons feed the seedling until the seedling can make its food. They promote seedling growth through photosynthesis. Direct sunlight fosters the most succulent growth, and indirect sunlight can suffice. They look nothing like the next stage leaves called “true leaves,” which appear in the second phase of plant growth. They pop out between the cotyledons 2-3 days after germination. Four to five days later, 2-4 inches tall, the microgreens with their first leaves are ready to be harvested. Don’t let them get much taller than that, or they’ll lose their sweetness.
Windowsill Gardening
You can grow many types of microgreens at home and even at work. And you can do it inside or outside, on your windowsill, in your kitchen or garden. All you need is a small space: a windowsill, a protected area of your porch, or near a window in any room. It would be best if you had sunlight or indoor light. Indirect light from the sun on a cloudy day is often enough.
You can grow microgreens in recycled containers or any pots with drainage holes: recycled clamshell containers, plastic containers, or old flowerpots. The best thing about growing microgreens is that growing your own is a 52-week year-round treat. It may snow outside, or it’s cold. You may be in the middle of the desert. Growing microgreens is like any recipe. It would be best if you decided how many people you would feed. Here are two servings. You’ll need some equipment which you may have to purchase. You’ll need to decide on the key ingredients, and you’ll follow the instructions which come later.
Which Microgreens should I Grow?
I believe the two best microgreens to use to start growing are arugula and red cabbage. Red cabbage is a fast grower, highly nutritious, keeps well, and has an earthy and peppery flavor that I like. I like Arugula. It is a fast grower, just as nutritious as any other Brassicaceae microgreen. Arugula has a perfect shelf life and has a nutty but not bitter flavor that I like. Recently, I learned that it is also one of the oldest domesticated plants, and growing is easy to manage.
But which species are not suitable to grow as microgreens?
Some common vegetable crops like tomato, pepper, eggplant, and potato are not edible at the seedling or microgreen stages. They contain toxic levels of alkaloids that can harm you. Regarding toxins, refrain from using wild plants to grow microgreens unless you are a plant expert. That includes wild chicory and common dandelion.
If you haven’t started yet, find some time, buy some seeds, and start to grow theming. Microgreens are a great way to boost your health, and you add nutrients to your meals. Growing microgreens is a great way to get your family involved, too. This route is ideal if you want to add flavor, something pretty to a plate, or just some added nutrition to your meals.
Microgreens can provide all the nutrients your body needs to heal and support your journey to a long and healthy life. Learn more about microgreens, how good they are for you, and what you can do with them. Check out my guide, “The Beginner’s Nutritional Guide to Incredible Microgreens.”
Andrew Neves
Microgreens Expert, Author and Founder
Microgreens World
What is a terrarium, and how can I take care of it?
But every plant needs a little bit of TLC to thrive, and terrariums are no different!
If you don’t remove dead plant matter straight away, it’s going to rot, which will lead to a smelly, unhealthy terrarium.
-
Dip a Q-tip into hydrogen peroxide and apply a small wipe to the affected area
-
Invest in some springtails to munch the mould away
-
Spray with chamomile tea – the rich sulphur compounds make it a mild fungicide
Yvette TimminsFounder
Bloom College
What are some common indoor plant diseases, and what’s the best way to treat them?
If you have an indoor houseplant, chances are you have experienced at least one plant disease. This is why you must be checking your plants consistently, as these can rapidly spread and cause a significant problem that, if gone too long, can be hard to come back from.
Here are some of the most common indoor plant diseases that you should be checking for often and how to treat them:
- Powdery mildew is a fungal disease that causes a powdery white or gray coating on leaves and stems. This one usually starts as circular, powdery white spots, which can appear on leaves, stems, and sometimes fruit. It can be treated by removing affected leaves and applying a fungicide. It is good practice to isolate the plant while in treatment and quarantine!
- Root rot: caused by overwatering or poor drainage, which leads to the decay of the plant’s roots. It can be treated by improving soil drainage and reducing watering. A great way to improve drainage is adding mediums to the soil, like organic perlite and bark. If that still does not work, add watered-down hydrogen peroxide to help aerate the soil. – But truthfully, the best remedy is to stop watering your plants so often! Each plant has different needs, but for the most part, as a good rule of thumb, you can just wait for the soil to be dry between waterings and then give them a good soak!
- Spider mites: tiny spider-like pests that can cause yellowing or stippling of leaves; spider mites love an arid environment, so underwatering your plants is usually the leading cause. They can be treated by hosing the plant with water or using a pesticide specifically formulated for spider mites. Quarantine the plant until you are confident these are gone, or the rest of your plants can quickly become infected.
- Fusarium: a fungus that causes wilting and yellowing of leaves, often accompanied by brown or black spots. The fungus thrives in warmer weather (optimal soil temp 82°F) and is more severe in acidic soil. The pathogen often enters through root wounds caused by cultivation or nematode feeding. Solarization kills off the fungus by raising that temperature to an extreme temperature where no fungus can survive. You will want to remove all infected plants from the infected soil and burn or discard them entirely.
- Black spot: caused by a fungus that produces circular black spots on leaves, which can cause defoliation. It can be found on flowers, fruits, and leaves and is problematic when the weather is hot and humid. It can be treated by removing affected leaves and applying a fungicide.
Identifying the specific disease or pest affecting your plant is essential to treat it effectively. An effective way to eliminate these plant diseases is through plant tissue culture.
Plant tissue culture is a powerful tool for producing disease-free plants because it allows for the propagation of plants in a controlled, sterile environment. This helps to eliminate pathogens that may be present in the original plant tissue and ensures that the new plants grown from the tissue culture will be disease-free.
The following steps can be taken to get rid of indoor plant diseases using plant tissue culture:
- Isolation: The first step is to isolate healthy tissue from the infected plant. This can be done by taking small pieces of leaf or stem tissue free from disease symptoms.
- Sterilization: The isolated tissue is then sterilized to remove any pathogens that may be present. This can be done by treating the tissue with a bleach solution or other sterilizing agent.
- Culture initiation: The sterilized tissue is then placed on a culture medium, a nutrient-rich solution that supports the growth of the tissue. The culture medium is typically supplemented with hormones to promote cell division and growth.
- Culture maintenance: The tissue culture is then maintained in a controlled environment, such as a growth chamber, to promote the growth of new plantlets. The culture medium and conditions are carefully monitored to ensure optimal growth.
- Acclimatization: Once the new plantlets have grown to a suitable size, they are transferred to a new environment, such as a greenhouse or outdoor setting, to acclimatize them to normal growing conditions.
- Planting out: Finally, the plantlets are planted in the soil and grown to maturity. They are now disease free.
It is important to note that plant tissue culture is a complex and technical process that requires specialized equipment and expertise. It is best to consult with a plant tissue culture expert professional like our experts at Plant Cell Technology.
Rachel Lopez, MS
Digital Marketing Manager and Plant Expert
Plant Cell Technology
What is hydroponics, and would you advise to get started with it from home (indoors)?
Hydroponics is a sustainable, low maintenance yet highly effective method of growing plants, this method is ideal for indoor growing, especially where lack of space is an issue, systems can be designed to make use of vertical space.
Simply put, hydroponics is best described as growing plants without soil. Water is utilised as the main method of delivering nutrients to the plants roots, combined with a growing media to help support the plant.
One of the main benefits of hydroponics is the ability to have more control over the variables including ph levels, lighting and nutrients. Hydroponically grown plants dip their roots directly into nutrient-rich solutions so plants get more of what they need much easier and faster.
Hydroponics is perfect for indoor use, not only is the risk of overwatering eliminated because the plant learns to uptake the water only when it needs it, but the risk of disease and pests are also eliminated.
The controlled conditions of hydroponics allows you to grow high yields all year round even in the smallest of spaces whilst utilising 90% less water than traditional methods and decreasing food miles.
Anastasia
Urban Green Farms
What are the differences (Pro/Cons) between a DIY and a Ready-Made hydroponic system, and what are their essential components?
Comparing hydroponics systems
Hydroponics is one of the most common methods used in indoor gardening. There is a large range of hydroponics systems, which might look very different from each other, but the key of all of them is that plants are grown without soil, which is substituted by water + nutrients.
There are 2 big categories of hydroponic gardens: the “do it yourself” systems and the commercial ready kit:
- DIY hydroponic gardens have the main advantage of being quite cheap to start and can be modified during the time depending on the need and wish of the gardener. A DIY garden might become quite expensive when the size gets bigger and more automation is needed, but that’s always a choice. To keep in mind, these systems might need a few attempts before being successful and they need some attention to be kept functional.
- The commercial gardens on the other side are usually extremely easy to start with and they require very little maintenance. The cons is that the number of plants that can be grown is fixed and the starting cost is higher.
In general DIY-gardens are ideal for those who would like to make gardening a full time hobby and are looking for a project that starts way before the plants start to grow. You can use your creativity and there is no limit! The commercial ready gardens are instead ideal for those who want to start immediately to grow plants and aim to enjoy seeing the little seeds growing into full plants in an easy and effortless way.
Key components of every hydroponics garden
Hydroponic gardens grow plants without soil! The soil has 2 functions in traditional gardening: First, give plants support, and second, provide nutrients.
In hydroponics gardening the support function is substituted by seed holders. They can be made of different hydrophilic materials such as rock wool, sponge, coco coir, etc . The nutrients are provided by a fertilizer which is provided to the roots with water during irrigation.
Irrigation in hydroponics systems can be passive if the water is kept in a reservoir and always availablefortheplants,viaastring/capilar; oractiveifthewaterisprovidedtotherootsonlyat a specific moment of time, usually via a pump. The use of a pump is providing extra benefits to the plants, like mixing the nutrient in the water and oxygenating the roots.
Hydroponic systems are also often equipped with a light, to support growth of plants indoors, where the natural light is not enough. LEDs light offers powerful and durable lights, which do not heat up and damage the plants. Red and Blue light are preferred by plants for growth, but other light colors are also important and full sun spectrum lights are now available. It is always good to choose plant-light as they are different from the one produced for the households.
In summary an hydroponics system requires
- A water reservoir
- Support for plants
- Plants nutrient/fertilizer.
Additionally a water pump and a lighting system will provide extra benefit for plant cultivation.
Martina
Plantui, Love at first Plant.
What would you recommend to keep your indoor plants pests-free while keeping your family safe (from chemicals)?
There are three recommendations I would make for keeping your plants pest-free and keeping chemicals out of your home.
The first is to grow plants that naturally repel pests. While herbs are great for adding to your cooking, many of them also repel pests. These include basil, mint, sage, and rosemary. Herbs are great for keeping mosquitos and flies away.
Another tip is when you bring a new houseplant into your home or if you are bringing your plants after they spend the summer outdoors, make sure you put them away from other plants for a few weeks.Quarantining your plants is important to do because there could be pests on the plant, and you do not want them to spread to other plants in your home.
The third recommendation is to occasionally give your plants a bath. Getting the dust off your plants helps with photosynthesis and bathing them and can also wash away any pests on the plants. Don’t forget to hold the leaves when you clean them to prevent damage and make sure you wipe the underside of the leaves.
Susan Brandt
Blooming Secrets
What is the proper way to take care of Bonsai trees indoors?
Have you ever thought about growing bonsai, but thought it was too intimidating to try? Once you have the correct type of bonsai for your indoor garden, maintenance is relatively simple.
The term “bonsai” refers to any miniature tree which is grown in a container. Bonsai has a history of being a beautiful piece of living artwork and is a true part of Japanese culture, dating back to the early 14th century. These small trees were initially enjoyed by only the wealthiest and elite in society and today have become a popular and valued art form that is enjoyed around the world.
There are two types of bonsai, those grown indoors and those grown outdoors. Generally, juniper, pine spruce, maple, elm, and gingko trees are outdoor plants and need to be exposed to the changing seasons to thrive. Varieties grown for indoor use generally include sub-tropical cultivars, such as Ginseng Ficus, Jade, and Dwarf Hawaiian Umbrella tree.
Lighting and Humidity: Your bonsai is best positioned in a bright location away from heat or draft and should be kept moist, but not over-watered. When watering your bonsai tree, it is best to fully saturate the soil and roots until excess water escapes through the drainage holes in the bottom of the planter. Do not allow the plant to sit in water or the soil to dry out, as either can be detrimental to the plant. The best practice it to water when the top layer of soil feels dry to the touch. I find watering every other week, completely saturating the soil and monitoring after one week to work best.
Soil and Fertilization: The best soil to use for your bonsai is a light, peat moss based potting mix which will ensure proper drainage. Add large particles such as volcanic rock or stones to the bottom layer of soil to improve drainage and allow oxygen to the roots. Adding sphagnum moss and pebbles above the soil creates a decorative touch and serves the purpose of retaining humidity. To feed your plant, a balanced liquid bonsai fertilizer containing nitrogen, potassium and phosphorus is recommended. Be sure that the plant is well-watered before applying, so as not to burn the roots. The best time to fertilize your plant is from early spring through early fall when the plant is actively growing, approximately every 2-4 weeks.
Pruning: To keep your bonsai looking its best, maintenance pruning involves removing any new growth which is starting to change the shape of your tree. Pruning away branches encourages the growth of smaller branches, giving your tree a fuller appearance, while pruning buds away from branches favors smaller leaves .Flowering bonsai are best pruned during springtime after bloom.
Lee Miller
Landscape Designer, Consultant, Author, Garden Blogger
A Guide to Northeastern Gardening Blog
What advice can you give to take proper care of indoor trees?
Caring for indoor trees is tricky because there are no all-encompassing rules that people can rely on. Each tree and interior circumstance are different. Growing trees indoors is more of an advanced gardening skill, so one should expect some setbacks.
My advice is to find an expert on the internet who has lots of content about care and feeding for the exact type of tree you are looking to have indoors and follow their instructions. If you cannot find an exact example, find the closest one you can and expect to suffer some amount of trial and error. But this should help steer you in the right direction when determining your watering schedule, potting, light exposure, fertilizing frequency, and any pruning recommendations. Those nuances aside…
Be conservative when pruning an interior tree as they will NOT have a dormant season like outside trees do. Pruning should be done in a minimally invasive manner vs comprehensive pruning. You’ll also need to fertilize your tree, but the frequency and type will be heavily dependent on your specific tree. Likewise, the size of your pot is also very important because it can determine the size your tree will grow to.
Lastly, if your climate allows it, it’s usually a good idea to put the tree outside for a portion of the year.
Lisa Tadewaldt
ISA-Certified Arborist / Owner
Urban Forest Pro a tree services company in Portland, OR
Is it possible to have a green living wall/moss wall at home, and if so, how can I get started with it and care for it?
- Select the type of moss wall you wish to have. Moss walls can be made of sheet moss, reindeer moss, or pole moss just to name a few.
- Measure your space and get some dimensions ready for design. Moss walls can be installed in any indoor space, as the moss is completely preserved and requires no light, watering or pruning. The moss walls will never die, decay, mold or fade.
- Install your moss frame, you can watch a how to video here.
Emma Terrell
Founder
The Urban Botanist
What are the easiest kitchen herbs to grow?
Finding the easiest kitchen herbs to grow was not as easy as thegardeningdad thought! Some require extensive care, others don’t grow well indoors, and some just don’t grow quick enough.
But growing kitchen herbs does not have to be hard.
Below, is a list of the 5 easiest kitchen herbs to grow:
- Basil
- Cilantro
- Mint
- Dill
- Rosemary
These herbs require very little care, grow great in a kitchen, and can grow very quickly no matter where you live.
If you want to have the best success growing these herbs, then I recommend taking advantage of these SIMPLE herb tips:
- Water these herbs once a week
- Place them by your kitchen window. While not required, it will help your herbs grow faster and provide a better harvest
- Harvest no more than twice a week to allow for the best growth
- Remove dead parts of the plant as you see them
- Use potting soil to provide the best drainage and to help prevent fungus and diseases from happening
If you want to learn more about herbs, I recommend reading this article.
Paul Jones
The Gardening Dad
Could you please give some insights on growing and caring for succulents indoors?
A big part of success with growing succulents indoors is knowing what types of succulents you have, or choosing a succulent that is suited for indoor growing. Brightly colored succulents like Echeveria don’t usually maintain their colors well indoors and will need a grow light to help them stay compact, healthy and color. On the other hand, most Haworthia varieties will do well indoors even with limited light. Most succulents need about 6-8 hours of bright, indirect sunlight, though some will need more than others.
Once you know what type of succulent you have and are able to give it the appropriate amount of light, the next most important piece is the pot and the soil. Succulents will do best in a pot with a drainage hole and in a gritty, well draining succulent soil. Succulents will not generally do well in a traditional potting mix, but need something that is mostly inorganic (rock) material. This then allows you to water succulents using the “Soak and Dry Method” — completely soaking the soil all the way to the center and not watering your succulent until the soil is completely dry. Watering this way allows succulents to develop a healthy root system and go longer periods of time without water. Indoors it’s likely you’ll only need to water every 2-3 weeks, even once a month for some varieties.
The combination of a pot with a drainage hole, a well draining soil, and watering only when the soil is completely dry will help prevent your succulent from rotting and keep it alive for months and years to come.
Cassidy Tuttle
Succulents expert, author and blogger
Succulents and Sunshine
How would you advise beginners to start growing and caring for cactuses from home (indoors)?
Caring for cacti indoors is not difficult but there are several things to notice. First, don’t water it too much. The indoor environment (in an office, at home, in a room, etc.) is not highly-evaporated. Be sure to check when the soil is completely dry or keep a watering diary. Second, give your cacti enough light. Indirect light is preferred in most cases. Keeping cacti under direct burning sunlight sometimes is not a good idea. Third, soil drainage is another factor to consider. Overwatering is the most common cause of succulent/cacti root rot, which is deadly. If you can’t control the way you water it, you better have soil that drains well.
Richard Miller
Succulent City
“What are the top 5 plants you would recommend growing at home for the benefits of their essential oils and why?”
Essential oils give plants their unique flavors and aromas, which is a large part of what attracts us to them. Growing plants for their essential oils is a fun way to explore the world of plant medicine, and to receive their aromatherapy.All plants have essential oils, but they are not all easy to access if you don’t have your own still.Below I’ve listed my top 5 plants for growing in a home garden. I chose these plants because they can easily be used in everyday life, they are relatively easy to grow, their essential oils are plentiful in the part of the plant that’s also edible, and they are wonderful in culinary dishes, teas, and added to baths. Melissa aka Lemonbalm (Melissa Officinalis) – Melissa grows low to the ground, like mint, and makes a lovely ground cover within a garden space.In aromatherapy, melissa is well regarded as one of the world’s most potent medicines. It’s commonly used as a remedy for shock and trauma, insomnia, migraines, dementia, and for viruses, especially when the symptom is cold sores.The essential oil of melissa is contained in the leaves which can be used to make a light, sweet lemony tea. It’s known to be very soothing and perfect before bedtime with a little honey.The leaves can be crushed gently between the fingers for essential oil inhalation. They can be eaten directly from the plant, but it may not be the most pleasant taste to some people.The leaves can also be chopped up and tossed into a salad, or cooked into savory or sweet dishes. Some people like to stuff chicken with melissa for its lemony flavor. Rosemary (Rosemary Officinalis)The tasty and aromatic spikes on the rosemary plant are full of essential oils. Sometimes I go over to my rosemary plant and give it a hug while enjoying its calming yet energizing aroma. Rosemary is a wonderful plant to have around just for the fact that you can walk up and smell the sprigs without the need to crush them. You also can pop a spike in your mouth and chew it up for a lovely flavor with benefits.Use rosemary as a tea or chopped up and sprinkled on any number of sweet or savory dishes. The essential oils is known to help with digestion, skin conditions, and cognitive function. Tarragon (Artemisia Dracunculus)Tarragon is favored amongst chefs for its spicy and unique sweetness. Known as “little dragon” and “king of herbs”, tarragon has been used as a medicinal herb for centuries and is thought to have mildly psychoactive properties. Benefits of tarragon essential oils include hormone regulation, digestive relaxant, diuretic, and aphrodisiac. This herb stimulates the liver to produce bile. Its leaves are edible with a lovely delicate flavor. They can easily be added to salads or any other cold or hot dishes. It can also be added to a bath or made into a tea. Lemongrass (Cymbopogon Flexuosus)A deliciously sweet lemony smelling (and tasing) plant, lemongrass is a star in Thai cuisine. It can also be made into tea.The essential oils are contained in the leaves, which are long, narrow, and flexible. They have a fountain-like appearance that looks majestic in the garden. You can’t snack on this leaf, but you can add it to your culinary dishes and to baths.Lemongrass essential oil is used to relieve respiratory issues, and for its uplifting and relaxing aroma. Lemongrass is an insect repellent, except to bees. Beekeepers use our lemongrass essential oils to help them attract bees to their hives. Peppermint (Mentha Piperita)The leaves of peppermint make a lovely treat to taste while walking or working in the garden. Peppermint grows low to the ground, and it tends to spread out.Its leaves can easily be chopped and made into a tea or added to your chocolate concoctions or other desserts. On a hot day, the leaves can be added to a cool bath to reduce stored heat from the body’s tissues.Peppermint essential oil is used for bowel health, sleep issues, for calming, and to open the lungs.
Hope Johnson
Aroma Alchemist & Author
Miracle Botanicals
What are the five plant species you would recommend for indoors in a small apartment and why?
These are my top 5 recommendations:
Mini Monstera
Rhaphidophora tetrasperma
The mini monstera is the perfect choice for those who love the look of true Monstera plants but don’t have much room. You can pot up a mini monstera in a small planter with a moss pole and achieve the same look and feel but inside a decidedly smaller footprint.
Black Jade Hahnii Snake Plant
Dracaena trifasciata ‘Black Jade Hahnii’
The Black Jade Hahnii Snake Plant is one of the best all-around indoor plants. Reaching only about 8” tall, these compact plants are quite tolerant of low light and need very little attention. The dark green leaves of this cultivar look lovely in a small planter and the plants grows so slowly that it rarely needs repotting.
Bambino Alocasia
Alocasia ‘Bambino’
The Bambino Alocasia is a striking compact tropical houseplant. The arrowhead-shaped leaves are stunning, and this cultivar tends to stay under about a square foot in size. Other small cultivars include ‘Frydek’ and ‘Dwarf Amazonica’.
Rex Begonia
Begonia hybrid
Rex begonias are such fascinating foliage plants for indoor gardeners looking for something a bit different. There are so many different patterns and leaf shapes to choose from, and the plants don’t need much space at all to show off their lovely leaves.
Moonshine Snake Plant
Dracaena trifasciata ‘Moonshine’
Moonshine snake plant is a great option if you love the look of snake plants, but don’t have room for the more common tall varieties. While the larger varieties usually need to be placed on the floor, shorter types like ‘Moonshine’ can be placed on shelves or windowsills that don’t have much space in terms of height.
Home for the Harvest
What are the basics for growing mushrooms from home, and what’s the approximate budget to get started?”
Growing mushrooms indoors at home is often thought of as too difficult.
If you start reading articles about it, you can quickly begin to feel overwhelmed by all the different ways of doing it, the multiple stages of the growing process, and unfamiliar terms like sterilization, laminar flow hood, or liquid cultures.
But you really can skip past most of this and successfully and easily grow your own mushrooms at home.
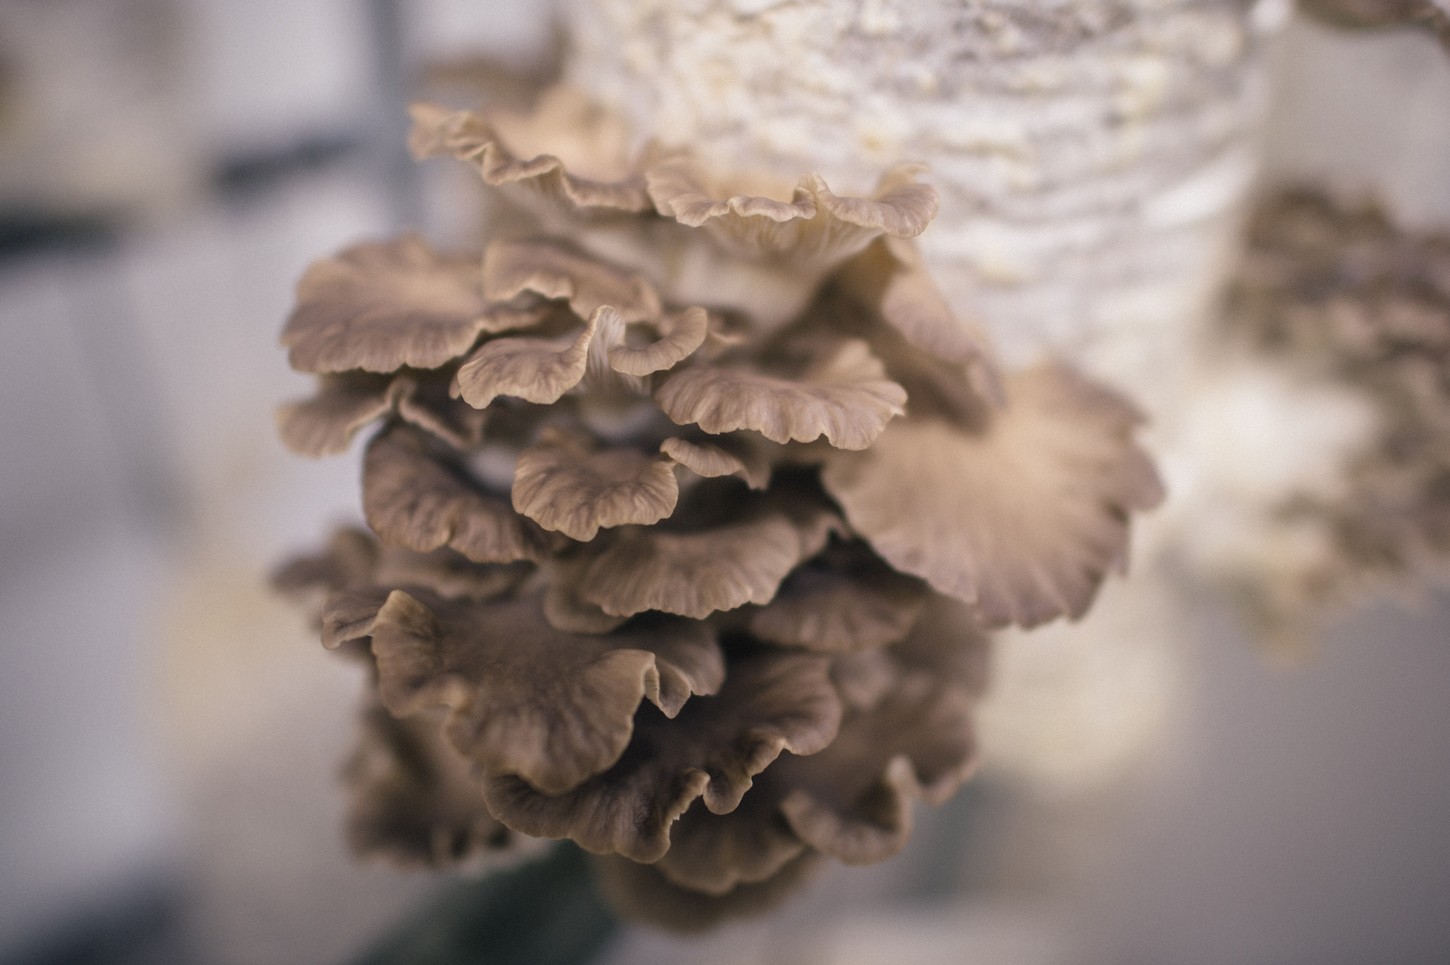
The easiest way is to simply buy a ready-to-fruit mushroom kit or substrate block. This is a ready-to-grow bag of substrate and mushroom spawn, which has already been part grown. When you receive it, you simply cut a hole in the bag, spray lightly with water each day and within 7-10 days you’ll start to see little mushrooms beginning to grow.
Then around 5-7 days later your mushrooms will be ready to harvest. Simply pick them, soak the substrate block in water overnight and another crop will grow 1-2 weeks later. After 2-3 harvests you can add the ‘spent’ substrate to your compost pile.
You can buy kits and substrate blocks like this for many popular mushroom varieties like Oyster, Shiitake and Lions Mane and they tend to cost around $30. If you enjoy the process, you can get more involved and start making your own substrate, but I always advise people to start with a kit to get guaranteed success and then take it further from there if you find yourself falling into the wonderful rabbit hole of mushroom cultivation!
[Image courtesy of GroCycle]
Adam Sayner
GroCycle
How can I know when it is time to re-pot a house plant, and how can I do it indoors without stressing the plant too much and making a mess?
The first tell-tale sign that your plants need repotting is when the roots begin to grow out of the drainage holes. The plant is also likely to be pushed upwards out of the pot by the growing roots.
Other signs, such as leaf loss and yellowing, are also strong indicators that there isn’t enough soil to support the growing plant. To preserve resources, the plant is forced to lose foliage.
When repotting the plant, you must take care of two crucial factors— the soil type and the material of the new pot.
Drought-tolerant plants such as cacti prefer sandy soils that are well draining. Conversely, moisture-loving plants like pothos and monsteras prefer moist, nutrient-rich soils.
On similar lines, terracotta pots are well suited for succulents, whereas plastic pots are more appropriate for plants that love moisture.
When repotting, take care not to break the roots while removing the plant from its old pot. Some plants can be highly root bound— take your time and remove them slowly.
Once the plant is out, loosen the root ball by removing any stuck old soil. Again be gentle, as some plants are intolerant of losing too many roots.
Place the plant in the new pot and fill it up with fresh soil—gently pat to level the soil. Water the plant thoroughly and keep it in its old place.
Sumit Gupta
FallsGarden
What do you think is the most popular herb to grow indoors, and can you share some tips to grow it?
Botanical Interests has 10 basil varieties and seed packets full of information, including optimal growing conditions, special care, harvesting tips, and more! Read up on tips and tricks to grow basil from seed with our Basil: Sow and Grow Guide. Try ‘Cardinal’ basil for robust flavor, and blooms that double as a beautiful cut flower or ‘Tulsi’ basil to add into a health-promoting tea blend to help combat stress.
Christine Adams
Botanical Interests
What is Aquaponics, and what’s the best way I can get started with it from home?
Aquaponics is a sustainable form of aqua gardening that combines aquaculture, the growing of fish and other aquatic creatures in tanks or ponds with hydroponic gardening, the cultivation of plants in nutrient rich water.
This hybrid system is nature’s way of encouraging growth: aquaponic tanks are populated with fish that consume food, produce waste, and release tons of beneficial natural nutrients like nitrogen into the water. Aquaponic systems don’t require large spaces or soil to grow crops – just two containers connected by pumps and pipes – so aquaponics can be done indoors, making it a great DIY project for small apartments and houses.
The first step to starting an aquaponic system from home is choosing what type of setup you’d like –whether pond aquaculture or tank aquaculture – then purchasing the necessary equipment such as an aquarium, a suitable growbed, pumps, growing media and water testing equipment.
To operate indoors you will also need to purchase grow lights for providing the plants with adequate lighting. Once everything is together, managing your aquarium-garden hybrid won’t require more than few hours a month. But its application extends far beyond fun hobbyism: aquaponics can help fight hunger in urban areas due to its efficient use of resources while allowing us to develop our understanding of ecology on a much deeper level.
Julian ElderOperations ManagerAqua Gardening
How can I make an environmentally friendly fertilizer with common household items?
Jitendra Kumar
Senior Domain Specialist
SankalpTaru
What are some soil alternatives for indoor plants?
You don’t need to use fertilizer, but if you do, one suitable for semi hydroponics is ideal.
Teak and Terracota
What advice can you provide on lighting for indoor plants (natural and artificial)?
When choosing a great spot for a new indoor plant, people often choose a place in their home that prominently features the plant, not a spot in their home that provides the ideal light for the particular houseplant.
I know this because I’ve done the same thing.
I repeatedly chose spots for my indoor plants that I thought complemented the space in my home over choosing the locations in my home that would provide the best light.
The good news is that with a little research to learn the type of light your plant needs, combined with learning how to increase or decrease the existing light in your ideal spot, you can place your houseplant nearly anywhere in the home you choose.
Adding a single LED grow bulb to any nearby light fixture for any plant that needs more light can instantly change a low-light area into a bright or medium-light area.
Houseplants placed in a spot that receives excess light are often an easier fix.
Turning direct light into indirect or dappled light can easily be created by making sure the light is traveling through a shear window curtain before reaching your plant.
Another great way to turn direct or excess light into medium or dappled light is by surrounding your low-light plant with plants that actually thrive in direct light.
Using houseplants that thrive on direct light to break up the light with their leaves before reaching your low-light plant is a win-win situation for all of the plants.
Fred Zimmer
Indoor Plants for Beginners
At Porch we do our best to bring you the best tips to improve your lifestyle. We really enjoyed the making of this article and want to thank you for taking the time to read it.
We truely believe that all the advice provided in this article will help you get started with indoor gardening and making your life greener wether you wanna go big or keep it small and simple.
We thank all the experts who participated in this round-up for sharing their valuable tips and knowledge with us.


