Decorating our homes with knots and weaves, yarn made up into a patterned fabric through hooks or needles, or joining different fabrics into a beautiful quilt has become a form of fabric fiber art. Many of us love creating our own home décor and feel proud of our beautiful crochet, knit, macrame, sewing and quilting crafts made at home. Unfortunately, not many of us have the knowledge required to start our own projects at home.
We requested the experts’ advice on how to start creating our own home decorations with these techniques that are loved by many. Check out the great tips and tricks that the experts gave us.
Macrame
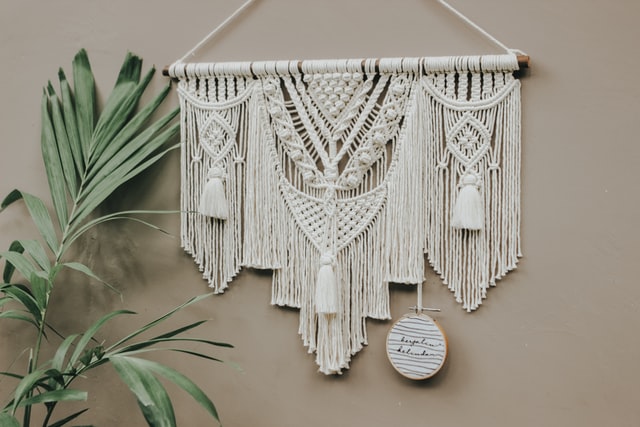
Which are the basic macrame knots that a beginner should start learning and which is the easiest craft you would recommend to start with?
The wrapping knot, spiral knot, and spider knot are the three basic macrame knots a beginner should start learning. Macrame plant hanger is one of the easiest craft projects that can be made using these three knots.
The wrapping knot is a finishing knot that helps to gather all cords together at the beginning and end of the plant hanger. The spiral knot is a decorative knot that will elevate the look of your macrame project. While the spider knot is an easy connecting knot that helps you create a sling for a macrame plant hanger.
By Jennifer Anderson from The Melrose Family
What kind of materials are often used for making macrame home decor projects?
The best part of crafting is that there are no big rules. The limits of crafting exist only in physics and in our imagination. That being said, there are always a few guides that make things easier if you are starting out. When working with indoor home decor like macrame and other wall hangings, experts often choose to start with natural fibers, but that shouldn’t detour you from exploring different fibers and techniques.
Materials like cotton, linen, jute, and hemp are great for indoor projects. Crafters often start macrame projects to introduce different textures into their decor. Many crafters use cotton or hemp cord as the main fiber in their macrame. You’ll also see beautiful felted wool fibers woven or tied in with a higher pile adding a contrast of textures. Make sure to explore other fibers like acrylic blends in your crafting projects. Many times, acrylic fibers can so closely resemble other fibers to make them nearly indistinguishable from each other. In addition, acrylic fibers have a wider color range, are more durable, and experience less shrinkage, making them more washable and suitable for your home.
By Gwen Bautista from Mary Maxim
What type of cord is commonly used for macrame, and which knotting technique would you recommend for a beginner to start learning to make their own home decor?
Sometimes the smallest things can throw us for a loop. Like, why does this stuff that looks mostly the same have so many different names? Rope, string, thread, cord, yarn, twine, floss, ribbon, just to name a few. These are some of the words used to describe the strands that are generally used in fiber craft. And the specific craft you pursue will inform what material form your fiber will take. When making macramé you will usually be dealing with rope, string, cord, and, to a lesser extent, yarn.
Yarn: Yarn is defined as a continuous often plied strand composed of either natural or man-made fibers or filaments and used in weaving and knitting to form cloth (Merriam Webster). Yarn is characterized by the craft for which it is used.
A weaver could weave with ribbon and a knitter could knit with our 2mm string (which we highly recommend!) but generally speaking those materials would be referred to as yarn when used for those crafts where the end result is cloth. Yarn is sometimes thought of as being made only of wool but it can be composed of any fiber.
And, you can absolutely use yarn to knot! We have a plush yet hefty yarn that knots up beautifully for those curious about using wool yarn for macramé.
Rope: We carry both rope and string at Modern Macramé and you may want to know how they differ because their material qualities lend them distinctly different characters.
Rope is similar to string but rope is plied, meaning that each rope is composed of bundles of multiple strings that are twisted (or sometimes braided) together to form the rope. That is the difference! Both are twisted but only one is plied. Rope has a different texture and tends to be a firmer material, with a girthier knot.
Our cotton rope comes in 3mm, 5mm and 12mm and in an array of appealing, modern colors.
String: A string is a twisted bundle of fibers used to “bind, fasten or tie” (American Heritage). Once again the purpose of the object is defined by its intended use. And if it is meant for tying you can bet it is good for macramé! String tends to be softer and more supple than rope because it is unplied and has a lower profile knot.
Our cotton string comes in three different diameters, 2mm, 4mm, and 9mm, an ideal material for myriad projects, large or small scale.
Cord: This is a term you will come across frequently when reading a macramé pattern. Cord is a word we use interchangeably for both rope, string, and yarn. It’s a catchall! If you are knotting you can think of all your working lengths as cords.
What cord should a beginner use?
For beginners, we recommend using a 5mm 3ply Cotton Rope – it is our best-seller. This particular fiber allows the maker to grip the cords easily in their hands having the ability to tie knots, untie, and rework their piece as needed. If you want help determining what cord to use for your project we’ve got some helpful pointers here!
As you’re getting started in your macramé journey, you’ll want to learn some of the most foundational knots to create a wall hanging. These knots are the 1. Lark’s Head Knot (and, 2. Reverse Lark’s Head) to attach your ropes to a dowel or piece of driftwood, the 3. Square Knot – which is the most widely used knot, and its variations (the 4. Half Square Knot Spiral and the 5. Sinnet). For those feeling confident with knots 1 – 5, try the Horizontal Double Half Hitch and the Vertical Double Half Hitch to up level your knotting skills!
Looking to jump into the craft of knotting? Modern Macramé is here to help with video tutorials, patterns, kits, high-quality supplies and top notch customer support! Let us know how we can help you get knotting.
Crochet
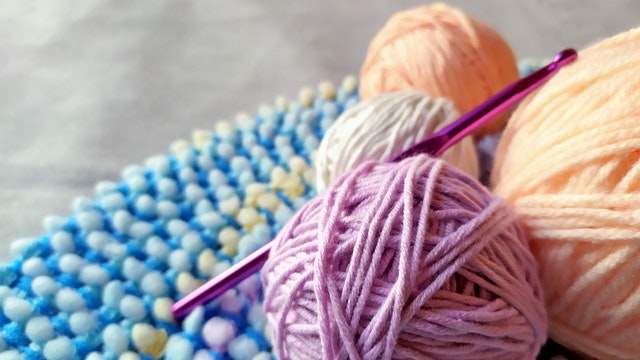
What are the essential supplies and tools needed to start crocheting?
The essentials to start crocheting are quite simple and easy to find at most craft stores.
In all honesty, these are the only must-haves to get started but as you learn more there will be a growing list of tools that you will want and may need as you learn and expand your skills.
However, there are only four tools that are essential to get you started:
- Yarn
- Hook
- Scissors
- Darning Needle
There are endless options for yarn, but I’d recommend starting with a #4 worsted weight yarn, you can find the weight on the yarn labels) as this is one of the most common yarn weights and readily available. As for Fiber content, I’d suggest a 100% acrylic as it is easy to work with and at a lower price point. 100% cotton would be another option but is a bit more expensive in most cases.
Just like yarn, there are so many hook options available in all different sizes, shapes, and price points. When you are just getting started there is no need to spend a lot of money on a hook. Any hook available from the craft store will do. If you have any hand impairments looking for an ergonomic hook would be a good idea. I’d also recommend starting off with a 5.00mm or a 6.00mm hook. These are common sizes widely used and easy to find. Once you continue on and try new patterns and techniques you can expand your collection.
Scissors of course you need for cutting the yarn, and a darning needle (upholstery needle) you will use for weaving in your ends once you finished a project. A darning needle only needs to be a needle with a large enough eye to thread the yarn through.
These tools are again, just the basics! There are more tools and notions you may want to acquire as your passion grows, but these four essentials will get you started on your crochet journey!
By Ashley Edmonds from Through The Loop Yarn Craft
What are the most common crochet stitches, and what type of items can you make with these?
If I had to choose the most common crochet stitches, I would say there are three crochet stitches that are mostly used in almost every crochet project. Those three stitches are: Single Crochet, Half Double Crochet and the Double Crochet. Once you master those three stitches, you could make almost anything you like! From wearables to home decor, from cozy scarves, beanies and blankets to potholders and tea towels. Those three stitches are like the basic building blocks of crochet and majority of other crochet stitches derived from those basic stitches.
The Single Crochet stitch will create a dense fabric, it’s the shorter of the other two stitches and is most commonly used for potholders, dishcloths, tea towels, summer hats, wall hangings, etc. The Half Double Crochet stitch is commonly used for winter wearables as it creates a soft fabric which is great for winter. It is commonly used to make scarves, beanies, and baby blankets. The Double Crochet is a taller stitch and creates more space between the stitches, so the fabric will be less dense, with visible spaces between the stitches. You can also use this stitch to make throws and wearables such as cardigans, scarves, or lacy shawls.
So, depending on what you would like to make, you can use just one, two or all three of those crochet stitches in your project. You can combine them in so many different ways and create the exact thing you have in mind!
By Olga Vogel from My Crochet Space
How would you suggest for a beginner to start crocheting, what kind of patterns would you recommend to start with?
To start crocheting all you truly need is a bit of yarn, a crochet hook, and an understanding of the basic crochet stitches.
For beginners, I recommend inexpensive medium 4 worsted weight in a light solid color. Dark colored, multi-color, ombre, or variegated yarns can make it very difficult to see your stitches. You do not want to use expensive yarn as you will make a lot of mistakes when first learning to crochet and will often need to “frog” (pull out your stitches) your yarn, which can distort, fray, and stretch the yarn over time.
I also recommend a 5.0 – 6.0 mm crochet hook for beginners, however, this can change based on hand size and individual crocheting technique. For this reason, I recommend purchasing an inexpensive aluminum crochet hook set with a minimum of hook sizes 4.0 – 8.0 mm and testing out which one feels most comfortable for you.
You can purchase an inexpensive beginner crochet stitch guide book or course to teach you how to crochet the basic stitches, including single crochet (sc), double crochet (dc), half-double crochet (hdc), and treble crochet (tr).
Although it can be tempting to jump into an advanced crochet pattern, I highly recommend not doing this. It can become very frustrating when you haven’t mastered a particular crochet skill and this could make you walk away from crochet altogether. Practice each basic stitch, starting with the single crochet (sc) on a small flat project worked in rows, such as coasters, scarves, and blankets. Once you have confidently mastered single crochet (sc) move on to the next basic stitch. After you are comfortable with all of the basic stitches, you should be ready to tackle crochet patterns labeled as “beginner”.
Here are some great resources I have for crochet beginners:
9 Must-Know Steps for Crochet Beginners
The 10 Best Tips for Absolute Beginners
How to Pick Your First Crochet Hook
How to Hold the Yarn When Crocheting
By RaeLynn Endicott from Itchin’ For Some Stitchin’
What are the most common and easiest crochet techniques you could recommend to start crocheting?
I know, crocheting seems like magic: just wave a hook over a ball of yarn, and poof, you have a piece of fabric, and while I’d love to claim that I have magical powers, crocheting really isn’t that mysterious and it isn’t hard to learn. The best place to start crocheting is by learning how to make a slip knot, chain stitches, and then learning how to work into the chain with single crochet stitches. With just those three skills, you can make coasters, dishcloths, scarves, and blankets if you are really adventurous.
By Jessica Underwood from Stitching Together
What is the best type of yarn for crochet, and how do you select yours?
The best yarn for crochet is one that fits the needs of your project and your budget. Selecting the best yarn for your project depends on what project you’re making. Crochet patterns will list the yarn that is used and/or recommended for the pattern. If that yarn is outside of your budget for that project, sites like yarnsub.com can give you lists of similar yarns at different price points that can work as suitable substitutes for the original yarn.
By Ashley Parker from The Loopy Lamb
Which types of threads are most commonly used in crochet and which ones are for what types of items?
There are a variety of crochet threads available on the market and it can be confusing over what to use for which type of project. The weight will signify the thickness of the strand, such as #10 to #70 or even #100. The larger the number the finer the thread.
Common 4-ply twisted threads include Knit Cro-Sheen that’s a bit larger than a size 10 and is perfect for apparel. Metallic Knit Cro-Sheen, has one strand of mylar running through it which is great for ornaments, or where you need a bit of “sparkle.”
The most common thread used is bedspread weight cotton which is a 4-ply firmly twisted thread. It’s commonly called a size 10 thread and is excellent for bedspreads, tablecloths, doilies, and more. This is perhaps my favorite to use of all the others. Surprisingly though, not all size 10 cotton crochet thread is the same. You’ll find thicker and finer ones depending on the brand used.
Size 3 crochet threads such as Curio 3 and Fashion crochet are perfect for bedspreads, tablecloths, and some fashion accessories while Perle cotton, a size 5 thread, is a 2-ply loosely twisted cotton thread which is great for vests and blouses.
Cotton crochet thread also comes in sizes with the most common, size 10, but also in sizes of 20 and 30 with the higher numbers being a finer thread. These will produce a delicate lace due to their thinness. Any of the three sizes is great for filet pieces; where crochet is worked much like a mesh with solid squares forming pictures. One of the most well-known is “The Last Supper” depicted in many churches.
Every day, it seems there are more new products added to the market. Yarn companies are always looking for new attractive threads and yarns that stay popular for a while before they are phased out and eventually discontinued. If you’re looking for a product that has been discontinued, check on Amazon, eBay, or Etsy for those who are still selling and have them in stock.
It’s always the best course of action to purchase enough of the same color dye lot for a project to ensure you don’t run out. Sometimes it’s difficult, if not impossible, to match a new dye lot with an old to make the project appear seamless.
By Cylinda from Crochet Memories
What are the different types of hooks used for crochet, and how do you know which one to choose for what?
A crochet hook is the most basic tool for crochet! Crochet hooks come in various shapes and sizes and are made out of different materials such as metal, wood, or plastic. Picking out the best crochet hook depends on comfort, function, and the proper size for the finished project. Let’s dive in.
Crochet hooks come in two types: inline or tapered. Inline hooks (such as the Susan Bates brand) have a smooth curve that allows them to slide easily against the yarn without snagging. Tapered hooks (such as the Boye brand) have a gradual slope from the base to the point which gives more control over stitches and helps with tension. Which is better? I prefer tapered, but it really is a personal preference.
Crochet hooks are most often made out of metal, usually aluminum or steel. This makes these hooks economical and easy to find. Metal hooks are even available with ergonomic handles (such as Clover Armour hooks), which makes for more comfortable crocheting.
Plastic hooks are also readily available and sometimes are the only option available in larger sizes. They are lightweight and affordable. They also are easy to stash in a carry on bag if traveling by plane.
Wood hooks have an organic feel that is comforting and warm. Wood hooks can be straight and basic or have a rounded full shape to feel better in the hand. They are more expensive and can be more difficult to find.
There are also specialty hooks too! For instance, a crochet hook with a light up component in the hook is perfect for crocheting with dark yarn or in low light conditions. Tunisian crochet hooks are long crochet hooks for a special type of crochet that looks a bit like knitting.
All hooks come in multiple sizes. Most crochet hook manufacturers label their hooks with both a labeling system AND a metric measurement. The confusing part is that the labeling system may not be the same from one manufacturer to another. For instance, one manufacturer might call a 4.0mm hook a size G, while another manufacturer’s size G hook is actually a 4.5mm hook (which is bigger). In the United States, many crocheters simply refer to their hook by the “letter” name, but it really is best to look at the metric measurement instead.
Which leads us to the last question: How do you choose the best hook for a project?
The best hook is the size that will give the desired results. The larger the hook size, the looser the stitch which creates a fabric that has more body and movement. The smaller the hook, the tighter the stitch, and the more firm the resulting fabric. So a lacey shawl might use a larger hook and a stuffed toy might use a smaller one. The hook size also depends on the weight of the yarn. A thinner weight yarn will usually require a smaller hook, and a thicker, heavier weight yarn requires a larger hook.
If you are following a pattern, it’s best to start with the hook size recommended by the designer. After you’ve worked a bit, measure your piece and see if it’s turning out the same size the designer indicated (we call this ‘gauge’). Adjust your hook size if you need to so that your piece turns out the same measurements as the designer.
If you are just crocheting for yourself and finished size is not that important, then pick a size hook that works best with your particular yarn. For instance, many crochet projects in the United States are made with worsted weight yarn. A 5.0mm hook (often an “H” sized hook) works very well with worsted weight yarn.
You can get more information on crochet hooks here, for more information on hook SIZES check out this post, and here is a post about yarn weights.
By Cheryl from Crochet 365 Knit Too
Which are your favorite crochet stitches and which ones would you recommend to start learning?
My very favorite crochet stitch is not a stitch pattern – it’s an actual stitch: the simple yet textured half-double crochet. I like it because it’s taller than a single crochet so it works up quickly, yet squatter than a double crochet so it creates a nice, dense fabric.
There is nothing like going back to the basics when you learn to crochet. Start with the chain stitch, the foundation of every crochet project, and work your way through the basic stitches: single crochet, half-double crochet, double crochet, treble/triple crochet. Each subsequent stitch builds on the one you just learned, adding a simple step each time. You’ll quickly be crocheting like the most experienced crocheter out there.
By Julie Desjardins from ACCROchet
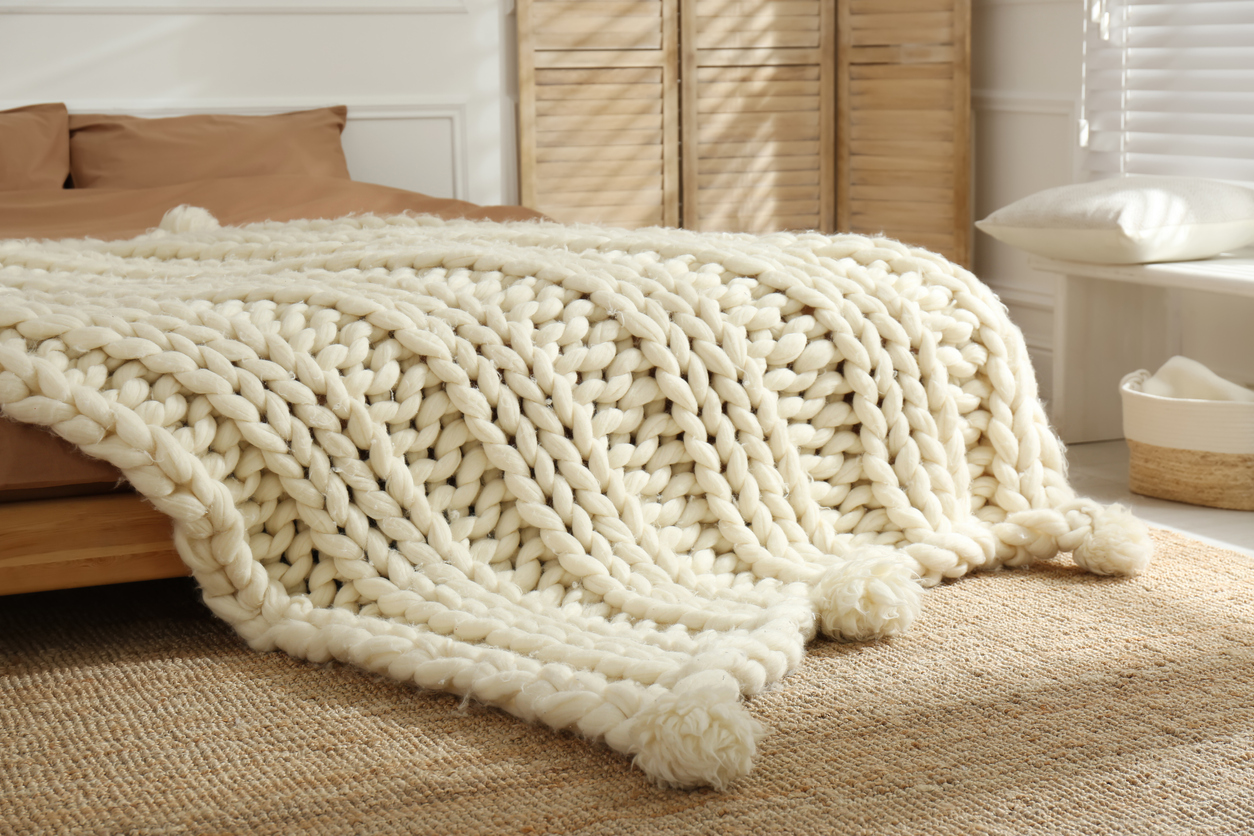
What is the technique used and which tips can you give us to make a chunky crochet blanket with thick yarn?
Crocheting a chunky blanket is an easy and fun way to decorate your home and make it cozy and personal. You can use any stitch or design you like for a project like this, but here are a few tips that help make the project go smoothly. Use thick yarn like Bernat Blanket or another #6 super bulky weight yarn for a big squishy blanket that works up quickly and use the appropriate hook size. I prefer to use a 12mmm or 15mm hook for this kind of project because it moves easily through the yarn and gives the stitches a nice definition! Be sure to keep your wrists loose as you work; if you’re holding on to the blanket very tightly and keeping your wrists stiff as you, you’ll feel it more as the blanket gets bigger and heavier. A loose, fluid motion of your wrists keeps your hands comfortable. Here is a free crochet pattern for my favorite chunky crochet blanket, the Sofie Throw.
By Shehla Ahmed from The Blue Elephants
What is amigurumi and what are the basic concepts that a beginner needs to know to start creating this kind of craft?
“Amigurumi” is a Japanese term that most commonly refers to crocheted stuffed dolls. Amigurumi are quite popular and a lot of fun to make – instead of creating flat pieces such as scarves and blankets, you are suddenly creating something in 3D! Imagine making a sculpture, but with yarn! Constructing a 3D plushy usually requires the creation of individual body parts that are then assembled together by sewing.
Making amigurumi might seem daunting to a beginning crocheter but in actuality, there are only a few basic skills required to get started. You will need to learn how to make a “magic ring” since most amigurumi pieces are started in this way. You will need to know how to make a single crochet stitch, how to make increases and decreases. With these few skills alone, you can make some adorable little dolls!
By Amy Lin from Little Muggles
Which easy crochet design would you suggest to start with when designing a baby blanket?
When making a baby blanket for the 1st time there are a few things to consider, the pattern, the yarn, and the size.
Find an easy pattern with solid crochet. I wouldn’t recommend the basic granny square although they are easy to make they aren’t suitable for a baby blanket because little fingers and toes can get caught in the holes. You could use a solid granny square either in one large square or small squares joined together. I have also used the Eva scarf pattern for a baby blanket, it’s an easy pattern and after the 1st row all the other rows are worked the same.
The type of yarn is also important, if possible find a yarn that is machine washable, there are plenty available. A busy new mum will appreciate not having to hand wash the blanket. Before purchasing the yarn consider the weight yarn you will need, a thick yarn will work up much quicker but isn’t suitable for a warm climate.
The size of the blanket is also important, is it to be used in a pram, on a bassinet or cot, or on the floor for floor time. There are charts on the internet for the sizes of the different baby blankets.
If you know that the mum has a theme for the nursery it is fun to make a blanket that would suit the theme.
As I specialize in designing crochet appliqués I like to add some to my finished items.
Picture: Baby blanket appliqués by Kerri’s Crochet
By Kerri from Kerri’s Crochet
What is the easiest wall hanging crochet décor that you would recommend for a beginner to start with and which tips would you give us to learn crocheting?
The easiest wall hanging to crochet is the one that you absolutely want to make and you can imagine it hanging in your home. The desire to make something that you love will keep you motivated, and by taking it one stitch at a time, you’ll finish it off. If you’re new to crocheting, look for a crochet pattern that uses a big hook and a super chunky yarn as this is easier to see and control, it makes for quick crocheting too! A pattern that includes video tutorials or an online course is the best for beginners as you can see exactly what to do.
By Lynda from Homelea Lass
How would you incorporate crochet into your home décor and which are your favorite crochet decoration items?
Crochet is a great way to decorate your home with a bit of that handmade touch! It is versatile, as you can easily customize your projects with different yarn colors or embellishments to match the theme or mood of the room, whether that’s bringing a vivid pop of color to your space, or going with a neutral tone to show off some texture from your stitches. Seasonal decor, such as the Fall Harvest Pumpkin, can really bring in some of those holiday vibes. Crochet decor can also be functional, such as the Teardrop Hanging Baskets, to use for storage and organization. Faux plants, like the Mama & Baby Cactus, are super trendy right now too. My personal favorite crochet decoration item would be the Petite Floral Dreamcatcher, which is a free pattern (and also available as a video tutorial) that is super fast to work up, works great as bunting, and can easily be customized to make your space truly “you”!
By Jade from Sweet Softies
Knitting
What are the main differences between knitting and crocheting, and which is better for what kind of project?
Knitting and crochet have a lot in common – but the differences make each very unique!
Crochet is usually done with one hook, and one “active” loop of yarn at a time. There are many stitches in crochet, all based on simply yarning over and pulling up loops, and you can take off any direction with each new stitch! With crochet fabric, you can create projects that stand up on their own, or drape beautifully.
In contrast, knitting is usually done with two needles, and there are multiple loops on the needles. There are two main stitches, knit and purl. These stitches are more dependent on each other, and you need to finish off one section before you can go in a new direction. Knit fabric is still made with loops and yarn overs, but is usually quite drapey and soft.
Of course, there are always exceptions, with special stitches, techniques, and variations. Typically, crochet projects work up faster than knit, but there are some super fast knitters out there! One of the rumors people tend to repeat is that crochet uses more yarn than knit – but again, it all depends on the details. In many countries, they are considered one hobby with two techniques, and they will be combined in the same project.
By Tamara Kelly from Moogly
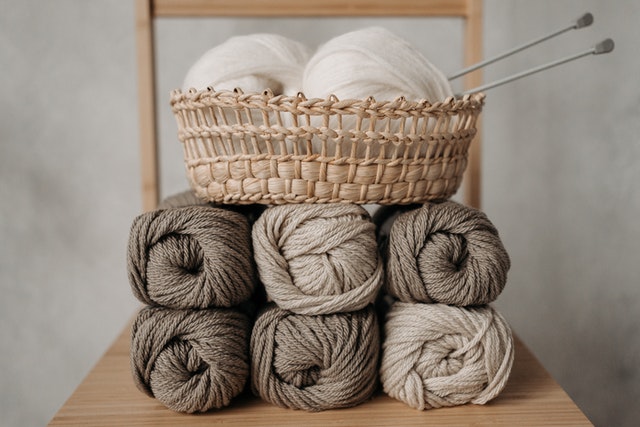
How many types and sizes of needles can we find for knitting and how do you select the correct size for your project?
When it comes to knitting needles, you have a lot of options out there. Let’s break them down by type and size and then look at how to choose the right size needles for your project.
First, the different types of needles. You can get straight needles for working back and forth, circular needles in many different lengths for working in the round, and double-pointed needles, which are also used for working in the round. The type of project you are making will determine what type of needles you need. For example, socks usually use double-pointed needles, but there are smaller circular needles made just for small projects like socks. The best thing to do is to experiment and see which type of needles you prefer. The same goes for materials – try out bamboo, metal, and plastic to see which is your favorite.
Just as there are many styles, there are lots of different knitting needle sizes. You can get teeny tiny needles all the way down to 1.50mm (known as a US Size 000) all the way up to a 35mm (US size 70). Most people will never use the needles at the beginning and end of this size range. The most common needle size is a 5.0mm (US size 8), and people usually use needles from US sizes 2-11, unless making very small or very large projects.
So, with all of these different styles and sizes, how do you know which needle is the right one for your next project? The first thing you should do is to check the pattern if you are using one. It will have the recommended size(s) of needles on the materials list as well as the style. Choose that size and check your gauge. If you don’t have the same gauge as the pattern calls for, go up or down a needle size, depending upon if your size is smaller or larger than the pattern. If there is no pattern, check the yarn ball’s label. Most yarn companies will have a recommended needle size for each particular yarn. This will help ensure you are working with the correct needle size for your yarn.
By Amanda from Love Life Yarn
Which are your favorite knit stitches and which ones would you recommend to start learning to knit?
Good question! All knitting stitches originate with knit and purl, and the most basic stitch pattern out there is Garter Stitch, which is made by knitting every stitch of every row. This is the first stitch pattern most knitters learn, and I think it’s underrated for that reason. Garter Stitch is easy, fast, and has a fun ridged texture that’s great for washcloths, sweaters, and everything in between.
Once you’ve learned how to purl, you can knit Stockinette Stitch, which is knit on one row and purl on the next. This gives you the classic V shape stitches that are common in commercially knit products, and on a large scale, it’s great for wall hangings and throws.
Then you can combine knits and purls in nearly infinite combinations. Moss Stitch and Seed Stitch are two of my favorites, where knits and purls alternate across a row and from row to row. This gives you a lot of texture without a huge amount of work and makes a great nubby texture that’s so welcoming on pillows, blankets, and more.
By Sarah E. White from Craft Gossip
What are a few ideas you can give us to decorate our home with knit décor?
My two favorite knitting decor items are circular pi shawls hung as art and knitted lamp shades. You can make a lace circular shawl and run wires around the permitter for a lovely circular piece of art. Adding a wool surround to an old lampshade can make it look new again. Even plain garter stitch in a bright color looks great, as does a lace like feather and fan or a simple cable.
I also love the look for glass vases filled with all your brightly colored leftover balls of yarn. I stick my grandmother’s blue and pink aluminum straight needles in the vase like a bouquet.
By Patty Lyons
Quilting

What are the essential supplies and tools needed to start quilting and what kind of design would you suggest for a beginner to start with?
Imagine creating your very own quilt from start to finish. Not just a $20 blanket that you could find at a big box store….but an actual, handmade, thought-out, made-with-love QUILT. Quilting is a hobby that is not only fun and (ahem) addicting, but it’s one that’s practical and functional and all around… just the best! To get started, let’s look at 4 major categories of supplies that you’ll need.
- Sewing Machine. All you really need from a sewing machine is a simple straight stitch. If you are using a machine that you already own, make sure that it’s in good working order. If it’s older or has been used extensively, I recommend having it serviced at your local quilt/sewing machine shop. If you’re looking at purchasing a new machine, check out my blog post, “10 things to Consider when Shopping for a Sewing Machine”!
- Notions. Think needles, thread, rotary cutter, rulers, cutting mat, scissors, pins, seam rippers, iron, and ironing board
- Fabric. This is the fun part! Once you’ve chosen your pattern, use the Fabric Requirements to pick out your favorite solid colors & prints from a small local or online quilt shop. At Lo & Behold Stitchery, we create fabric bundles for most of my quilt patterns so you can just get started!
- A Quilt Pattern. I have designed a pattern called Celtic Crossing 2.0 that is PERFECT for beginners. This pattern is a play on the negative space of a traditional Irish Chain quilt & is a classic (yet modern) pattern to make as your first quilt! No matter which pattern you choose, I would recommend starting with a baby or crib size quilt as it is much easier to handle in a domestic sewing machine.
If you’d love to learn a little more about beginning your first quilt, feel free to check out my Ultimate Quilting Starter Guide! You’ll be ready to sew in no time & we’d love to welcome you into our quilting community!
By Brittany Lloyd from Lo & Behold Stitchery
What are the general steps to making a basic quilt for beginners?
Who doesn’t love a great quilt?! This cozy and often decorative bed covering has been around for hundreds of years, and with good reason – there is nothing like sleeping under a handmade quilt. And once you start making them, you won’t want to stop!
They can be made entirely by hand, entirely by machine, or a combination of both.
On its most basic level, a quilt is a sandwich of three layers that are stitched or tied together.
The top layer is the decorative bit which is often “pieced.” You can find hundreds of options for quilt designs, some of which are simple squares that are stitched together using different prints to create patterns, and some that are incredibly intricate. English Paper Piecing is one way to stitch a variety of shapes together, and very handy if your shapes include bias edges. Some of the most intricate quilts involve appliquéd blocks. But however you go about connecting the pieces, you will end up with is referred to as the “quilt top.”
One of my favorite parts of making a quilt is choosing the specific prints and colors to use on my quilt top. If you can dream up a print, you can probably find it already printed on quilting cotton. From the classic ditsy print that is often associated with antique quilts, to boldly colored and oversized designs, there is a length of quilting cotton out there for you! You can even design your own whimsical patterns and have them printed by one of many companies that offer the service. And pairing multiple patterns together is one of the most creative parts of making a quilt.
Once the quilt top is completed, a middle layer of warmth (often batting), and the third and final layer, the backing, are stacked together to complete the quilt sandwich. You can use pins, safety pins, or even hand basting to keep the quilt sandwich from shifting.
And finally, we get to the actual “quilting” portion of the project. One simple means of securing all three layers is with ties. These ties, which can be made of pearl cotton, yarn, or even string, are strategically placed throughout the quilt to ensure that the layers remain together permanently. What most people think of when they hear the term quilt, however, involves stitching all three layers together, by hand or by machine. Advanced quilters come up with some amazing designs and stitch patterns, but simple outline stitches or parallel lines running across the quilt are just as lovely.
Once the quilting is complete, you will want to bind the raw edges with your excess backing or a separate piece of fabric called binding.
And the final touch for your new quilt is a label. Use an extra piece of fabric and write, stitch, or otherwise document any information about your quilt such as your name, the title of your quilt, the dates on which you started and finished your quilt, washing instructions, or even perhaps a message to the intended recipient if you are gifting your new work of art. Stitch this to the backing of your finished quilt as a record of all the love you have poured into this project.
And now is the time to enjoy your new quilt, and perhaps start dreaming of your next quilting project! Did I mention that quilting can become rather addictive . . .
By Laura Mae from Lilacs & Lace
Which types of fabrics would you recommend for quilting?
With today’s amazing choice, it’s a thrill to shop for the right fabric for your next quilting project. The thing to remember is to use 100% cotton fabric with a high thread count for long-lasting quilts. Batik fabric is also excellent for making quilts as it has a higher thread count than cotton and won’t fray as you work with it; choose smoother batiks over the rougher kind. Either cotton or batik fabric expressly produced for quilting purposes are best found at your local quilt stores, you get to see the colourful selection and feel the fabric too. At the same time, you can choose the matching threads for piecing and quilting.
By Carla A. Canonico from Quilt Social
Which are the most common techniques used for quilting and which one is your favorite?
Quilting can be as easy or as hard as you want it to be. Any two pieces of fabric with some batting in between, secured by stitches, becomes a quilt. Keep it simple with plain squares sewn together or get really creative with rectangles, circles, appliqué, and hand stitching. My favorite quilt technique is the humble half-square triangle patchwork unit, which can be arranged to form so many good looking geometric patterns. I never get tired of making this easy and creativity-sparking patchwork block.
By Kirsty Cleverly from Bonjour Quilts
If you’re looking to sew your own projects at home, there are a few basic supplies you’ll need on hand before you get started.
- Sewing machine. Projects will go together much quicker with a machine. If you’re just beginning to sew, look for a basic machine without a lot of complicated stitches.
- Thread. White sewing thread is a staple but you may want a few additional spools of all-purpose thread, especially if you’re wanting to match thread color to the fabric color.
- Sewing scissors. Everyday scissors aren’t able to cut fabric as neatly as sewing scissors. Purchase a good quality pair of sewing scissors and use them only for cutting fabric.
- Rotary cutter, ruler, and mat. A rotary cutter’s circular blade allows for neater curves, and straight pieces are cut with ease when used with the cutting ruler.
- Seam ripper. When stitching goes awry, a seam ripper becomes your best friend. Slip it between the layers of fabric to cut stitches without cutting into the fabric.
- Iron and ironing board. Whether you’re getting rid of wrinkles before cutting or pressing seams after sewing, an iron is a must. You’ll also want a heat-resistant ironing surface.
- Straight pins and pincushion. Use pins to hold fabrics together and prevent layers from shifting when sewing. Then store them in a pincushion to keep them on hand – and off the floor.
- Measuring tape. Made especially for sewing, this flexible tape can be used to measure flat surfaces as well as be wrapped around objects. People included!
- Erasable marking pencil. Sometimes markings need to be made on the fabric and you’ll want the markings to be temporary.
- Hand needle and thimble. There are some times you may find sewing by hand is more efficient than using the sewing machine. Use a simple set of needles, a thimble to protect your finger, and the thread from the sewing machine to stitch those few stitches.
- Storage container. Whether it’s a bin, basket, or bucket, having all your sewing supplies in one place will be easier when it’s time to start your project, especially if you don’t have a dedicated sewing space in your home.
And sewing wouldn’t work without fabric. Once you have an idea in mind take a look at the type of fabric needed for the project and enjoy choosing just the right color and design. Then use your supplies to start sewing your very own handmade-at-home project!
By Deb P from Deb’s Days
How can you incorporate quilting into your home décor, which are your favorite ideas?
Using quilts on beds is a common way to decorate, but don’t be limited by that. Patchwork curtains are a unique way to bring a burst of color into a space. They can be custom made to fit the size of your window and the look you are trying to achieve and they can be easily switched out throughout the year to celebrate different seasons. On a sunny day, they look like stained glass.
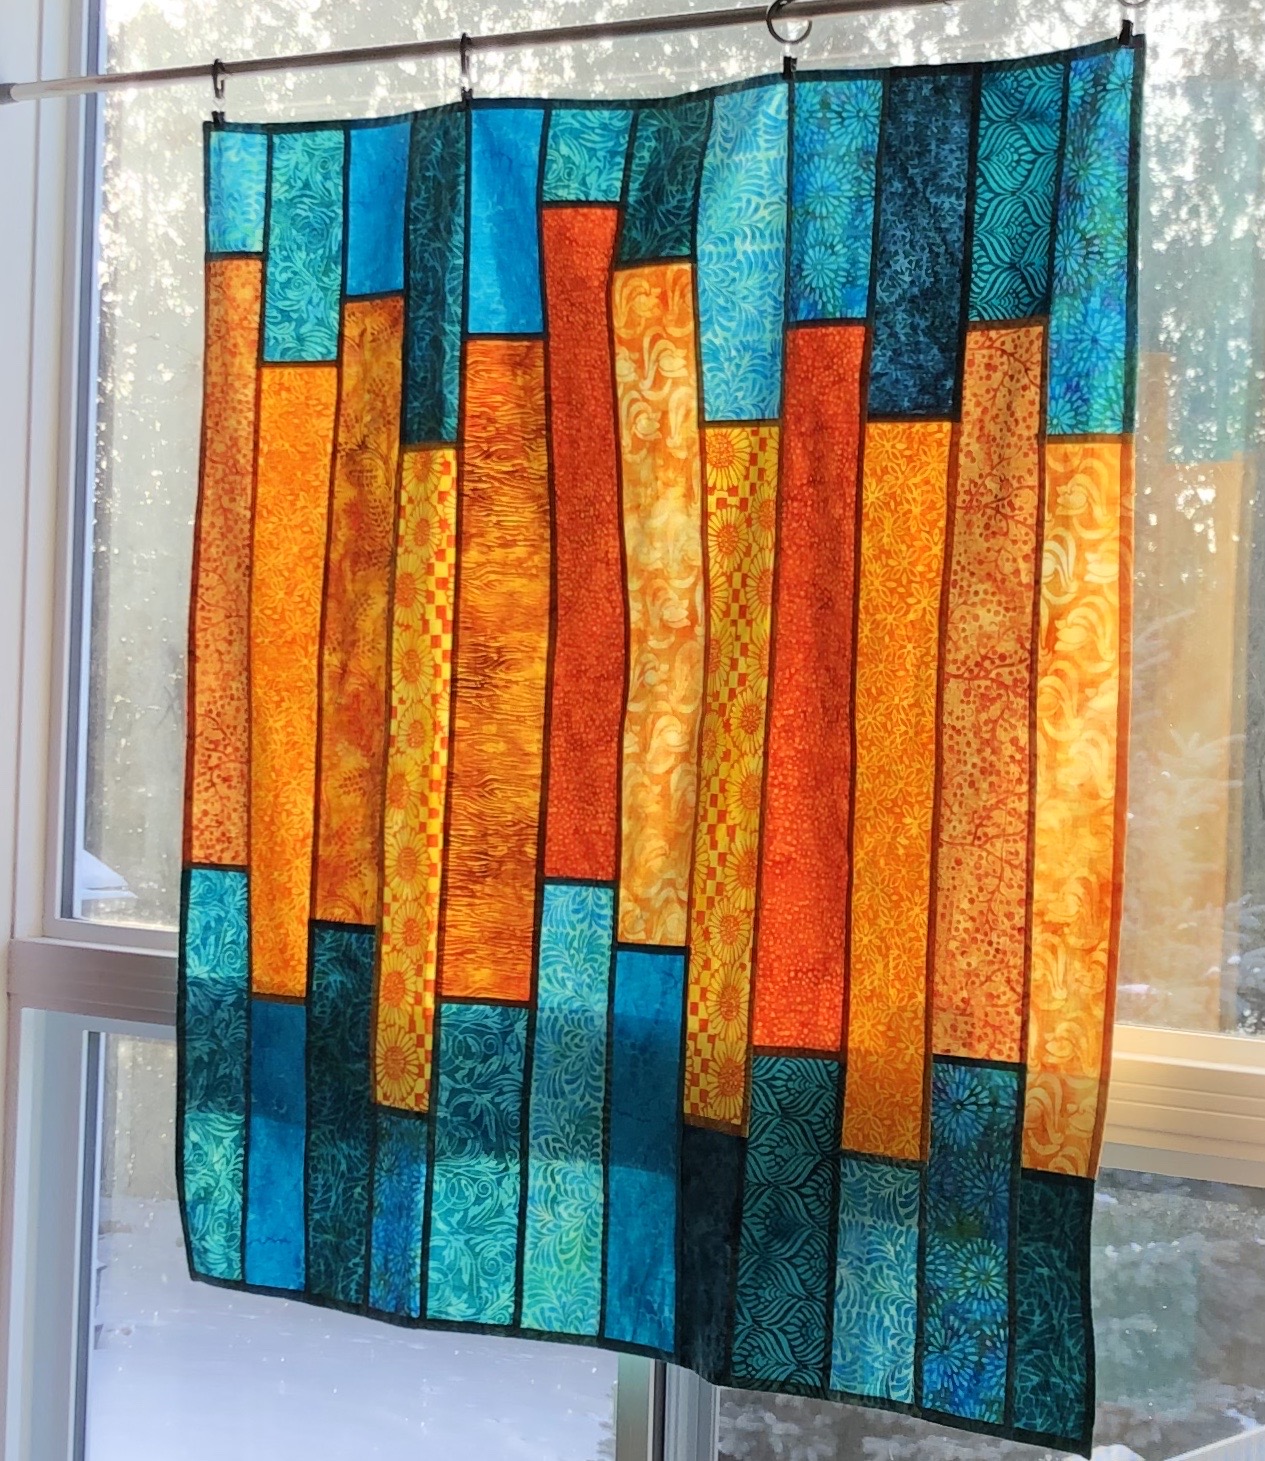
By Elizabeth DeCroos from Epida Studio
How do you design a quilt inspired in a holiday season, what is the creative process and where do you get your inspiration?
When I start to design a quilt, ideas usually pop into my head and my brain goes into overdrive wondering how I can create what I’m seeing in my head. I begin by searching images from the internet, magazines, EQ8 (Electric Quilt), royalty-free clipart, and holiday decorations in stores. Once I have a basic plan, I set to work using the EQ8 software to create applique designs and quilt patterns. I never draw on paper and only use EQ8 for creating my applique art.
Halloween is my favorite holiday and where I get the most creative with my appliques and quilt designs. Creepy and spooky things are totally what I love drawing! “Ms. Winifred’s Closet” is my best selling quilt pattern. The idea for “Ms. Winifred’s Closet” came to me when I was having a sleepless night. The thoughts just rolled in and I couldn’t wait to start designing the pattern when morning came. As one of the administrators for a Facebook Halloween page, Cackling Stitches, my mind is constantly thinking of wicked ideas to create and share. The Halloween ideas in my head are endless!
Often it is the fabric that inspires me with ideas. For instance, a fabric line by Benartex of outer space fabric had me thinking of aliens and UFO’s. My imagination used that thinking to create two quilts, a large one and a mini one. The large UFO quilt had an applique spaceman and a little green man on it, and the mini quilt had an alien holding an unfinished quilt (UFO.) I love making quilts that are fun and make people smile!
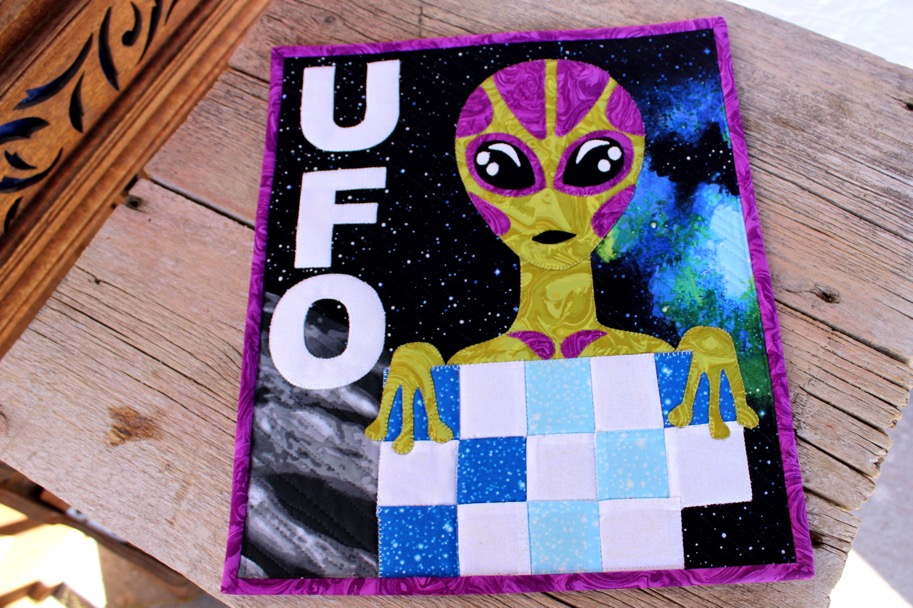
By Carol Swift from Just Let Me Quilt
As you can see from what the experts told us, there is an infinite amount of styles and techniques available for you to create your own pieces of macrame, crochet, knit, or quilt décor, once you get a hang of the basics of these techniques, you can let your imagination fly and start creating unique designs for your and your loved one’s home décor since these also make great gifts for those that you appreciate the most.

