For us, coffee lovers, discovering the art of coffee, and new brewing tricks and techniques is almost like finding a treasure (in this case, a delicious, tasteful treasure). However, there is no reason why the steps to brew the perfect cup of coffee at home should remain a secret that only certified baristas and coffee experts can possess. For this article, we have gathered quite a few interesting tips and useful answers to some of the most common questions that coffee enthusiasts have, all given by coffee connoisseurs, coffee shop entrepreneurs, and all kinds of coffee experts. Keep on reading for some unique insights into the magical world of coffee. Everything from choosing the right beans to brewing your coffee like a pro!
What is Turkish Coffee and how can I prepare it?
The first thing you might be asking yourself is why it is called Turkish. Turkey doesn’t grow its own beans, but it has an unusual method of making coffee which is pretty different from all the other ways. Turkish coffee is made of finely ground beans, which means that it looks more like cocoa than the ones used for espresso or robusta. Another thing is that it is made in a cezve (a traditional coffee pot made of copper) which makes the process authentic and unusual.
Turkish coffee is a great option for those who are looking for coffee with high caffeine concentration and moderate sugar. All the ingredients that you need are extra finely ground coffee beans, add cold water and sugar (optional). After mixing them in a Turkish pot, put them on hot sand or low fire. Hot sand allows the brew to slowly develop its special taste and scent. The small number of ingredients doesn’t mean that there is nothing to experiment with. Coffee experts and enthusiasts came up with various tips to make Turkish coffee, so there are plenty of things to learn from them.
Turkish coffee is unfiltered, so no taste qualities will be lost. But it also means that you will have to wait until the powder in the brew settles, after that it’s ready to be served. Serving has its own traditions. To make it really authentic, you will need small Turkish coffee cups (demitasse ones). It is traditionally served with a cup of cold water that helps to better feel the whole taste of the brew, and some sweet treat like a little piece of the chocolate or a Turkish delight.
–Mary Goodwin at PapasCoffee
Why should I weigh my coffee beans?
There are lots of good reasons for “scaling up” your coffee game. Using a scoop, particularly one that came with your brewer, is just fine if you usually make the same amount of coffee, with the same brewing method, every day. But if you lose your scoop, want to try a new method, or find yourself brewing for a larger crowd, it can be hard to estimate the right proportion of coffee and water.
For most common brew methods, the golden ratio of coffee to water is 1:16 (meaning for every gram of coffee, you’ll want 16 grams of water). This is roughly equivalent to the “two scoops per cup” recipe. Using a scale makes it easy to keep this ratio consistent, regardless of how much you want to brew.
Coffee-brewing recipes that use measurements like “scoops” and “cups” can be confusing. Different coffee scoops can vary in size. And did you know that a “cup” of coffee isn’t a consistent measurement? Some coffee brewing recipes define a cup as 8oz, some as 6oz, and some as 5oz! If you’re weighing your water and grounds, you don’t have to worry about these recipe variations.
The amount of coffee in a scoop can also vary, depending on whether it’s whole bean or ground. Different sizes or densities of coffee beans can also impact the final amount of coffee, as can roast treatment. Weighing the beans can keep your ratio consistent, regardless of bean size, density, roast level, or grind settings.
You can get started with any kitchen scale, but many digital, coffee-specific scales allow you to convert between grams and ounces and have timers for pour-over recipes. Our favorite intro coffee scales are the Hario V60 Digital Scale, the Bodum Bistro Scale, or the OXO Precision scale. These three all cost ~$50. For a splurge, it’s hard to beat the functionality and sleek, modern look of the Acaia Pearl, which comes with a price tag of $200.
-Maryna Gray at Bean Box
How can I make my coffee taste stronger?
Coffee strength is an ambiguous term because people refer to different things when they talk about it. Most often though, people refer to the TDS, (total dissolved solids), when they talk about coffee strength. TDS is a measure of how many soluble compounds are extracted from the beans in our cup.
The caffeine content can also be perceived as a coffee strength, and people want a cup with more caffeine content when they say they need a strong coffee.
Finally, there is the intensity of a certain flavor that can be perceived as coffee strength.
So if the caffeine content is not your main goal, you can make a stronger coffee by choosing a darker roast. Dark roasts tend to be perceived as stronger for two reasons. Firstly, they are more soluble, so you can extract more soluble compounds, using the same technique. Secondly, the roast flavor is particularly intense, so it gives the coffee lover a stronger tasting sensation. I personally don’t like dark roasts, because they tend to mute all other origin flavors that make coffee so distinct. By roasting dark, we make all coffee, regardless of the origin, taste the same.
Another way to increase the TDS of the coffee is to grind finer. By grinding finer, we increase the surface area during brewing, making all of the soluble solids easily available for extraction. By grinding finer, we allow a higher TDS without needing to increase the brewing temperature or the brewing time. It is often ignored among home baristas that high temperatures allow the extraction of more bitter flavors from the coffee. Even with a longer brew time, we could extract those bitter compounds that most coffee lovers want to avoid.
This brings us to the taste intensity, perceived as coffee strength. As we said, simply increasing the brew temperature will increase the number of bitter flavors, which many people like in coffee.
As for the caffeine content as a measure of strength, this should not even be discussed. But if we must, here is how you get a caffeine bomb. Caffeine gets extracted pretty easily from the coffee grounds, so no technique is going to help you extract more. Use coffee beans that are known to have great caffeine content, such as Robusta. Or, just add more grounds to your recipe.
-Dorian Bodnariuc at Coffee Brewing Methods
What’s the best time to grind my coffee beans?
As a local coffee roaster, I know this question is the one that always confuses newbie coffee drinkers. Of course, the answer will always be the same: Try to only grind the beans right before brewing, as much as needed. If you must do it earlier for convenience, please DO NOT grind it earlier than the night before.
The reason why we tell you that is because the oxidation process will dramatically change the flavor. From the moment you open the coffee bean bag, to the moment you grind the coffee, and even at the moment coffee finishes roasting is its own oxidation rate by changing its surface area.
There is something called the 15/15/15/15 rule of thumb. Non-roasted beans will stale in 15 months. Roasted beans will stale in 15 days. Ground coffee stales in 15 minutes. Brewed coffee should be served within 15seconds.
I always suggest the following to the coffee newbies:
1-Purchasing coffee from a local roaster will remove weeks/months of supply chain and distribution and waiting. This should have a roasted date on the bag and should be purchased within days of it being roasted.
2-Buy the best grinder your budget allows and grind on demand. A $9 Cuisinart blade grinder is not a $2,500 Mahlkonig but it pairs up well with a french press for a low-cost low effort entry into Coffee.
3-Buy a french press and a v60. Use both/one/whichever you feel like right now.
-Chu-Yu Hsu at The Coffee Concierge
What is Pour Over Coffee?
Pour over coffee is essentially the same type of coffee we have been brewing on drip coffee makers for years: Paper-filtered coffee brewed via percolation. So what’s the big fuss?
Well, while you can make excellent coffee with an electric machine, you get even more precise control when doing it manually.
With pour over coffee, you can achieve truly transcendent coffee because you can control extraction parameters such as agitation and temperature to a higher degree.
A necessity for pour over lovers is the gooseneck kettle. This type of kettle is more precise than a regular electric kettle, which would cause unnecessary agitation. Most people who are serious about pour over coffee also invest in burr grinders with narrow particle distribution. A good grinder can easily cost hundreds of dollars.
The Chemex and the Hario V60 are two of the most iconic pour over brewers.
These devices have many similarities since they both use a cone-shaped filter. However, with Chemex, you have to use a unique, proprietary paper filter, which is relatively thick. The Hario V60 uses a less dense paper filter, and as a result, the flavor profile is more fruit-forward.
You can use the same coffees with both brewers. But since the Hario V60 is smaller and faster, it’s usually favored for lighter roasts and more unique flavors.
The Chemex is suited to bigger batches, so many people choose it for more traditional beans.
However, today there’s a ton of different pour over drippers on the market – most of them with their unique selling point.
-Asser Christensen at Coffee Chronicler
What’s the difference between a latte, a flat white, and a cappuccino?
In the modern coffee world, the difference between the three is very little. The only thing that separates them is the thickness of the microfoam (silky milk layer on top) and in the case of the cappuccino, some chocolate powder. They all have the same ratio of coffee to milk and when you sip a latte or a flat white through a takeaway lid, you probably wouldn’t even tell the difference.
Let me go into detail:
The Cappuccino got its name from the Capuchin monks who wear the domed hoods. It means “little hood” so the thickness of the microfoam needs to be about 2cm/.79 inches and after adding some chocolate powder to the top I like to add one last dash of milk to create the “hooded” effect.
The Cafe Latte has always been confusing for coffee drinkers. Traditionally, it was served in long and tall glasses making it milkier tasting. These days, however, you simply choose the size of your cup and the Barista will add the exact same ratio of coffee to milk to make sure it’s as strong tasting like any other coffee. A Latte might have 1cm/.39inches of microfoam on top.
The Flat White has also evolved over the years. Australians and New Zealanders can’t agree on who invented it first, but the story goes that we southerners hated all that “foamy stuff on the coffee”, we just wanted a Flat coffee. The original flat whites would have zero microfoam on them but in today’s coffee culture, anywhere up to 1cm is considered acceptable.
-Ryd Jeavons at Coffee Beans Delivered
How can I best pair chocolate with coffee?
Coffee and chocolate make quite the perfect pair. You will find that most any coffee pairs very well with chocolate, but in our research and many taste testing events, we find that espressos or darker roasts, like a French Roast or something nice and dark, will pair very nicely with a good piece of chocolate! The strength of the coffee you are pairing with definitely makes a difference, and that is why you will get the best flavor combination when you choose a nice bold espresso or dark roast!
At Door County Coffee, we also offer some decadent and delicious chocolate-flavored coffees like Brownie Batter, Mocha Mint, and Turtles in a Cup! These coffees give you all the flavor and fun of good chocolate and coffee, without the guilt and 0 grams of carbs and sugar per serving! We also have some fun flavored coffees that would make a great pairing with any kind of chocolate like our Peanut Butter Crunch pairs perfectly with milk chocolate, or our seasonal Candy Cane coffee pairs wonderfully with dark chocolate! You can always taste test, and come up with fun combinations of your own because you can’t go wrong with coffee and chocolate!
-Allie Reinikainen at Door County Coffee
Does coffee expire?
All coffee eventually expires. Whole beans and grounds alike have expiration dates. But their timeframes can differ. How fast coffee spoils depends on how it is packaged and stored. While most coffee can actually outlast its expiration date, there is a difference in terms of shelf life.
Let’s go over when beans, grounds, brewed coffee, and instant coffee expire and how to best preserve them.
Whole Beans. Sealed whole beans can sit for 6-9 months in your cupboard or pantry. But quality dwindles after about a month. These solid beans hold their molecular compounds to lock in flavor. An opened bag of whole beans can last for a maximum of 6 months.
Coffee grounds won’t last as long as whole beans because they’re more broken down. This means they spoil quicker as oils evaporate. An unsealed bag lasts about 3-5 months longer than its expiration date while an opened one can sit for 3-5 months in the cupboard.
Brewed coffee spoils quickly, lasting 6 hours at the max. You can still safely drink it, but the flavor won’t be there. Coffee oxidizes faster since water releases coffee’s solubles. Do not let coffee sit for 8 hours and then drink it. Also, do not bother reheating cooled coffee; the flavor and oils will just break down more.
Instant coffee might not be as flavorful as brewed. Already broken down, instant coffee can last anywhere from 2-20 years based on how you preserve it. Even after sitting in the freezer, this convenient coffee can give you a caffeine fix.
Preservation Tips
Keep coffee lasting longer by storing it in an air-tight container, put away in a moisture-free, dark spot. Moisture will ruin coffee, which is why an airtight container is handy. Mold and mildew can grow on coffee after prolonged exposure.
Naturally, the best way to preserve coffee is by consuming it as soon as you can. This keeps the flavor fresh with natural oils locked in. After all, there’s nothing better than a fresh cup of joe.
-Sasha Pavlovich at Coffee How
What’s the difference between an Espresso and an Americano?
People can sometimes get confused about the difference between an Espresso and an Americano. Some people think they are the same while others think of them as opposites. The truth is, though, that they are two very different drinks.
To make things even more confusing, there are people who refer to both Espressos and Americanos simply as “coffee.” It can be helpful to know the differences between these drinks. So, how do they differ, really?
The difference between an Americano and Espresso is the process used in creating it. An espresso uses water under pressure, whereas an Americano uses hot water at 82°C (180°F).
It takes longer to make an Americano compared with Espresso; 25-30 seconds for Espresso, and around 2 minutes for an Americano.
The texture of the beverage is also different. Espresso has a layer of crema on top, created by forcing steam through packed coffee grounds with high-pressure water at about 93 °C (200 °F). It can be served straight or with milk, unlike an americano which doesn’t have the same texture.
Moreover, an Americano is an espresso diluted with hot water or a shot of espresso mixed with hot water. The result is less intense but similar to espresso, while the texture can be different depending on how it’s prepared.
When it comes to nutritional information, an espresso contains around 1.5% fat and 10 calories per cup, whereas an Americano has no fat or calories.
-Charles Vallena at CuppaBean
What is a Stovetop Percolator and how can I use it?
You can define a stovetop coffee percolator simply as a kettle that comes with an in-built system to draw hot water from the bottom to the top. This system allows the machine to ooze back down along the grounds, and this process is technically known as percolation.
Typically, this kettle carries a small reservoir at the bottom. In addition, it holds a central tube that runs to the top, where a filter basket is placed to put ground coffee.
Using A Stovetop Percolator
Using a stovetop percolator is pretty simple. Here’s a step-by-step guide that can help you understand how to use a stovetop percolator.
1- You need to start with grinding and measuring the coffee. Grinding beans just a few moments before brewing is suggested. Additionally, you should use a burr grinder as there’s no filter in the percolator; too coarse grind may affect the delectability of the flavor profile. Once you wrap up the grinding part, you need to measure the coffee, and it depends on the number of cups you want to make.
2- Now, get the percolator ready by adding cold water to the reservoir and placing the funnel filter on the top. Once done, you can put the ground coffee in the basket and press it gently.
3- The next step is heating the percolator. It’s highly recommended to heat the water slowly to avoid the risk of a burnt or bitter taste. When you see that bubbling has started, you need to adjust the heat source to control the temperature.
4- Now, your job is done, and it’s time to leave the rest on the percolator. LEt the percolation occur; however, stay nearby so that you can keep on checking the temperature. Usually, it takes 5-10 minutes to complete brewing, wait patiently, and take the percolator off the stove once done.
5- Now is the time to discard the grounds so that they don’t go straight into your cup. Once done, you are all set to enjoy cups that delight you like anything!
-Amit Ahuja at FriedCoffee
What is coffee acidity?
Coffee’s acidity is the most important thing, it is a first and only impression. It is the first taste sensation that is perceived as a rose directed at contact with the lips, a numbing sensation on the tip of the tongue, dryness on the palate and on the sides of the tongue. Being a key of utmost importance to help decipher the flavor and quality of a particular coffee.
-Luis Montoya at East West Coffee Wine
Is instant coffee real coffee?
Instant coffee is made from real whole coffee beans that were roasted, ground, and brewed. Similar to the process required for making coffee from ground coffee. After the coffee is brewed and filtered, it is sent to a giant evaporation tank (evaporation is when a liquid changes into gas), heated at about 158°F (70°C). At this phase, the water evaporates from the coffee, causing the liquid to condense by about 50% into a thick coffee extract closely resembling honey.
From that point on, there are two primary methods for manufacturing instant coffee. The spray drying method and the freeze-drying method (Waka Coffee’s choice). The freeze-drying process takes a long time and is more expensive, but it yields a tastier coffee that preserves the original taste and aroma of the coffee beans.
Instant coffee (the drink) is made with coffee granules or powder that have already been brewed, dehydrated, and packaged for an easy cup of joe. To clarify, instant coffee is indeed made from real coffee beans that were roasted and ground prior to the evaporation and dehydration processes.
Important to note that instant coffee will easily dissolve in water while ground coffee will not. Ground coffee needs the additional brewing step to extract the flavors from the beans to prepare a coffee drink, but both types of coffee are made from real (and often the same) coffee beans.
-David at Waka Coffee
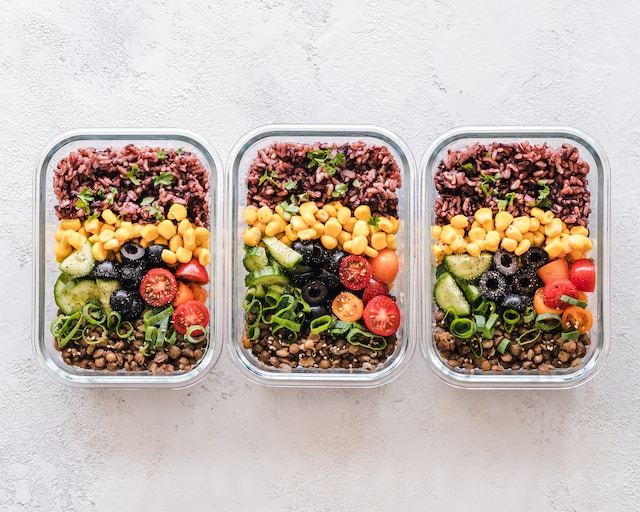
How can I pair coffee with food?
The complex flavours of coffee lend themselves to pairing with your favourite desserts or snacks. Some of the key flavour notes of coffee are chocolates (sweet and bitter), nuts, toffees and caramels, and fruits ranging from sweet berries to citric lemons and mandarins.
Single Origin coffees are readily available from specialty roasters today, so choose an origin that will either compliment or contrast with your food choice. The majority of coffees we purchase will be a blend, meaning it is a mix of 2 -3 origins but will usually have a key tasting note, so you could choose a blend that highlights your favourite flavour.
African coffees from Kenya, Ethiopia, or Uganda are known for their fruit notes and will pair beautifully with berries such as raspberries, blackberries, and blueberries or dark or milk chocolate for contrast. South American coffees from Brazil and Costa Rica are known for their nutty flavours and are generally milder with sweet caramels and toffees and will pair nicely with the sharper flavours of peaches, citric fruits, a crisp apple, or stone fruit tarts.
And then there is chocolate! Chocolate pairs wonderfully with everything, but especially with coffee, and no matter how you like your chocolate, sweet, bitter, or salted it will work. African coffees are known for their syrupy bodies, dark fruit notes, and cocoa flavours so both dark and sweet chocolates will be complementary. Guatemalan coffees are also known for their chocolatey notes and will pair nicely with your chocolate cakes, slices, and biscuits.
The flavours found in coffee are endless, and the choice for coffees and how to brew your beverage continues to grow – to find what you love, drink different coffees and drink them often.
-Our friends at Crema Coffee Garage
Why do you need to tamp espresso?
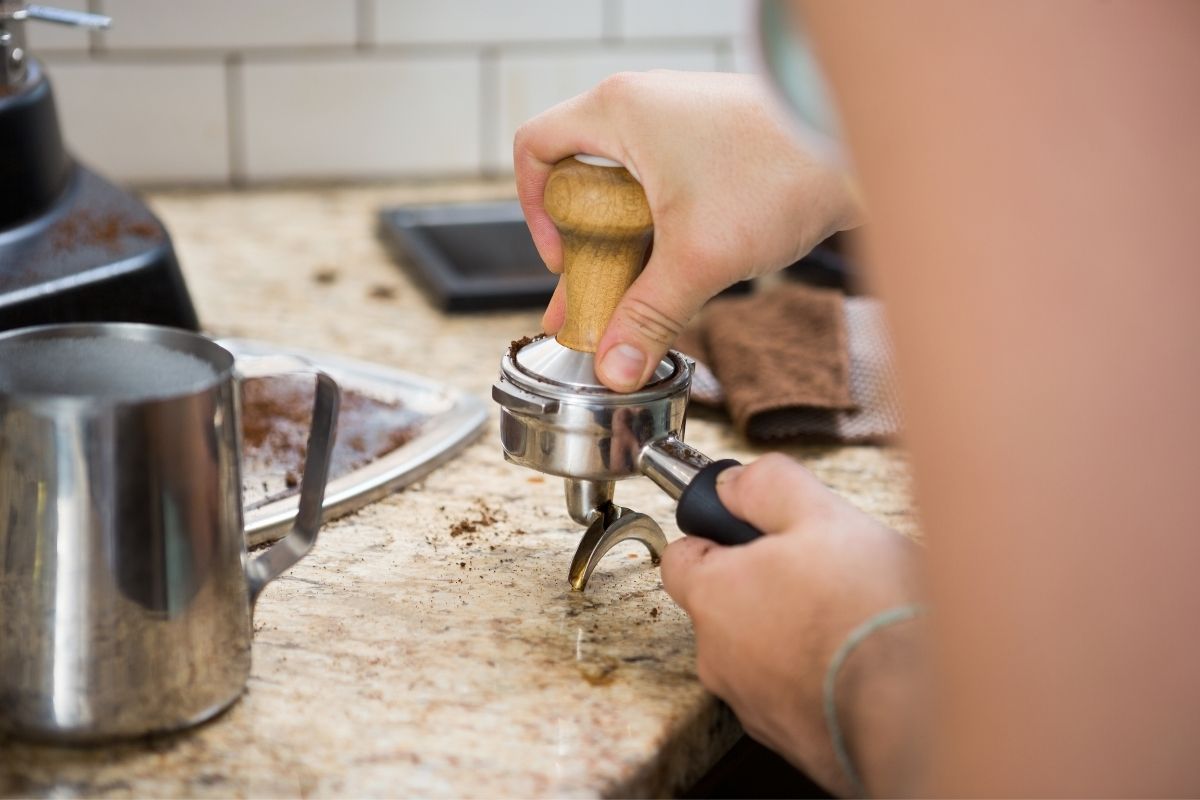
Tamping espresso is a very important step in creating the perfect shot of espresso at home. The purpose is to create uniformity across all ground coffee, allowing for an even amount of water to flow through the grounds at any grind size, allowing you to taste only the best nuances intended by your specific blend.
When you tamp espresso, you are applying the right amount of pressure to the correct amount of coffee, which will allow for a smooth and perfected pull from your espresso machine. To achieve this, you need to ensure that the puck is perfectly level after tamping. The only way to do this is by using a tamper, which has a flat bottom to distribute the pressure evenly across the entire coffee bed.
What Should be Done Before Tamping?
For best results, you should ensure your coffee has the correct grind size, measured by the amount of coffee you use for your specific espresso machine. If your grind size is too coarse and not uniform across all coffee grounds, your espresso will taste harsher and over-extracted. On the other hand, if your grind size is too fine and/or tamps with excessive force, it can lead to a very bitter-tasting espresso shot.
This is why it is important to measure and grind your coffee beans correctly for the right espresso machine and always use a burr grinder. Burr grinders provide better consistency than blade grinders, which will produce over-extracted and/or under-extracted shots of espresso.
If your coffee is not ground correctly, you’re going to have problems with the actual tamp. Also, if there are any irregularities in the grind size, you will have inconsistencies with each tamp. This will cause some water to flow through the coffee too quickly.
-Harry at The Coffee Wave
What should I take into account when choosing a coffee machine?
The main thing I think you need to consider when choosing a coffee machine is the specific type of coffee you like to drink. There’s so much choice these days, the term “coffee machine” is an all-encompassing umbrella term, and it’s quite easy to end up with entirely the wrong coffee machine for you.
For example, there are people who drink filter coffee, who end up with a bean to cup coffee machine, and can’t understand why they’re getting something so much different in taste and mouthfeel than they were familiar with. The simple answer is, they are drinking espresso, not filter.
An Americano or Lungo looks similar to a cup of filter coffee, but it’s not the same at all, it’s produced in an entirely different way.
Bean-to-cup coffee machines are nearly always espresso machines. Unless the machine is specifically listed as a filter, it’ll be bean to cup espresso not bean to cup filter.
So, what coffee do you want to drink? If you want espresso, and espresso-based coffees such as Latte, Americano, Lungo, Cappuccino – you’ll need an espresso machine. If you prefer the slightly lighter and less intense taste and mouthfeel of filter coffee, then you’ll need a filter coffee machine.
Once you know that it’s espresso you need, the question then is do you go the bean to cup coffee machine route or the traditional espresso machine? The answer there depends on whether you value perfection highly enough to warrant taking on a new hobby. Using a traditional espresso machine really means becoming a home barista, the skills you’ll need to develop are the same skills that a professional barista would need, and this is beyond what most people would be prepared to do.
Most people, unless/until bitten by the home barista bug, would value convenience more highly than perfection, and for that reason would go for a bean to cup coffee machine, and I do think this is the right choice for most “normal” coffee drinkers.
But it doesn’t end there ;-). Bean-to-cup coffee machines also fall within different types, namely semi-auto bean to cup and fully-automatic or “super-automatic” bean to cup machines. The former will make your coffee from one touch, but you have to steam and pour your milk via a steam wand. The latter will do the entire thing for you.
“But I want a pod coffee machine”, I hear you shout.
Well OK then, and pod machines are fine, just make sure that machine is capable of producing coffee that resembles your favorite coffee closely enough. What you need to keep in mind about pod machines, is they don’t produce exactly the same coffee as the traditional route to producing that same coffee.
For example, if you want espresso and espresso-based coffees, pod machines can deliver espresso-style coffees, but it’s not espresso, not quite.
True espresso comes from an espresso machine, pod machines are very clever things, and they mimic quite well the kind of coffee they claim to offer, generally speaking, but they don’t actually produce that same kind of coffee.
Once you know exactly what kind of coffee machine you need, and you just need to choose the right one, the thing I’d then keep in mind is the power of the internet! Spend some time reading reviews of the machines on your shortlist, and you’ll soon come to a conclusion about which is the better choice. Remember the age-old saying, though, buy right or buy twice.
-Kevin Lewis at Coffee Blog
What is the perfect water ratio for cold brew?
A common mistake people often make when learning to make their own cold brew is using the wrong coffee to water ratio. Like all coffee brewing methods, cold brew coffee has an ideal grounds to water ratio that will bring out the best flavors in your resulting brew.
A good rule of thumb for cold brew is a 1:4 grounds to water ratio. It’s easiest to think about this in terms of grams. If you use 100 grams of coffee grounds, you would need 400 grams of water. For those who don’t have a food scale or a coffee scale at home, the calculation to use is 1 tablespoon of coffee grounds for every 4 ounces of water.
Now if you’ve been in the coffee world for some time, this ratio may seem dramatically greater than other coffee brewing methods you’ve dealt with before. Pour over, for instance, uses an average coffee to water ratio of 1:16, achieving the perfect balance between coffee and water. However, in the realm of cold brew, the goal is quite different. In fact, a motto to go by in making good cold brew is “the stronger, the better.” This is due to the fact that most cold brew recipes yield a concentrate. What this just means is that the resulting cold brew beverage must be diluted with ice, water, milk, or a combination of the three.
This concentrated yield ends up being a really good thing, especially for newbie cold brew makers, because a strong brew can nearly always be fixed. Typically, cold brew concentrate is served as 1 part concentrate to 1 part milk or to 1 part water. But if that doesn’t catch your fancy, with cold brew concentrate you have the freedom to doctor it up, creating the exact cold brew strength you prefer by adding more concentrate or more water as needed.
Alternatively, if your cold brew ratio is too low and therefore, too weak, there’s really not much you can do to fix it. So when in doubt, go back to the cold brew mantra of – “the stronger, the better.”
– Cheyenne Elwell of Baked, Brewed, Beautiful
What are the differences between Cold Brew and Iced Coffee?
The short answer is that cold brew and iced coffee are differentiated by taste and brewing process. Now, for the slightly longer answer:
Cold brew is coffee that is coarsely ground and soaked or ‘steeped’ in cold water over a long period of time (12-24 hours). This long brewing period paired with the exclusive use of cold water results in very smooth and sweet coffee with rich chocolatey flavor notes. Cold brew is typically brewed in concentrate form and then diluted with either water, ice, or milk.
Iced coffee, by contrast, is coffee that is brewed with hot water over ice. The brewing process is similar in length and process to any other dripped coffee and can be achieved with a specified iced coffee maker or at home with a number of different coffee brewers. The resulting flavor is primarily determined by the specific beans that are used. The taste tends to be lighter, with more fruity notes and a broader spectrum of flavors than is found in cold brew. Milk is usually added to the iced coffee before consumption.
Generally, iced coffee tends to attract a more popular audience, while cold brew is more closely associated with the specialty coffee movement. However, both brewing methods are delicious and well worth a try to see which you prefer.
-James Hyslop at The Coffee Folk
How can I prepare the perfect Iced Coffee?
- An iced coffee is made the same way you make your regular drip coffee, then you let it cool down before you add ice.
- A cold brew is made by steeping coffee grounds in cold water for several hours – approximately 12 hours or more.
- An iced latte is usually made using an espresso machine and it consists of espresso shots, cold milk, and ice.
You can also choose to add sweetener and dairy to your iced coffee. If so, then make sure you add your sweetener first, then the room-temperature brewed coffee. Give it a stir before you add the ice. Leave some room to top it all off with your dairy of choice!
-Nick at Your Coffee and Tea Essentials
Is a percolator a good option for coffee brewing beginners?
Brewing coffee with a percolator doesn’t require high-level barista skills. The brewing process is not complicated and takes only a few steps to make strong cups of coffee.
- Grind the coffee beans into medium coarse size, a bit coarser than you would use for drip coffee.
- Add coffee grounds to the filter basket and place the filter into the kettle. Shake to level the coffee bed or gently tamp it with a spoon. One tablespoon of grounds per 8oz-cup of coffee would be a good starting point, and you can adjust the ratio accordingly.
- Then fill cold water in the kettle and place the percolator on medium heat. As the water boils and circulates within the percolator, you can see the bubbles from the glass knob on the lid. Adjust the heat, and aim for a steady bubbling pace for a better cup.
- Keep percolating coffee for 8 minutes, and then you can remove the filter and dump the grounds.
- Enjoy your freshly brewed coffee.
Overall, it’s a more forgiving brewing method for beginners. Coffee percolators are not that sensitive to the brewing variables, such as grind size, ratio, and temperature. Because the boiling water washes the coffee grounds repeatedly, you’ll get a robust coffee with low acidity every time. So you don’t really need a high-end grinder, gooseneck kettle, coffee scale, and other coffee accessories.
In comparison, other brewing methods require higher accuracy for optimal extraction since hot water goes through the coffee grounds only once.
Keep in mind that coffee percolators tend to over-extract coffee. It will wash out the nuanced flavor of the beans, which is not suitable for brewing premium single-origin beans. However, the classic coffee flavor is palatable for beginners and much stronger than regular auto-drip coffee.
Moreover, coffee percolators are inexpensive, so you can start your coffee journey at home without spending lots of money on coffee equipment.
-Chris at Brew Coffee Home
How can I brew my coffee in a Moka Pot?
The Moka Pot is a great coffee maker, but it’s easy to make mistakes that will create a bitter or burning taste in your coffee.
A Moka Pot is a simple coffee maker that uses pressure to brew coffee. It has three parts: the base or the heating vessel which holds water, the middle section – the funnel, which holds the coffee grounds, and the top section – the coffee collector which holds the brewed coffee.
Here are 7 basic steps for using the Moka Pot:
- If you want to make the perfect cup of coffee using a Moka Pot, it’s important to use the right grind and coffee type. You’ll get the best results if you can find a coffee that is specifically labeled as being suitable for Moka Pots. If you can’t find such a coffee, you can still make great coffee by grinding your beans coarsely.
- Fill the heating vessel with water up to the safety valve (See comment below about the temperature of the water).
- Close the Moka Pot with the upper part, tightening it well.
- Put the Moka Pot on the heat source. If you’re using induction you may need to get a Moka Pot for Induction Stove or get an adapter.
- When the froth formation has been completed in the coffee collector remove it from the heat source. Place the heater under running water to get the temperature down.
- Enjoy a great cup of coffee.
- But wait! Now I must break the rumors that the Moka Pot doesn’t need to be cleaned. This is not the case. While it is true that you don’t need to scrub the pot with abrasive material, you do need to wash it. The coffee residue can build up over time and cause your pot to become stained and/or taste bad. To clean your pot, simply rinse it under hot water after each use. If any coffee residue is stubborn, you can use a soft cloth or sponge to clean it off. Consider using more cleaning tips.
Did you know…
That in some countries the Moka Pot is called “Makinetta”?
That you need to pull out and clean the Gasket and Filter Plate each time you clean your Moka Pot?
Do you know what should be the temperature of the water?
Well, from what we know at Elijahcoffee.com, hot water is the best, to be more specific, the ideal water temperature for brewing coffee in a Moka pot is between 195 and 205 degrees Fahrenheit, but recently we found in the manufacturers’ manuals that they actually recommend filling the heating vessel with cold water.
-The Elijah Team at elijahcoffee.com
Should coffee always be brewed by following exact measurements?
Brewing coffee is like any other cooking art. That is, it should always be made using carefully measured recipes. Many self-identified brewing experts enjoy showing off their flamboyancy using sweeping gestures and measurements as if making a cup of coffee is more akin to dance than science. But, while we are just starting to understand the various elements that make up a great-tasting cup of coffee, they all involve some attention to specific amounts of water and ground coffee, the fineness of the grind, the water temperature during extraction, and the time of extraction.
That said, there are arguments to be made that various bean varieties, growing variables, roasts, brewing styles, and of course your own taste buds are factors that cannot be ignored. Still, a consistent recipe is good to have. It can be modified to suit your taste buds.
The recipe for a great cup of coffee is as follows:
-10 grams/1 Tablespoon of coffee per 6 ounces/177 ml of water (I use a small scale to weigh my beans before grinding)
-Medium fine grind
-Extraction time of 4-6 minutes
-200°F/93°C water temperature
-Use water that is ideally 100 TDS (total dissolved solids) medium hard water. Salt-softened water is generally to be avoided.
Notes: When using a French Press, consider grinding only as fine as will still allow gentle pressing down to filter the coffee before serving. If there’s too much resistance, grind coarser. Also, agitating ground during extraction can facilitate extraction, one reason a press can brew strong coffee using comparatively short extraction times (ie: 3 minutes) compared to a long drip time.
-Kevin and Patricia Sinnott at Coffee Companion
What’s the best way to store my coffee?
We all know coffee loses freshness over time, but proper storage can be the difference between it lasting a few days and a few weeks. As coffee oxidizes its flavor and aroma degrade, so the main goal of any storage container is to prevent the coffee from coming into contact with oxygen.
The rate of this oxidation process depends on the surface area of your coffee. To brew an optimal cup it’s best to grind your beans immediately before use, which is why a grinder is the single best investment you can make to improve your home coffee setup. There are lots of great options on the market, such as the Wilfa Svart Grinder.
As a minimum, you should roll down the top of the bag in which your coffee was purchased, press out the air, and keep it tightly closed with an elastic band or two. Your coffee should be fine for a couple of weeks if you put this in a cool, dry place.
Now, let’s dispel an old wives’ tale. There’s little benefit to putting your coffee in the freezer, especially if it’s pre-ground – if you want to, make sure your coffee is vacuum sealed and preferably is still as whole beans.
At Chimney Fire Coffee, our quality control team recommends using an airtight container with a one-way valve to let carbon dioxide escape. We suggest the CoffeeVac Storage Container, which should keep your coffee fresh for up to three months for whole bean, or six weeks for pre-ground.
-Sam Pearce at Chimney Fire Coffee
What are the best milk alternatives for coffee?
We live in a world with a huge amount of alternative kinds of milk at the moment. In fact, it can be a little intimidating in the grocery aisle these days!
But don’t worry, I’ve got a list of three of my favorite alt milks out there. I like these so much, I’ve even created a “build your own latte” virtual event around them!
Oat Milk
This is hands down my favorite! This is the most versatile of all the alt milks out there. We’re talking milk that’s at home as much in a latte as it is in a macchiato or even a cup of tea! It’s got the thickness and consistency of regular milk as well as that rich flavor that dairy is well known for. It’s no wonder that the world’s biggest Oatmilk brand, Oatly, just IPO’d for $1.6 billion!
Almond Milk
I like almond milk because it’s SO easy to make at home. Take some almonds, soak in water, remove skin, blend, strain. Congratulations, you’ve just made some of the best almond milk you’ll ever try. But if the effort is not your thing, there are a million different types out there. My protip here is to try to find almond milk that is labeled “Barista”. It’ll usually be fattier and as such, delicious!
Coconut Milk
OK listen up, this one is harder to get right, but SO worth the effort. Never buy cheap Coconut milk – always spend a little more on the good stuff. I really enjoy mixing coconut milk with a lighter, fruity cold brew coffee and some sugar. It’ll give you a strong, punchy, almost piña colada-like drink that’s best over ice.
These are only three of many choices out there! My final advice is to try as many different types as you can. You never know what you might like.
-Tom Fitzgerald at Jelly Donut Events
How can I know which coffee grinder is best for me?
It’s a scientific fact that keeping roasted coffee in its whole bean form and grinding only what you’re preparing to brew is a key factor in maintaining a high-quality cup. The reason: Oxygen is the enemy of flavor, and pre-ground coffee has more total surface area for oxygen to get in and diminish the flavor of your coffee.
While it’s impossible to keep all oxygen away from coffee that’s being stored for later brewing, there are a few things you can do to help prolong the magic of fresh-roasted coffee, and buying whole beans, and using a coffee grinder is one of the best ways.
There are 2 types of coffee grinder: Blade & Burr
Blade grinders are like food processors; they pulverize the solid bean with whirling blades by engaging an on/off switch. The benefit of blade grinders is that they are cheap. The downside affordability comes at the cost of controls and a quality grind.
Burr grinders are like spice mills. The solid coffee beans pass through a set of burrs that are flat or conical in shape and made of either metal or ceramic. The distance between these burrs can be controlled to result in the grind size spectrum, running from “fine” to “coarse” ground coffee. They are dramatically more consistent than blade grinders. However, they are also more expensive – so you’re trading off affordability for more control and a more consistent grind, which equates to a better-tasting cup of coffee.
Burr grinders also come in manual/hand-operated and electric varieties. If you’re ever only making coffee for yourself, there is a certain romance and ritual about hand-grinding your own coffee beans. But if you’re consistently making larger batches of coffee, your arm will get tired in a hurry.
To summarize, here are the things to keep in mind when choosing a coffee grinder that’s right for you:
- What do you care about most: Affordability or Quality – Burr grinders are the best quality option, no question asked
- How much coffee will you regularly be making? – Manual burr grinders are more affordable and portable but if you’re making a lot of coffee on a regular basis, an electric grinder will serve you better.
Choose wisely. 🙂
-Brian Gumm at Ross Street Roasting
What’s the easiest brewing method for a beginner?
Searching for a quick, convenient brewing method to fuel your coffee addiction? Brewing a high-quality coffee in a standard drip coffee maker is the easiest way to make a great cup of coffee.
You’ll Need:
-Standard coffee maker
-Coffee filter
-Water
-Coffee beans (medium-grind or ground for drip)
Instructions:
1-Purchase a bag of small-batch roasted coffee from a local coffee shop for the best taste. The beans you can buy at a grocery store aren’t as fresh because they’ve been sitting on a shelf for months.
2-Place the coffee filter in the coffee pot. Read the coffee bag for the exact coffee to water ratio. Typically, you need to add one ounce of coffee for every 16 ounces of water. Scoop the correct amount of coffee into the filter.
3-Add water to the coffee maker, close the lid, and press the start button. Voila! In just a few minutes, you’ll have a delicious, piping-hot cup of coffee waiting for you.
If you’re looking for some fresh, small-batch coffees to try, check out Elevate Coffee, a locally-owned coffee shop in North Phoenix. You can sample their premium, medium roasts like Costa Rica Gold or chocolatey, high-caffeine dark roast blends like Rude Awakening.
-Brittany Sawyer at Elevate Coffee
What is the vacuum brewing method?
The vacuum brewing method is a full immersion brew system and looks like something out of a chemistry lab. It was patented in the 1830s by the German, Loeff of Berlin and is also known as a siphon or siphon brewer.
A vacuum brewer consists of a lower chamber that holds the water, an upper chamber that holds the coffee, and a pipe or tube connecting them. During brewing, the water is heated in the lower chamber and the increased pressure in the bottom forces the water to go through the pipe and into the upper chamber with the coffee. Once the heat is removed from the lower chamber, the pressure equalizes, the water (now brewed coffee) drains back through the grounds into the lower chamber and is ready to enjoy.
Coffee brewed with the vacuum brewing method tends to have a crisp body and can have a cleaner taste profile than other immersion brew methods. The consistent heat source used during the vacuum brewing process helps give you more control over the brewing process and ensures a more even extraction of your grounds. The vacuum brewer is popular in many cafés partly because it can be a more passive way to make coffee, but also because many siphon brewers are incredibly beautiful.
-Andrew Pautler at Pull & Pour Coffee
What is an Affogato and how can I best enjoy it?
Here at Black Insomnia, we love a good Affogato. It’s a classic Italian recipe that only contains two simple ingredients; Espresso and Ice cream. What’s not to love? We think it can be best enjoyed using our espresso pods, as you get a rich, creamy and intense brew every time. You can even make it boozy by adding dessert wine or sweet by adding honey and melted chocolate. The possibilities are endless! To try our signature recipe, check out our blog post: ‘The Black Insomnia Affogato’.
-Jeyda Omer at Black Insomnia Coffee
How can I make Cold Brew?
French Press is a great brewer for cold brew! 2ith just ground coffee and room temperature water, steep for 12 hours & voila! You’ll have a refreshing cold brew to enjoy over a hot afternoon.
Here are a couple of brewing tips for the best tasting cold brew 😋
We highly recommend making cold brew with espresso roast coffee beans, ie. range from medium to dark roast is good, as the medium darker roast is much soluble compare to light roast coffee & easier to fully extract coffee with room temperature water!
To enjoy as black, we recommend single-origin espresso roast coffee that has fruity-floral characteristics. Preferably with African natural coffees with a 1:10 ratio for a juicy refreshing cuppa 🍓🍇🥭
To pair with milk, go for espresso blends that have a load of chocolate notes and a heavier body to punch through the milk! 💪🏼
The ideal cold brew ratio to pair with milk is 1:8 or lower for a more concentrated cold brew. The more concentrate the cold brew, the more milk you can pair it with 😊
We usually prep the cold brew at night and by morning just pour out the cold brew into small bottles. You can keep the cold brew for 3-5 days in the fridge 😍
To enjoy it, just pop a couple of ice and pour the cold brew in. If cold brews tasting bitter, a quick fix is to add a dash of milk to neutralize the bitterness.
How can I choose the perfect French Press?
The way in which you brew your coffee has a huge impact on its taste. After all, it’s a simple matter of chemistry. The French Press is one of the most popular ways to brew coffee partly because it yields such a deep, robust, and full cup of coffee. This method involves the full immersion of coffee grounds and ultimately, allows for more contact between the coffee and water than other brew methods. Follow some of the following tips to get the most out of brewing your coffee via the French Press method.
Grind
You’ll typically want to use a coarse grind for your coffee when using the French Press. This immersive brew method requires more time than other methods. As such, a coarser grind is ideal because it will slow down the extraction process and prevent over extraction. Perhaps just as important as the size of the grind is the consistency of the grind. An even and uniform grind is desired and has a major effect on the coffee’s final flavor. Buying a simple manual burr grinder is a worthy investment that will help you achieve the perfect grind size and consistency.
Ratio
Another common mistake that coffee lovers often make is using the wrong quantity of coffee. A 12:1 ratio of 12 grams of water to 1 gram of coffee works well. Of course, being that everyone has different preferences for coffee strength, you can fine-tune this ratio to suit your own personal tastes. If you want stronger coffee, just add more coffee while keeping your water quantity the same.
Timing
Drink your coffee immediately. Coffee that’s left in a French Press will over extract quickly leaving you with a bitter and dull tasting cup of coffee. This occurs because the coffee grinds will continue to brew even after you’ve pushed the plunger all the way down. If you want more than a single cup of coffee, pour you first cup and then transfer the remaining coffee into a thermos or a carafe.
-Dan at Best Quality Coffee
How can I use a French Press?
Step One: Choose your beans
The first step to using your french press is choosing the right beans. You’ll want to select a coffee that is dark-roasted and has a strong flavor.
Baristas typically use a blend of coffee beans, but you can also use a single-origin bean if you want to highlight its unique flavor profile.
When grinding your beans, be sure to not grind them too fine – the grinds should be about the size of sea salt.
Step Two: Boil water and preheat your french press
Next, you’ll need to boil water and preheat your french press. Bring the water to a boil and then let it sit for about 30 seconds before pouring it into the french press.
This will ensure that your water is at the optimal temperature for brewing coffee – around 200 degrees Fahrenheit.
While the water is boiling, preheat your french press by swirling hot water around inside of it.
Step Three: Add grounds and hot water
Once your french press is preheated, add in your ground coffee beans.
Then, pour in the hot water, being sure to evenly distribute it over all of the grounds.
Let the mixture steep for about four minutes.
Step Four: Plunge slowly
After four minutes have passed, slowly press down on the plunger until it reaches the bottom of the carafe.
Be sure to do this slowly and evenly – if you plunge too quickly, you’ll end up with grinds in your cup of coffee.
Once all of the liquid has been pressed through, give the french press a quick swirl before pouring yourself a cup.
Enjoy!
There you have it – now you know how to use a french press like a pro! By following these simple steps, you’ll be able to make a delicious cup of coffee that is rich in flavor and free of grinds. So what are you waiting for? Give it a try today!
If you enjoyed this article, read more like this by checking out our Specialty Coffee Beginners Guides.
-James at Coffee Kiwi
What’s the best way to clean my French Press?
French Press Cleaning is very easy when you follow these simple instructions. There are 2 different types of cleaning: First is daily cleaning when you simply need to disassemble everything and rinse with warm water. It’s best to use a brush to remove all coffee grounds. We do not recommend cleaning the plunger with soap (it can alter the taste of your coffee if you don’t rinse it thoroughly). The Glass Beaker can be washed with soap or baking soda.
Once a month, you will need to do a deep cleaning to remove coffee oil buildup, for which you can use products like Deep Clean from Espro. This will make cleaning super simple so that you can enjoy your French Press every time.
-Igor Dernov at French Press Coffee
How long does Cold Brew last?
Cold brew can last between 7 days to 2 weeks, depending on the temperature that it is stored, the level of dilution, and the type of additives added. In contrast, regular hot brewed coffee starts to degrade within half an hour of brewing. This is one of the main reasons why some coffee lovers prefer cold brew to the regular hot cup of joe.
Storing cold brew in the fridge will make it last up to 2 weeks, provided that the brew is still in the concentrated form. If you leave it at room temperature, the flavor will begin to spoil in approximately 2 hours. However, do note that the coffee flavors will start to degrade after the first week, which is unavoidable.
If you further dilute the cold brew coffee concentrate with water, this will affect the acidity and shorten the shelf life. Diluted cold brew can only last 2-3 days when stored in the fridge. On the other hand, cold brew with added milk can only last up to 8 hours when stored in the fridge.
Hence, for the aforementioned reasons, coffee experts recommend storing cold brew coffee in the fridge as it helps in making it last longer. This is because the cold brew method keeps much of the oxidation in check by totally removing the heat from the process.
-Dee at PageOneCoffee
What is Lungo?
Lungo, much like a Ristretto, is a less common drink than espresso. Because not a lot of people know such a possible formulation. It is an Italian word meaning “long”. In plain English, it’s called a Long Black. A type of espresso shot that needs longer water and time to pull.
How It’s Made?
The “longer” part has to do with the amount of water is needed to pull a shot. A shot of espresso needs about 30mL of water and 18 to 30 seconds. A lungo takes double the amount of water. Thus, it needs a minute to pull also.
That’s why it’s a longer and larger shot drink. However, these aren’t the only characteristics. Many home espresso machines have a set option for it. If one doesn’t have the preset then adjust the pull time and water amount. These two tinkerings are enough for you to make one. Leave the temperature and ground amount the same as an espresso shot.
Taste
Because of double water, a lungo tastes much more subdued than an espresso. It is more bitter and maybe why it’s the least favorite among the espressos. This bitterness phenomenon happens for an extended amount of brewing time. But also it’s the same reason why a lungo turns out to be a smokier, roasted flavored espresso.
Caffeine
A common misconception is that it has more caffeine than in a standard espresso. But the amount of caffeine depends more on the beans you are using.
Confusing Americano With Long Black
Americano also needs extra water. But the barista 1st pulls a normal espresso shot. Then adds water. Hope this clears the confusion. Both these drinks are weaker in strength but different in flavor. The Smokey notes are exclusive to lungo.
Final Words
A lungo is a milder and less concentrated espresso with unique aromatic advantages. So if you love smokier, earthier flavors from an espresso, the lungo is the answer.
-Saleheen at CoffeeAtoZ
Is drinking coffee unhealthy?
Both tea and coffee have caffeine and antioxidants. They help in weight loss and can make your mind calm yet, at the same time, attentive. Despite these known health benefits from both drinks, many still believe that coffee is not healthy like tea. We have written an entire article about this topic here: Myth Busted? – Coffee Is Not Healthy Like Green Tea.
-Kei Nishida at Japanese Coffee Co
What is ‘Coffee Bloom’ and how can it enhance the taste of my coffee?
A ‘coffee bloom’ refers to the release of carbon dioxide during the coffee brewing process. It occurs when specialty coffee grounds are fresh, the fresher the coffee, the more significant the bloom. When hot water comes into contact with the coffee grounds, bubbles of carbon dioxide form, and the coffee ‘blooms.’ We recommend using a pour-over method and soaking the coffee grounds with hot water for 15-30 seconds to allow the bloom to occur. This is a really important step for the coffee brewing process, as it enhances the final flavor of the coffee. If the bloom does not occur it could mean that the beans are not as fresh as they could be, or that the degassing process has already occurred, both of which could result in your cup of coffee tasting flat and lacking those sought after nuanced flavor notes.
A few of the following factors also affect the coffee bloom. Storing the specialty coffee beans in a cool dry place is important because if the beans are too warm, the degassing process occurs at a faster rate and the likelihood of the bloom diminishes. Keeping the storage area free from high humidity is also important to limit mold and fungus growth on the beans. The length of time you allow the coffee to bloom also impacts the taste of the final product, but this depends on personal preference.
The roast level of the beans impacts the flavor after the bloom takes place, as darker roasts tend to degas less than medium or lighter roasts. This would affect the bloom as less carbon dioxide would escape while brewing a darker roast, and you would experience a diminished bloom. The origin of the bean, as well as the hardness, affect the bloom to a certain degree. Mainly, harder beans make it more difficult for the gases to escape and therefore result in a lesser bloom.
Experimenting with a shorter or longer bloom time, different roast levels, as well as specialty coffees from different origins, are all exciting ways to customize your brewing experience and final taste of your coffee.
-Stephanie Bunnett at Kunjani
What factors can affect the taste of my coffee?
The factors that can affect the taste of your coffee are:
Brew Method. Your brew method itself massively determines how your coffee will turn out.
Fresh Coffee Beans. Use coffee beans that are as fresh as possible. Your local coffee roaster will often put a date on your bag of beans. Between 1-3 weeks after roasting is the sweet spot.
Fresh Water. Use either filtered water or bottled water.
Measure It Out. Measure out how much coffee and water you use. I recommend a 1:15 ratio; That’s 20 grams of coffee for 300 grams of water. You might want to play around with the ratio and see what works for you.
Grind Size (Pre-Ground Vs Whole Bean). Preground coffee is quicker and easier, but whole beans will always win for tastiness. Different brew methods work better with different grind sizes. Slower brew processes like French Press want a coarse grind. A fast brew process like espresso wants a fine grind.
Grind consistency (Blade vs Burr Grinder). A blade grinder will just randomly chop at your beans, whereas a burr grinder allows you to choose your grind size.
Brew Temperature. The perfect brewing temperature is between 195°F and 205°F (90.5°C and 96.1°C).
Let it Bloom. When the water first hits your coffee beans, you will get lots of bubbles appearing on the surface. This is called The Bloom. Add a little bit of water, allow the bubbling to stop, then add the rest of your water.
Brew Time. Find out how long your brew method needs and set a timer!
How The Beans Are Made. It’s a whole new world of coffee when it comes to bean blends and single-origin beans, Arabica beans, where they are grown, how the beans are processed after harvest, and how they are roasted!
-Scott Deans at Above Average Coffee
What is the difference between arabica and robusta coffee beans?
You may have heard there are many types of coffee. And while several subspecies of coffee do exist, only two main species of plants produce the world’s supply of coffee.
Coffea Arabica
Also known as Arabica Coffee, this species originated in the forests of Ethiopia. About 60% of the world’s coffee production is Arabica coffee.
Arabica coffee grows best at higher elevations. For example, Tower Yirgacheffe Ethiopian coffee grows at 2350 masl — or meters above sea level. Arabica coffee prefers shade and lower temperatures between 59—75 F degrees.
It is a more delicate species, and it is susceptible to disease. So it requires more care to cultivate it.
Arabica coffee got its name when the bean crossed the Red Sea from Ethiopia into Yemen and lower Arabia. It is believed to be the first species of coffee that was cultivated. You might have also heard it misnamed as “Arabic Coffee.”
Varieties or cultivars of arabica coffee are produced by agricultural techniques rather than production in nature. The most common varieties or cultivars of arabica coffee are Typica and Bourbon.
The Dutch transported Typica seeds to Indonesia, where they were cultivated on the island of Java (hence the nickname for coffee). Coffee also spread to Sumatra, another island in the archipelago that is known for cultivating high-quality Sumatra Arabica coffee.
Coffea Robusta
Also known as coffea canephora, robusta coffee is a species that originated in central and western sub-Saharan Africa. Robusta makes up about 40% of the world’s coffee production.
As the name indicates, this plant is more robust. It can grow in full sun, hot temperatures, and at low altitudes — from sea level to 600 meters. It has a greater crop yield than arabica beans.
There are not many famous varieties of robusta coffee because it was not as widely cultivated as arabica. Instead, robusta was introduced to many areas of the world because it could withstand diseases such as Hemileia Vastatrix — also known as coffee leaf blight or rust.
What’s Better? Arabica or Robusta
Arabica coffee is the clear winner because of its lighter, sweeter, and milder flavor according to most coffee drinkers. It often has flavor notes of flowers, fruit, honey, chocolate, and nuts. On a cupping table (where coffee professionals evaluate coffee), Arabica often receives the highest scores for taste and overall flavor.
Robusta coffee is often considered stronger and more bitter flavored. It is less acidic and has grain and nutty flavor notes. The bitterness is mostly due to higher caffeine levels and chlorogenic acid. Robusta contains 2.7% caffeine, compared with Arabica’s 1.5% caffeine levels.
Robusta is usually found in strong espresso drinks and blended with Arabica coffee to lower the cost of the coffee.
If you want to try some of the best 100% Grade 1 Arabica coffees available, Tower Roasting has a variety of different roasts in both whole bean bags and their proprietary K Cup Super Pods.
-Christy Ingkavet at Tower Roasting
What are the health risks concerning flavored coffee?
There is no such thing as a toasted coconut macaroon coffee tree. All of those intriguing flavors are actually chemicals that are doused on roasted coffee beans. In fact, most roasters use cheap beans for their flavored coffee because the flavoring covers up the inferior quality of the bean.
The main ingredient in coffee flavoring is propylene glycol. It is used across various industries. “Propylene glycol is used by the chemical, food, and pharmaceutical industries as an antifreeze when leakage might lead to contact with food. The Food and Drug Administration (FDA) has classified propylene glycol as an additive that is “generally recognized as safe” for use in food. It is a solvent for food colors and flavors and in the paint and plastics industries.” (ATSDR – Agency for Toxic Substances and Disease Registry)
What you are really drinking is cheap coffee with an intoxicating aroma. In addition to its status as “generally recognized as safe”, the flavoring solution is highly concentrated. Roasters should wear protective clothing and have proper ventilation when using it. One prominent flavoring company lists this in the instructions:
-Allow your roasted beans to cool, then place them in a glass or stainless steel bowl, beaker, or canister. Some potent flavors, like cinnamon and amaretto, can even erode plastics, adding unpleasant notes to your final products.
In addition to possibly eroding plastic, the solutions come with a warning to not inhale or touch it directly as it can irritate skin, eyes, and mucous membranes.
So, are there health risks with flavored coffee? Not for coffee drinks according to the FDA. There are, however, risks for the coffee roasters who apply flavoring to their coffee beans.
-Emeran Langmaid at A&E Coffee and Tea
What are Brewing Ratios?
Brewing ratios are how we measure how many coffee beans or grounds and water to use when brewing coffee. You wouldn’t make a pot of coffee with just one bean, and you wouldn’t make a cup of coffee with a gallon of water. Getting the right ratio of coffee to water is one of the keys to brewing a delicious cup with a balanced flavor and strength.
Most coffee lovers agree that coffee tastes best when using a small range of ratios: 1 gram of coffee, and 15-18 grams of water. This is generally written as 1:15, 1:16, and so on. It’s in this range where there’s the right amount of water to pull out the coffee’s best flavors and aromas, but not so much water that it tastes weak (or so little that it’s too strong).
Measuring coffee to the right ratios is easiest with a gram kitchen scale because you can be precise and consistent. To make an eight-ounce cup of coffee (225 grams of liquid), you’d simply divide the total liquid by the larger number in the ratio. If you prefer a 1:16 ratio, the calculation would look like this: 225 g water / 16 ratio = 14 g coffee.
If you don’t have a kitchen scale, you can generally assume that one level tablespoon of coffee is equal to ~5 grams. So if you’re making an eight-ounce cup of coffee with 225 g of water and 14 g of coffee, you’d need just about 3 tablespoons of coffee. Measuring water without a scale is even easier since 1 g of water is equal to 1 ml of water – any measuring cup should work.
Write down your favorite “recipes” for safekeeping (and to avoid doing math every morning!) and your coffee will taste consistently delicious every day.
-Garrett Oden at Coffee Marketing School
If you are more into the experimental charm of the coffee experience, you might enjoy ruining a couple of cups just for the sake of science, only to work towards getting a perfect result in a sort of trial-and-error approach. On the other hand, if you’re tired of serving bitter, bland coffee to your guests and losing time and money trying to figure out the best way to use your sophisticated coffee maker, this thorough guide will help you get the job done and make a coffee pro out of you. Do not forget about the amazing benefits of coffee and get brewing.


