When you have a backyard court or sports field at home, you may never want to leave. Although installing a basketball court or soccer field in your yard may take some time to design and build, it is sure to be an investment in fun and fitness. If you or your family enjoys sports, you can transform your backyard into everyone’s favorite place to be—your house! Here, we’ll outline how to add various sports courts and fields to your yard with tips for making the most of your designs and DIY know-how. While you can always hire professionals or even a handyman to complete your sports courts for you, you can also manage these projects on your own if you choose for terrific cost savings.
Turning Your Backyard into a Basketball Court

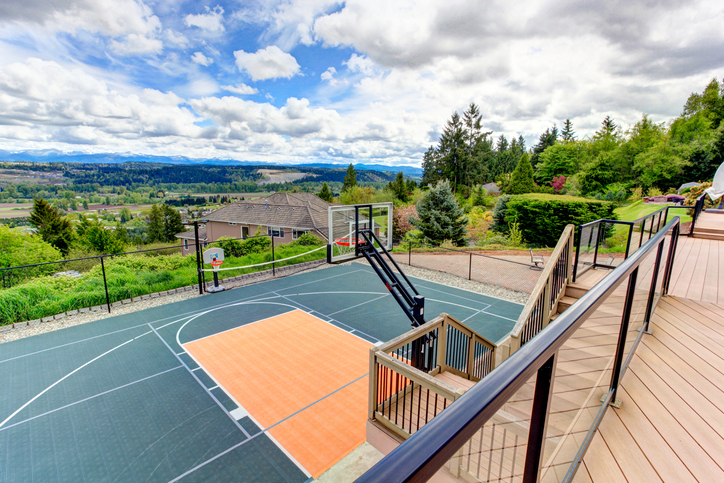
Sure, you can mount a basketball hoop on your garage to shoot hoops, but there’s nothing like a whole court experience to experience all the great benefits of playing basketball. If you or your family members love the game, your court promises to deliver hours of fun and sports fitness. You’ll be able to host fun family events, neighborhood tournaments, and even team practices right in your backyard. To create your backyard basketball court, follow these tips:
Basketball Court: Size and Location
An NBA-grade basketball court measures 28m x 15m, but that’s typically too large for the average backyard. Of course, if you have the 420 sqm to spare, you can undoubtedly take the professional route. On the other hand, many backyard courts feature smaller dimensions. A regulation-size half-court measures 15m x 11m, but you can go even smaller if you choose.
Inspect your yard with a tape measure in hand. You may want to use yarn to section off an area for your court to encompass. This will help you determine what dimensions your space can accommodate. If your court is too large, you may not have much space left for spectators or to set up chairs and tables for viewing. Also, if possible, choose reasonably flat ground; otherwise, you’ll have a more challenging job of leveling the court. You might find you need to hire professionals to tackle the earth excavation for you.
Level the Ground
A basketball court requires a flat foundation. Before you can pour concrete, you’ll need to dig up the ground and ensure that it’s level. If you intend for your court to be at ground surface level, you should excavate 117mm to accommodate your concrete slab. On the other hand, if you prefer an elevated slab for your court, you’ll only need to remove grass and level the ground. You won’t have to excavate. If you do choose to excavate, you should contact your utilities; there may be cables and sewer lines buried in the vicinity of your court. You’ll need to determine if any lines are present, so you don’t disturb them.
Choose Your Court Surface and Hoops
Before you pour concrete for your court’s foundation, be sure to order your hoops if you want to anchor them into your concrete. Mounting them in the concrete will give your court a professional look. Your concrete slab provides a durable foundation for your court, but you may want to adorn it with a synthetic sports surface. Rubber or polymer sports tiles make for an excellent court experience and are typically more durable than turf. If you choose asphalt, you’ll want to seal it after painting its lines to promote its longevity.
Install Your Court and Paint Lines
Once you have your materials, you can construct your court according to the dimensions you mapped out. Again, you may want to invite a contractor to perform some work, such as pouring the concrete for your slab. After the concrete has cured (allow for 72 hours), you can install your court’s surface. Many tile systems are available in the marketplace, so choose one that meets your needs and preferences. Once your surface tiles are in place, you’re ready to mark out the court’s lines carefully. Use a tape measure and tape to mark gameplay lines as well as the court’s borders. Then, you can paint them. You can use a basketball court stencil kit to ensure that your markings are perfect.
Accessorize Your Basketball Court
Consider painting a custom logo in the center of your court to personalize your space. You might also want to invest in netting to set up behind your hoops to keep the basketball in the court space, especially if you live near neighbors. Add some outdoor court-style seating for your players and spectators to complete your basketball court. For more efficient training, consider adding a basketball rebounder or shooting machine like the Dr. Dish Home or iC3 Shot Trainer
Basketball Court Maintenance
To maintain your basketball court’s good condition, be sure to pressure wash it annually or every other year. This will allow you to remove dirt or other ground-in debris. Otherwise, simply keep leaves and twigs off the court by inspecting it routinely. If your basketball court is enjoyed routinely, you may need to have it resurfaced every four to five years.
Turning Your Backyard into a Baseball Field
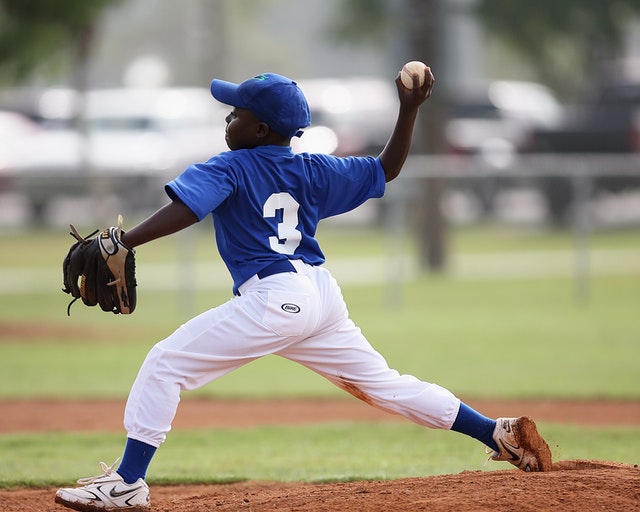
Unfortunately, not all backyards can accommodate a baseball field. You’ll need a massive amount of space to create your field and to ensure that line drives don’t wind up smashing your windows or your neighbor’s. The larger your yard, the more you’ll be able to enjoy safe gameplay. If you have the room, you can build a baseball field according to these tips:
Size and Space
To create a full-size baseball field, you’ll need to create a 90 foot square for your baseball diamond. The home plate to the home run fence or border along the foul lines (left and right field) should measure 330 feet. Finally, the center of the field should measure 400 feet from home plate to the center-field home run fence. Of course, you can modify these dimensions, but if you have kids with major league aspirations, you’ll want to create a field that’s at least in keeping with local ball fields. Of course, the larger the field, the more time it will require to maintain it.
Level the Field
Next, you’ll want to level your baseball field. A level field is a necessity to prevent injuries. Your infield diamond, in particular, needs careful leveling along the running lanes. Players won’t be looking down as they sprint from base to base. A level infield will also ensure better gameplay. Fill in any dips or holes so that your players don’t trip and fall due to them.
Mark the Bases and Cut the Infield
Marking the bases requires careful measuring. You can begin by mounting a sturdy stake or screwdriver into the apex point of the home plate. Tie a string around it and secure it carefully. Then, use the string to measure your foul lines to the 90-feet mark. You can use this stake and string method to measure the rest of the infield—the bases and the pitcher’s mound. You can follow these measurements to ensure your infield is regulation size according to the stand you’re following (major league, little league, pony league, etc.).
Build the Pitcher’s Mound
First, you’ll need an anchor point for your pitcher’s mound; measure two feet from the center of your pitcher rubber toward home plate. Next, cut your 18-foot circle and add soil to build up your mound within that circle. The rubber itself should rise about 10.5 inches off the ground and slope slightly (one inch per lateral foot) toward the home plate.
Fencing
Fencing is not a requirement, but you should consider installing a backstop or a turtle shell to guard against foul balls or any balls that your catcher misses. If you opt not to construct a home run fence, you can still mark the boundaries of your field using paint.
Landscape and Drainage
The grass for your baseball field certainly doesn’t need to appear to be a perfect lawn; it’s going to endure wear and tear. However, you may want to consider its overall health as you build your field. You can install grass, but it’s much cheaper to plant seeds. Drainage is also essential, especially if you live in an area that gets considerable rain.
Baseball Field Maintenance
If you aerate your field’s grass before your season of play, you can promote good drainage as well as a more lush lawn. Aeration and overseeding are relatively straightforward DIY tasks, but you can also have a professional landscaping service perform this for you. Keep in mind that a lush lawn features natural defenses against encroaching weeds. During your season, you’ll want to mow your lawn routinely and rake the infield dirt between your bases. You may also need to build your pitcher’s mound up with new dirt periodically.
Accessories and Extras
Although you don’t have to accessorize your baseball field, it might be a nice touch to add some outdoor benches for your players to sit on while they’re waiting their turn to bat. You can create your own style of dugouts using pergola-type structures or even ivy-covered trellises. You may also wish to add some bleacher-style seating for spectators. Finally, consider constructing a small shed nearby to accommodate all your baseball supplies.
How to Turn your Backyard into a Football Field

As with a baseball field, a football field is going to require a huge backyard space. If you can’t accommodate the space for a regulation field (120 yards by 53 yards), can you fit a scaled-down version that’s still going to ensure plenty of room for gameplay? Here, we’ll outline everything you need to do to create a backyard football field.
Football Field Size
Essentially a rectangle field, a football field is a relatively easy space to create. It requires flat ground and appropriate square footage. You can use these dimensions to create your field depending on the size of your yard:
- Small yard: 16 feet x 9 feet
- Medium-sized yard: 32 feet x 18 feet
- Large yard: 64 feet x 36 feet
In the U.S., there are three regulation sizes for football fields: high school, college, and National Football League (NFL). The differences relate to goal posts and hash marks. A typical field features 100 yards with an extra 10 yards for each goal post.
Level and Landscape
If there are trees in your prospective field, you’ll need to remove them and level the ground. After leveling, you’ll have to install grass or seed it. If your land is already level and has a healthy lawn, simply inspect it for holes or dips; you can fill these to ensure safer gameplay. If your grass isn’t particularly healthy and you don’t fancy the idea of building it up or maintaining it, you might opt for artificial turf instead.
Goal Posts
If you create a permanent football field, you can purchase goalposts to mount in each end zone. Of course, this isn’t necessary, but it will give your field a completed and more professional look. It will also allow your kicker to get in some good practice.
Mark the Field
Marking the field with turf paint requires attention to measurement. You’ll need to create your hashes and numbers to mark each yard, as well as the end zones and boundaries of your field. To ensure that your hash marks line up from side to side, you may want to enlist a helper. You each hold an end of a string to help you create straight lines and uniform hash marks.
Accessories and Maintenance
Once your field is installed, you can accessorize with flags, outdoor seating, or even a central-field logo. If your field encompasses natural grass, it will require mowing and routine inspections for weeds and pests. Fill in dips and reseed the lawn as needed. Synthetic turf requires regular cleaning as well as replacement of problem areas. Follow the manufacturer’s instructions for caring for the synthetic turf product you choose.
Turning Your Backyard into a Soccer Field

A soccer field also requires substantial space, but its construction isn’t quite as detailed as a football field’s construction. Rectangular in shape, a backyard soccer field requires flat ground and two goalposts. To create your field, follow these tips:
Size
Ideally, you should not install a soccer field that’s any smaller than 15 yards by 20 yards. The optimum size soccer field for pros is 75 yards by 120 yards. You can create a field anywhere in between those dimensions. This link will provide you with recommendations for field size based on the ages of your players.
Level the Field
Once you have measured the area for your space, you’ll want to clear it of any roots and rocks. You should level the field to help prevent injuries for your players. They’ll be focused on the soccer ball and not likely to be examining the ground.
Plant Grass or Turf
Natural grass tends to be the preferred ground cover for soccer as it’s associated with fewer injuries and better-ball play. Balls can take more ‘unnatural’ bounces on the turf. In Europe, for instance, professional fields are covered with natural grass. Also, turf encourages faster gameplay, which may or may not be preferred for your players.
On the other hand, turf fields are easier to maintain. They’re also less likely to be impeded by inclement weather. If you’ve had heavy rains, turf fields will not have the same drainage problems that natural grass fields are likely to have. If you are not opposed to irrigating your field, mowing, reseeding, and filling in holes as needed, you might opt for grass.
Mark the Field and Add Goals
You’ll need to use turf paint to mark all the lines of your soccer field. Once you mark the end zones, you can add your goals and football nets. Use a tape measure to mark your centerline. You can also create a circle in the center part of that line for your game ball drop.
Accessories
There are many different styles of goalposts you can choose from. The official size goal post should measure 8 feet x 24 feet. However, you’ll find different-sized goals that are commercially available. If you plan to enjoy soccer games during the evening, consider installing outdoor lighting. You might also want to fence the field to ensure that the ball isn’t kicked into neighboring yards.
Maintenance
Maintaining your soccer field depends on the type of ground cover you have. As mentioned, maintaining natural grass will require more work, including regular mowing, fertilization, reseeding, aeration, and possibly treating pests and weeds. Turf requires debris removal to keep it clean. You may want to water it on hot days to keep it cool. You should add infill to areas prone to becoming worn down, such as around the goalposts.
Now you are all set to start enjoying your field, practice your moves and have fun with your friends. Check out this interesting article with everything you need to know about 5-a-side football!
Turning Your Backyard into a Volleyball Court
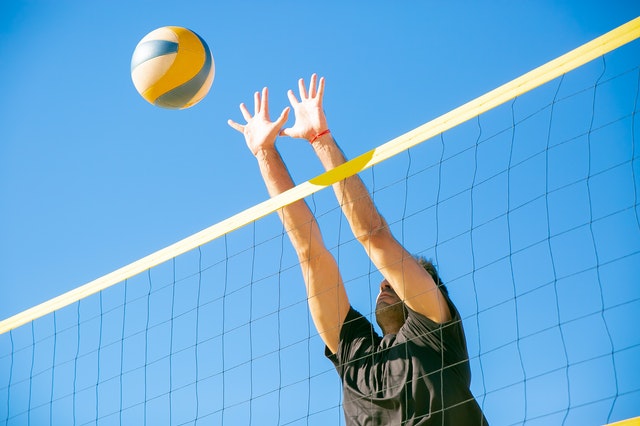
Unlike many of the fields listed above, a volleyball court requires less space. A standard court for this game should measure 60 feet in length and 30 feet in width. The playing area, of course, should be flat. To design and create your backyard volleyball court, employ the following tips:
Prepare the Site
The site of your volleyball court must be flat. Although you can play the game on grass or a harder surface, your players can easily become injured if the court doesn’t feature a level surface that’s free from obstacles like tree roots or holes. Before you can install your court’s surface, you’ll need to carefully measure, mark the court, and perform all leveling work. You may wish to excavate a few inches before pouring to create your slab if you use concrete.
Drainage
It’s important to ensure that your court will have good drainage, especially if you live in a rain-prone area. This is why many designers will opt for a concrete base for your outdoor court. If you’re going to use natural grass as your foundation, consider installing drainage pipes across the width of your court.
Choose Your Court’s Surface
Although volleyball isn’t quite as physical as football, it can involve diving and falling. Therefore, concrete might be too tough for a playing surface. Many people opt for sand as their court’s base, but if your players practice playing the sport traditionally, you might want to stick to grass. Or you can cover your concrete foundation with rubber or PVC tiles. The rubber will absorb impact if players fall, which makes it an excellent surface to play on. It’s also easier to maintain than grass.
Volleyball Net and Poles
You can purchase high-quality poles and a net for your backyard volleyball court. Poles should be durable and able to withstand the tension needed for a volleyball net. Remember that the net can be used strategically by players, but ample tension is required. Most backyard nets will measure 32 feet long and 39 inches tall. The standard height to mount a net for men is 8 feet; women’s standard volleyball net height is 7 feet and four inches.
Volleyball Court Maintenance
When you’re not playing, remove the net to keep it in good condition. If you have a sand court, you should rake the sand routinely and remove any twigs or leaves that fall or blow into it. If your court is covered with rubber tiles, be sure to keep them clean. A grass-court requires more maintenance. The gameplay is likely to harm the grass and leave it looking patchy. So, plan to aerate and reseed each season. You’ll also need to mow the grass and remove any weeds that may pop up.
With these tips and ideas, you can create a backyard court or sports field that’s perfectly suited for your love of gameplay. Remember, you can also adapt these field sizes and ideas to suit your own backyard and preferences.


