
Which skater hasn’t wished to have a backyard space designed especially for practicing and refining their skating abilities? Whether you like skateboarding, roller skating, in-line skating, ice skating, playing hockey, or even practicing BMX cycling if you have enough space for this, it would be a dream come true to have the ideal setup at home for practicing your favorite hobby.
This is the reason why we asked the experts how to design and install a specific setup to practice these disciplines at home. Keep reading to know the tips and tricks the experts shared with us.
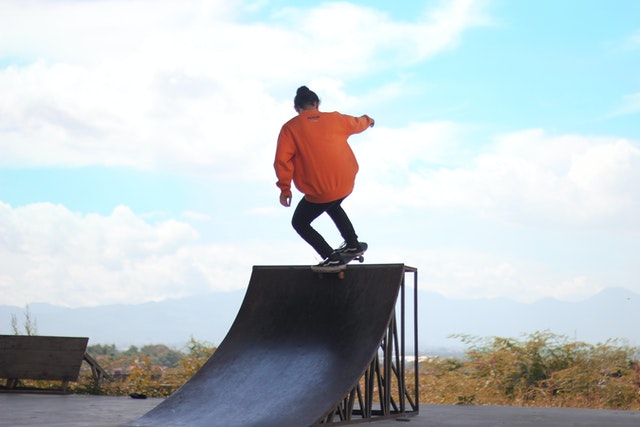
Skateboarding
What type of ramps would you recommend for a beginner to install in their backyard to start practicing skateboarding?
The best ramp to build (or buy) for a young kid learning how to skateboard would be a 2.0-2.5-foot-tall quarterpipe. This helps establish comfort with a skateboarder’s balance at the angle of the transition. It also affords a young skateboarder the opportunity to learn how to drop in!
What kind of obstacles would you suggest installing for practicing and refining skateboarding abilities?
As with many things, there’s no one blanket answer that works best for everyone. I would tell anyone that is going to build obstacles in the backyard to get their hands dirty. Watch videos of contests and pay attention to the obstacles that stand out to you. Get out to as many skateparks as possible and figure out which obstacles appeal to them the most. Which ones bring the most joy? Which ones are difficult but are the ones you just have to get better at? Arming yourself with this knowledge and experience will help to develop the proper backyard build for you is the way to go. All that being said, nothing beats a good backyard mini ramp IMHO. So much fun!
By Matt E. from SellerDoor
How would you recommend transforming your backyard into a skatepark and what kind of creative obstacles would you add to it?
Ever dreamt about transforming your backyard into a mini skatepark? We have some useful tips, ideas, and resources on how to make it possible (without ripping out the garden or laying a tonne of cement). Here’s a range of projects you and your mates (especially builder mates) might like to try out.
Outdoor swimming pools
Do you have an outdoor pool in your backyard? The easiest way to create a skate bowl or smooth surfaced area for skating would be empty the water from the pool in the months when the pool isn’t in use. It’s a trend that has been popular since the 70s. A drought in Southern California during the late 70s led to a massive uptake in skateboarding. Youth were keen to make the most of the smooth hard surfaces of the evaporated swimming pools.
Not all of us have swimming pools in our backyards, so we have some more ways to create your own mini skatepark.
Building a mini ramp
If you’re a tradie, handyman, or simply have done a few DIY projects how about building your own mini ramp? There are many easy to follow tutorials online to help to build a portable mini ramp. If you have the power tools (electrical drill, and saw) already the building materials should cost around $500 (NZD). Do check with your local hardware store for a closer quote.
As with all building projects do follow all health and safety protocols, and have an adult handle the tools.
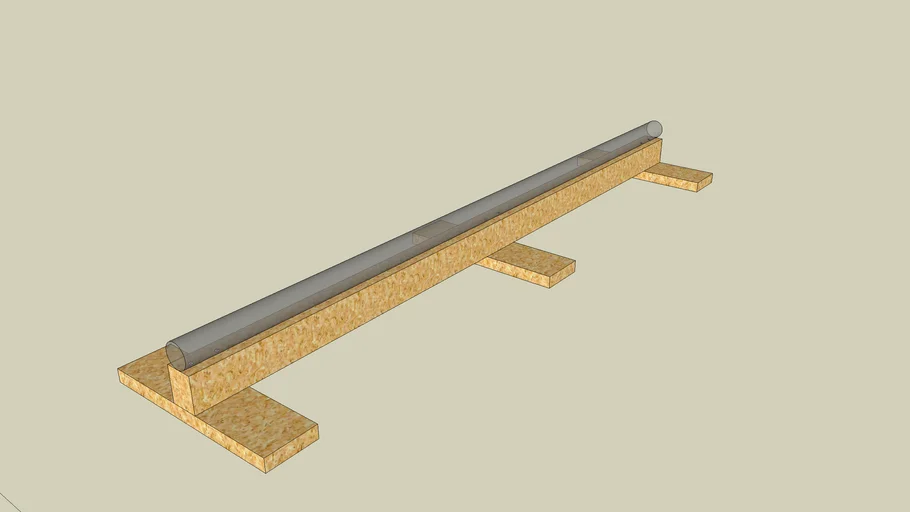
Building a skate rail
Another fun D.I.Y project to transform your backyard into a skatepark is building skate rails. They are also easier and cheaper to build than the portable mini ramp so might be a good one to start with. There is a number of ways to make your own rails but you can find many useful tutorials for this on Youtube. Rub on the rails lots of skate wax to make it silky smooth.
Make your own grind box
Grind boxes are another fairly straightforward construction. They are also pretty cheap to build too. Ask nicely at your local hardware store and you might be able to be given the wooden pallet for free! You don’t need many tools either for building a grind box.
Build a skate ramp
How about adding a skate ramp to your backyard skate park? A reasonably cheap DIY project which you will be bound to get a lot of use out off. Check with your local hardware store for the cost of the plywood and materials. An added bonus is that it will be small enough to store away in the garage after you use it.
Once you have created your backyard skate rails, grind box, and skate ramp you may want to decorate with spray paint stencils and skateboarding stickers. We would love to see your creations, so tag us in your stories and posts on social media.
By Matt from Empire Skate
What is the building process to install a skating ramp in your backyard?
Building a halfpipe is a lot easier than it used to be. I remember building our first local halfpipe before the web was a thing. Nowadays there are tons of free plans available that are tried and tested. Use Google and YouTube first, before you build an unskateable ramp with a terrible transition.
- Start by leveling the ground. Placing your ramp on a concrete pad is the most effective, but very expensive. To keep it affordable, consider placing your ramp on a footing made from concrete blocks. Here are a couple of tips I learned from building mini ramps:
- You don’t want a transition too steep or too mellow. Build a halfpipe that you can actually skate. Make sure that is challenging enough and still allows you to learn new tricks.
- Support the entire ramp at the base, not just the outside of the ramp.
- Instead of building two wide quarters, build four quarters (or more) to prevent deformation. It will make the construction stronger and more durable.
- Try to test your mini ramp before assembling all the parts. Create a temporary middle section and place quarters on each end. This way you can tell if it’s too slow, fast, or just right. If you’re not happy with the flow, adjust the length.
- Don’t place your second sheet plywood layer exactly on top of the previous one. It will cause a bumpy ride and the edges will wear faster. Place the first layers horizontally, and the top sheets diagonally. It requires more work but makes the ramp last longer. Cover the plywood with tar paper before applying the last layer to keep water out.
- Consider soundproofing the halfpipe to avoid angering your neighbors.
- You’ll want a big fat coping that doesn’t stick out too much. Place it so you can comfortably lock in your wheels with little effort.
- Create a platform that has lots of room. If you make a mistake, you want to have a safe place to bail, consider adding a fence.
- Countersink the screws, if they stick out it’s an accident waiting to happen.
That’s the gist of it. The right dimensions and transition are key and testing at an early stage will save you a lot of time and frustration.
By Ruben Vee from Skateboardershq.com
Can you mention a few simple DIY obstacle ideas we can install in a backyard for practicing a medium level of skateboarding?
I would strongly suggest you look at Thrasher’s DIY video series. We have been slowly making some things that most people can make for around $100 and it’s good for all levels. A cement ledge or a double-sided curb is always fun and easy. A quarterpipe having transition is something you can’t find in the streets normally so that’s always a good one. Have fun with it for sure. Think of what you’d want to get good at and realize once you build something you’re gonna use it a lot and get good at it. But fun is most important.
By Greg Smith from Trasher Magazine
Roller Skating and Inline Skating
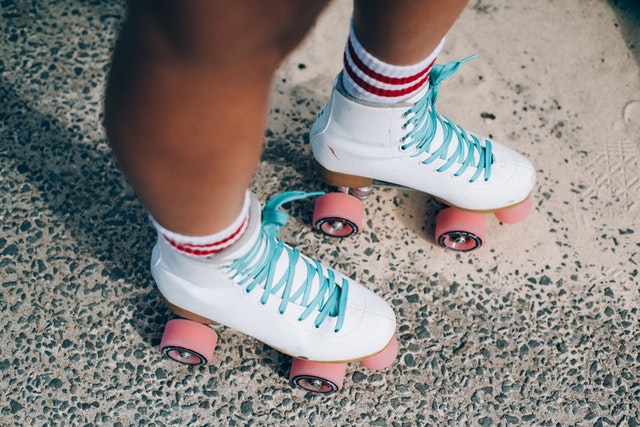
What type of setup would you suggest having for practicing roller skating in a backyard?
To start skating in the backyard a beginner will need a good pair of roller skates, like some Chuffed Skates. A smooth, flat surface is also important! A beginner must understand how to roll, stop and turn around on the flat before moving on to more complex maneuvers. If you don’t have smooth concrete you can DIY a skating surface with sheets of ply. Once you build some confidence you might like to build a small rail with some PVC piping (a p-rail) to practice slides and grinds. Small wooden boxes are also great for practicing stalls, jumping on and off, and other ‘street’ tricks. The most important thing is to have fun and take your time – roller skating is a skill that takes many years to master!
Sam from Chuffed Skates
What kind of setup do you recommend having in a backyard for practicing inline skating?
The reality is, you’ll never build anything in your backyard that will rival the local skatepark. City councils are building fantastic skating facilities all over the country.
So what is the best thing to build to enhance your skating at home? It’s called a PVC simply put it’s a piece of 50mm PVC plumbing pipe screwed to a treated pine wall stud.
The beauty of having a PVC at home is that it can go straight on the grass. This allows you to walk up to the rail and hop on. if you fall it’s either on the grass or on a low PVC pipe.
So now you have a rail that’s a safe and fun way to learn every possible grind before you have to take it to the skate park.
You want the feeling of sliding on the rail to be comfortable and smooth.
It’s super easy to find plans to build a PVC rail on the internet.
Here is a simple one
By Bill Vertucci from Skater HQ
Which protective items do you recommend wearing for inline skating or roller skating to assure safety while practicing?
The more the better!
What you’re doing on skates will stipulate how advanced your safety gear should be.
Load up proactively to avoid heartache – it’s easy to be grateful for having your faithful kneepads on, and almost impossible to walk away from a session wishing you’d worn less.
Normal Recreational Cruising
Your safety gear should be lightweight, flexible, and feature a mix of foam padding and hard plastic caps for both impact and scratch protection.
The tri-packs with wrist-guards, elbow pads, and knee pads are always brilliant value and can help you build good technique – bend those knees forwards, knowing you can fall onto your knees and palms and slide without losing skin or potentially breaking something.
Wearing safety gear can help reduce your tendency to stand upright, which can lead to falling onto your back, bottom, and even the back of your head. Those things are all fragile, and teaching yourself to lean forwards helps with more than just security – it’s a powerful, more agile way to move on wheels.
If you’re on the road or crossing busy streets, wear a helmet. A normal bike-certified helmet works, but a skate style helmet is even better for wrapping around the back of the head – again, we want to protect ourselves if we fall backwards.
Skatepark Skating
There’s a fun phenomenon that a lot of the best street and park skaters wear very little safety gear at all. If you’re super skilled and willing to take that risk, all power to you, but while learning we strongly recommend loading up on strong wrist-guards and bulkier, superpadded kneepads at a minimum. Like skateboarders, wearing massive kneepads can help you to trust that you can bail from the biggest gaps pain-free.
We avoid flexible wrist-guards for skatepark skating, sticking to styles that have plastic splints on both the top and bottom of each hand.
As you get better you may remove the helmet, but indoor skateparks often need you to wear them legally. A lot of the best skaters in Australia set a good example for helmet use – Bayside Team Rider Matt Caratelli is a perfect role model, he wears a helmet every time he puts skates on.
Derby Skating
The WFTDA requires you to wear a lot – wrist guards, knee pads, elbow pads, a helmet and a mouthguard.
Just like skatepark skating, we focus on massive knee pads (they’re almost helmets for your knees!), so that you can fall and recover instantly.
Some players prefer flexible wrist-guards because players have to be able to ‘brace’ one another, forming protective walls to stop the opposing team from passing them.
Some players also choose to add Bumsavers (padded shorts) or shinguards, and many players choose to equip helmets with visor attachments to fend of wayward fingers and elbows. These things are not required but can make your derby journey smoother.
Wheels On Your Feet
We want you to enjoy skating the same way we do! Keep your body fresh and strong so that every session is a good time, and the next session is just around the corner.
You’ll never get scare tactics or mothering from us, just the truth – some days it’s too hot for elbow guards.
Some days you think you’ll stay within your scope of easy tricks, but still have a silly fall and wish you were wearing more safety gear.
It’s all part of your safety journey and the more you know, the safer you’ll be.
By Matthew Clanahan from Bayside Blades
Ice Skating and Hockey

What are the best tips you can give us to build our own DIY backyard ice rink for practicing ice skating?
The best backyard ice rink is the one that fits your requirements – if you are looking for the most realistic feel and enjoy building things from scratch, you might want to construct your own conventional ice rink in winter; if you prefer using your rink all year round and keeping the installation/maintenance simple, synthetic ice is the perfect choice.
A premium synthetic ice surface like Glice can very closely mimic all the skating characteristics of conventional ice, which has made it a great alternative to traditional ice for professional athletes like NHL Captain Roman Josi. Glice panels are made from a highly engineered and proprietary plastic formula that delivers incredible skating performance, all the while being able to set them indoors or outdoors, where ever you have the space! If you’re looking for an easy setup that allows you to practice year-round with minimal maintenance, consider Glice synthetic ice.
By Marc Bjerring from Glice
What are the steps and recommendations you can give to make an ice rink for practicing hockey in a backyard?
A clean, smooth sheet of ice is a magnificent thing. It evokes childhood memories of endless skating and hockey games followed by warming up with a steaming cup of hot chocolate. Plus there’s no need to worry about crowded public skating areas or paying to play on indoor rinks—you can lace up and skate anytime.
Having your own backyard rink can be the most gratifying. It’s a lot of work but it pays off in big ways. Here’s what you’ll need to set it up:
Boards: Helps frame the ice surface while keeping the pucks inside the rink
Brackets: To keep the boards in place
Liner: Provides a smooth surface for flooding the rink to create the ice initially. The liner is very important, especially in areas where the temperatures are not consistently below freezing.
Ice Resurfacer: A must for smoothing out the rough spots. “Zamboni”-type devices can be purchased for that. As an alternative, synthetic ice can be used but obviously it’s not the same as natural ice.
As with everything else, your backyard rink must be maintained. Be sure to clear away any snow that accumulates, as well as leaves, etc.
Installing and maintaining your own rink is a lot of work, but it can be very rewarding. The smiles on the faces of happy skaters will be proof positive.
From Warren Tabachnick, Editor of CrossIceHockey.com
Scooters

What is the best scooter type and safety gear to use when riding in a skatepark or in a makeshift backyard one?
Skateparks are no longer dominated by skateboards—more and more riders are embracing scooters. When hitting a skatepark—even a homemade backyard version—stunt scooters in particular will get you fully immersed in the freestyle vibe! Unlike kick scooters, stunt scooters are specially designed with durable materials to withstand the grind of freestyle shreds, stunts, and scoots.
And safety always comes first with fun freestyle scootering—helmets, elbow pads, and knee pads are a must to protect riders from scratches and bruises on the ramps. Wearing safety gear also helps boost confidence to try and practice different stunts and tricks—knowing you’re fully protected.
Globber offers a range of complete GS stunt scooters suitable for beginner, intermediate, and advanced riders from as young as 6 years old to adults. So get ready to elevate your skills and shred your skatepark in a fierce sport that’s all the rage for any age!
By Jimcy Labio from Globber
As you can see, building your very own backyard skatepark is not as complicated as it may seem, with the right set of skills, knowledge, and materials required, you can start practicing your favorite hobby at home in no time.


