Art is a fulfilling form of self-expression that allows us to be creative and showcase our unique talents. If you’re passionate about the arts, creating a home art studio or art school is a great way to teach others in a convenient and safe setting. Whether you love dancing, music, or painting, it’s easy to design your own art school at home with a few simple tips. This guide has all the information you need to get started, including tips about designing a home dance studio, setting up a music room, and more. Read on to discover how you can share your love of the arts with others.
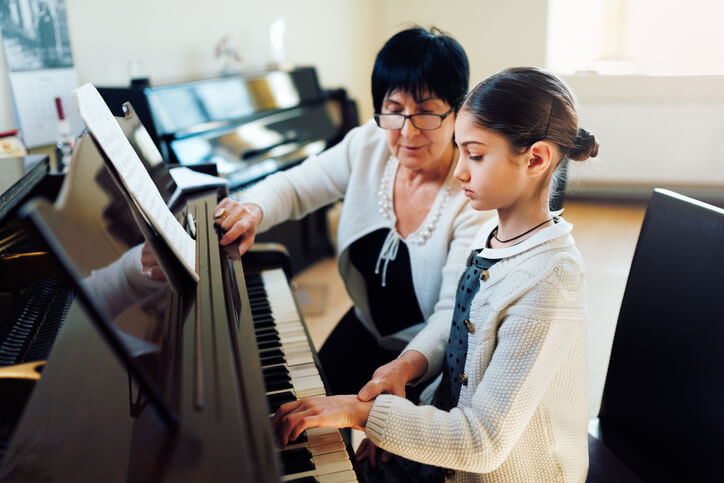
How to set up your music school
Share your love of music with others and start a music school in your home. Here are some pointers to help you get started.
- Planning: Choose an open location in your home that has enough room for you to teach piano lessons. Make sure there’s ample space for any instruments, music stands, or desks you plan to use. There should also be room for objects like visual aids to help you perform music lessons as efficiently as possible. Look for a part of your home that’s calming and quiet so your students can hear themselves as they play and hear you as you teach.
- Layout: Draw out a few layout ideas to organize all of the essentials in your music room in a way that makes sense. Remember to make room for a piano bench and a chair for you to sit in while your student plays. A good layout is easy to walk through and free from clutter.
- Lighting: Choosing a space with lots of windows provides your music room with bright, natural light. Supplement the lighting in this space with a tall floor lamp placed next to the piano or beside music stands. Task lighting will make it easier for your students to see the sheet music and the instrument as they play.
- Soundproofing: You’ll want to soundproof your music room to keep the sound from traveling to other parts of your home. This is especially important if you have neighbors close by or other family members in the home who prefer peace and quiet. Use acoustic foam or sound dampening materials that you can apply to the walls to help absorb excess noise.
- Gear: Make sure you have all the necessary gear, including amplifiers for guitars and mixers, if you plan to record your students’ music.
- Furniture: Use a piano bench for piano lessons, and provide comfortable, supportive chairs for other instruments. Include a comfy couch or loveseat where students can lounge and relax in-between lessons.
- Fixtures and shelving: Install wall shelving or a bulletin board to create a lovely display. You can use these fixtures as a mood board, to share inspirational messages, or as a place to write down lesson information. If you need assistance, look for a handyman near you who can help you make any necessary modifications to your music room.
Classes you could teach:
Here are some examples of music lessons you can teach your students at home:
- Percussion instruments, such as the piano or drums
- String instruments like the guitar, violin, or cello
- Wind instruments including the saxophone, clarinet, or trumpet
- Singing and voice lessons
Tip: It can be daunting for parents to consider supporting their child in taking up music lessons on account of the noise – but don’t despair, there are a wide variety of options to choose from, including children’s drum sets that are much quieter than traditional acoustic drum sets.
Tips on how to teach music
Here are some helpful music teaching tips to help you get started:
- Make sure that you know how to play the instruments you teach. For example, know how to change guitar or violin strings easily if you want to teach the instrument to others.
- All music teachers should know how to read, translate, and teach sheet music — particularly piano players.
- Practice using clear, thorough communication when teaching your students so they can understand the fundamentals of music and the instrument they’re playing.
- Practice your instruments in your free time. Teachers are only as good as their skills and the experience they share with others.
- You don’t need a degree to teach music, but it’s good to have some experience playing a specific instrument or performing for others.
- If you teach high-level lessons, then it’s best to have prior teaching experience or a degree in your field.
- Remember to be patient when teaching younger students. Decide in advance whether you’d prefer to teach children, high schoolers, or adults.
- Set a goal for your students and plan your lessons before each session.
- Come up with a schedule that works for you as well as for each individual student. Flexibility is also important if your schedule needs to change once in a while.
- Keep an organized billing system to ensure timely invoices and payment. Use invoicing software designed for small businesses, so it’s easy to invoice your students, get paid, and track your payments for tax purposes.
- Continue to learn new music, techniques, and skills you can pass on to your students. It’s also a great way to improve your skills as you branch out and try new things.
- Market your music school so that you attract new students.

Dancing room
If you adore dancing and want to share your skills with others, you can set up a dance studio at home using these helpful tips:
- Choose a space: Make sure your dance studio is large enough to provide students with ample room to move around. Ideally, the room should be at least 10’ x 13-14’ in size, but bigger is always better. A rectangular-shaped room is an excellent option for a dance room, and it’s also easier to install mirrors and ballet barres on long, flat walls. You can use your basement, but ensure that you provide adequate cooling and ventilation. If you choose an attic or spare bedroom, you’ll need to invest more in quality flooring that dampens sound and is safe for students to dance on.
- Flooring: Marley’s special vinyl flooring is a prime choice for a dance room because it has an ideal texture for dancers to slide and grip the floor, depending on the move. Marley is sold in various sizes and goes on top of the subflooring. Make sure that all seams are secured and sealed, so your students don’t accidentally trip over the joints. You can also add a sprung dance floor that absorbs shock when your student leap, run, or slide. This flooring helps to prevent injuries since it provides a soft, safe surface made just for dancing.
- Mirrors: The mirrors in your dance room should go from the floor to the ceiling and stretch across the entire length of at least one wall. You may need to order custom-fit mirrors, which can be a costly investment. If these mirrors are too expensive, you can add individual wall mirrors along the wall, but make sure that they are at least taller than the tallest student you have. Dance studio mirrors must be tall so students can see themselves as they leap or jump.
- Handrails: Ballet barres are must-haves for any dance studio. Install these handrails on the wall directly across the mirrors, and make sure they’re securely attached to the wall studs. This ensures the barres can support the weight of your dancers without the risk of them coming loose or falling off. How high you install the handrails depends on the age of your students. Younger students will need the barres placed lower, while adults will need them placed higher.
- Ventilation: Proper ventilation is essential for a dance studio to ensure your students stay cool and comfortable while practicing. Make sure the room has proper heating and cooling so you can control the temperature and airflow. Additional fans can also help to keep the room cool and the air flowing.
- Lighting: The brighter your dance studio is, the better. Choose a space with lots of natural lighting or supplement it with many bright downlights that won’t get too hot when they’re on for an extended period.
Tips to Become a Dance Teacher
As a dance teacher you should know the movement techniques, terminology, cultural and historical context, and anatomical function of the dance style you are teaching. You should also understand how people learn at different stages of development and be able to execute tactics that assist them in gaining skills and understanding.
Dance teachers are expected to:
- Assist students in doing a warm-up, conditioning exercises, stretches, choreography, and cool-down in a safe manner.
- Teach safe dance principles; non-judgmental attitudes; positive body image; punctuality, planning and preparation.
- Show your love for dance with energy and enthusiasm
- Encourage self-expresion and creativity
- Create an emotionally safe space where students can grow and learn
Choose Your Dance Style
It’s important to pick the correct dance form to teach. Choose a dance form that you enjoy, are knowledgeable about, and, ideally, have certification in. Your objective is to create dancing courses that are engaging, participatory, and fun for your students. Each lesson should leave students feeling as though they’ve learned something new.
Styles of dance you could teach
- Tap
- Tango
- Dance Fitness Classes like Zumba, Ballet Barre, etc.
- Latin Dance Styles like Cuban or Puerto Rican Salsa
- Swing Dance
- Hip Hop
- Bachata
- Flamenco
- Ballet
- Jazz
Choose The Level You Want To Teach
Depending on your student’s’ ages, abilities, and dance levels, you’ll need to adjust your strategy. In order to ensure they can succeed at each level and develop confidence, you should introduce them gradually. It’s okay to introduce complex moves to a beginner student to motivate them, but don’t have them begin a really challenging routine right away! Even if you think they’d be up for it, we suggest starting the lessons off easy so that students may be proud of what they’ve accomplished in the first lesson and progressively adding more difficult stages in later classes.
Plan Your Dance Lessons
- Selecet the music your plan to use for the class
- You should be able to provide a brief overview of the dance you’re teaching. This way, you’ll be ready to respond to any queries newcomers may have.
- Review the dance vocabulary you’ll need to teach
- Set up the space and equipment needed.
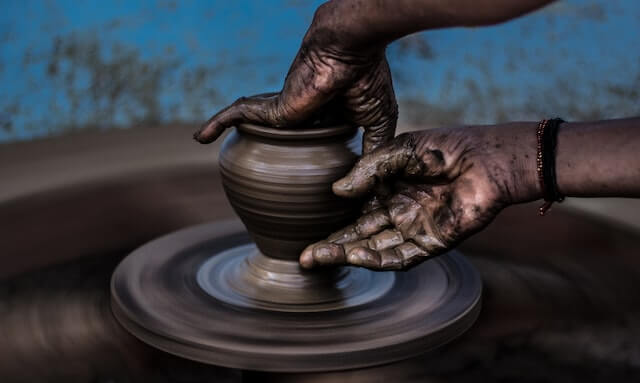
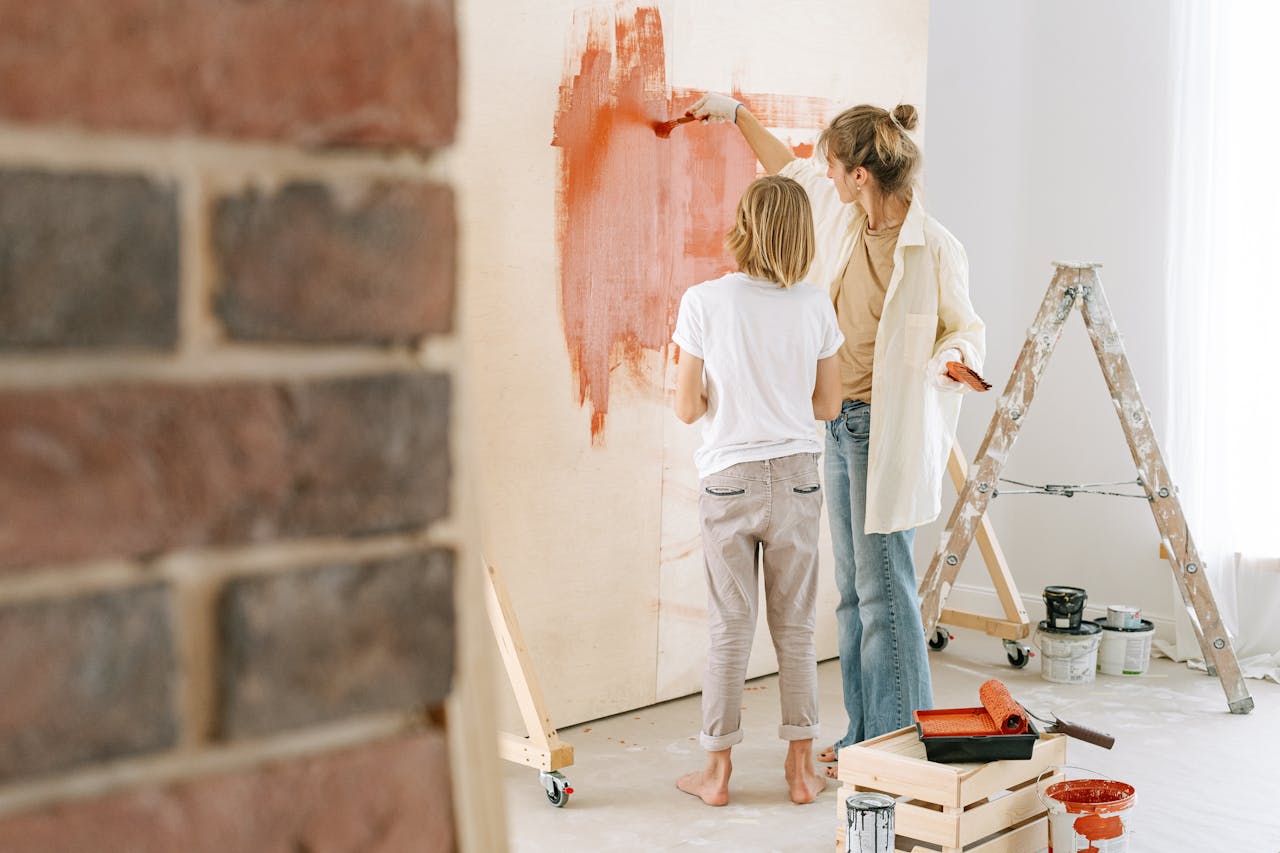
Setting up a sculpture and painting room
Whether you adore painting on canvas or crafting sculptures with your hands, you’ll need several key items to start your home art studio.
- Easels: Provide easels to hold canvases upright and make painting easier. Choose easels that fold for easy storage since art supplies often take up a lot of floor space. Always use sturdy, well-made easels that are simple to set up and take down.
- Organizers: From tons of paintbrushes and paint colors to clay, it’s crucial to keep your art supplies organized. Use clear bins to store and separate various items or try containers that clearly label the contents. Utilize vertical storage by installing wall shelving, so you have a place to organize your supplies without taking up too much extra room. Rolling carts are another great way to organize your supplies while providing easy access as needed.
- Paint supplies: Every painting instructor or art teacher should have plenty of available supplies. This includes a variety of canvases or paper in various sizes, lots of different brushes, palettes, and of course, plenty of paint. Decide which paint you prefer to use, whether it’s oil, acrylic, or watercolors, then stock up. Don’t forget to include clear glass jars for water that will help students clean their brushes when they switch colors.
- Sculpture supplies: The supplies you need depend on the medium you use to create and teach sculpture. For example, make sure you have plenty of clay or plaster so that each student has enough medium to work with. You’ll also need tools including chisels, hammers, rasps, sandpaper, and a comfortable workbench where everyone can sit as they sculpt. If working with hard materials, provide safety glasses, ear plugs, and gloves. Plaster sculptures require the use of a dust mask or respirator. Always provide a well-ventilated space to work in.
- Spinning table: A spinning table, banding wheel, or sculpture wheel is a must-have for making sculptures. This handy tool features a sturdy, round base that gently spins around as the sculptor works. Spinning tables also make it easy and convenient to paint every side of a sculpture if desired.
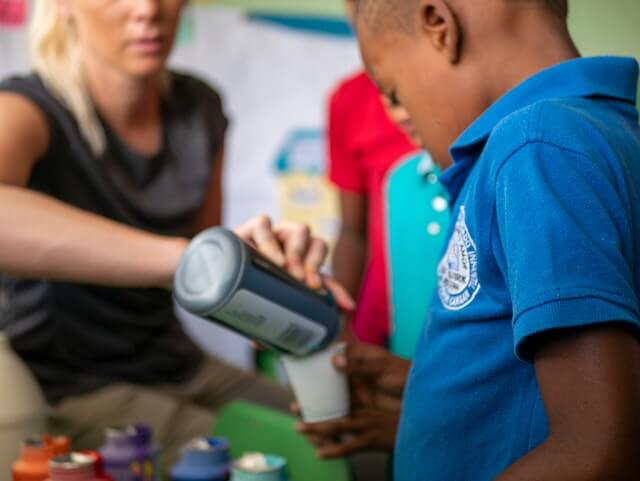
Tips on how to teach arts and crafts
Follow these tips for a successful art school at home:
- Determine your level of knowledge before you start offering lessons. Assess your skills to determine your specific level of ability, whether it’s painting, sculpture, or drawing. This is the best way to decide what level you plan to teach and how well-versed you are in particular art.
- Spend time training for various arts and crafts. Whether you enroll in some local classes or take courses online, practice is the best way to hone your skills so you can teach others in confidence.
- Practice using different supplies, including pencils, paints, paintbrushes, or clay. The more you practice, the more you’ll be able to show your techniques to others.
- Expand your horizons by learning new crafts and techniques you can teach to others.
- Think about what you need to invest in and how much you’ll need to start your art school. This will allow you the opportunity to plan ahead so that you’re fully prepared when you’re ready to market your services.
- Take time to plan your curriculum by creating lesson plans based on two to three per week for a full year. Having a fully planned curriculum helps you and your students stay on track.
- Decide which age group you prefer to teach, whether it’s very young children, teenagers, young adults, or older adults. This will determine your curriculum and the skill level you need to teach as well as what to expect from the overall experience.
- Remember that you are running a small business, so it’s important to advertise and market accordingly. Invest in some quality software that will help you schedule your classes, communicate with students, send invoices, and process payments.
Promoting your art school
Implementing a smart marketing strategy is the best way to gain and retain students for your home art studio. Here are some tips to help you stick with a plan that works for you.
- Develop a business plan: Make sure you have a solid business plan that includes key things like the startup and ongoing costs, your target market, and how much you plan to charge your students. This is also the time to decide what you want to name your business and if you want to design a logo and tagline. Budget how much money you’ll need to pay upfront and factor in the costs of things like supplies and maintenance to help you come up with a solid number to charge customers.
- Organize your finances: Every business needs to have a solid accounting system in place. This includes important details like your taxes, how much you expect to pay each year, and what you can use as a write-off. You should consider hiring an experienced accountant to help you manage your incoming and outgoing cash flow. Many accountants can also help you file your taxes each year to ensure everything is done right.
- Define your brand: Branding is the key to any successful business, so focus on who you are, what you stand for, and what you have to offer. Use various means of promotion to spread the word about your new art school and the types of classes you offer. Don’t forget to define your brand based on the medium (painting, dance, piano) and the age group you’re teaching, too.
- Maintain an online presence: To be successful, you’ll need to develop and maintain a solid online presence. Design a website that includes pertinent information about your home art studio, including the location, contact information, and your background. Ensure that the website includes your rates and availability and an overview of the lessons you offer. It is crucial to let people know how to reach your site. When creating your website, it’s also important to understand how to buy a domain name and make your website secure for your visitors. Set up several business social media accounts, including platforms like Facebook, Twitter, and Instagram. Social media is an easy, inexpensive way to engage with customers and reach your target market.
- Use marketing strategies: Promote your business through organic social media posts, paid online ads, and partnering with other art community members. Always advertise your school by speaking to your target market for the best results. You can also use an affiliate marketing program so that people find you through other avenues.
- Market your business by putting together a social media marketing strategy, having your own website, and creating an email marketing campaign.
Remember these crucial tips to help start your own art school at home. Make sure you look into all of the necessary permits and licensing in your area before starting your business. With a few simple changes, you can design a functional, profitable home art studio and school that your students will love. Art is a fulfilling venture that spreads creativity and excitement to others. Whether it’s painting and sculpting or music and dance, you can start teaching your love for the arts to others with the helpful information in this guide and a bit of persistence for a wonderful career you’ll love.


