Candles are the perfect piece to create a cozy, warm and fragrant atmosphere. They also have a good deal of uses. For example, candles can be used for aromatherapy, to decorate a romantic dinner date, to give a pleasant and relaxing touch to your bubble bath, to keep mosquitoes away, to keep your house a little warmer during winter, to be used as light sources in case of an emergency, and even just to serve as a decoration item to be sitting on shelves and other furniture. However, candles can also be somewhat pricey and have a limited lifespan. The good news is that it’s really easy to make your own candles at home! You will only need a few components, a good recipe to follow and some Candle Making 101 tips for beginners. So before you get started, read through our handy beginner’s guide that we’ve assembled with the help of expert candle makers and DIYers.
What equipment do I need to start making candles at home?
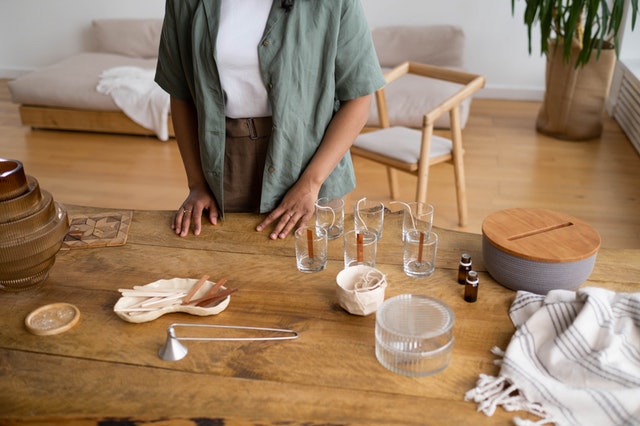
Making your own beautiful, fragrant candles at home is a fun activity–and easier than you might think! Candle making is both an art and a science, but something anyone can learn. If you want to get started with candle making, there are a few essential supplies you’ll need.
First, you will need a candle-safe jar or container, wax, fragrance oil, an appropriately sized wick, a wick sticker, and a melting/pouring pitcher. Choose fragrances that are created specifically for candles, like CandleScience’s line of high-quality, thoughtfully curated fragrance oils. With a wide variety of scents ranging from Apples and Maple Bourbon to Moroccan Cashmere, there’s something for everyone to love.
You probably already have some or all of the rest of the needed supplies in your home! Grab a pot or saucepan, a stirring utensil, and a thermometer so that you can add fragrance and pour the wax into your jars at the correct temperatures. Lastly, you will need a scale for weighing the correct amounts of wax and fragrance oil. Before you get going, make sure to check out a how-to video for tips straight from the pros.
If you want to jumpstart your candle making journey, snag an all-in-one kit. CandleScience’s Pro Candlemaking Kit has everything you need–including full step-by-step instructions–to make your own candles that fragrance your home or to give as thoughtful gifts.
Making your own candles allows for endless creativity and customization. Add candle dye for a pop of color, play around with different containers, try your hand at pillar candles–there is so much to learn and explore. If you’re ready to get started or want to dive deeper into learning the ins and outs of candle making, head over to candlescience.com
-Sean S. and Cassi H. at CandleScience
How can I make candles out of crayons?
Planning to dump your old crayons collection that’s just adding to the clutter in the house. What if we tell you that you can make them more functional with a simple DIY technique? This project is perfect for kids and grownups who are looking to get creative. So, let’s get started!
Step #1 Gather Your Materials
Begin with collecting these items:
Crayons
Wax
Jars with lids (cleaned and dried)
2 sticks
A wick
Essential oil
Water
A measuring cup
Step #2 Set Up
1) Measure the Wax
Candles made entirely of crayon do not burn well. So, you’ll need to add wax. Set aside enough wax to completely fill your candle holder. When you melt the wax, it shrinks. So, keep some extra ready after filling the candle holder.
2) Peel a Crayon
Crayons come with a wrapper. We don’t need this extra ingredient in our colorful candles. So, pick the crayons in the colors of your choice and peel off the wrapper. If the wrapper doesn’t come off easily, you can cut it off with a craft knife or soak it in water for a few minutes.
3) Crayons Pieces
Once you have got rid of the wrappers, cut them into small pieces for their easy melting. Now, set them aside. Make sure different colors are kept separate.
4) Secure the Wick in the Candle Jar
In the middle of the glass candle holder, place a tabbed wick and secure it with a drop of hot wax. A drop of super glue or a piece of double-sided tape can also be used. Some candle wicks with tabs will be self-adhesive. To keep the wick stable, sandwich the wick between two sticks so that it stands up straight.
Step #3 Melting the Wax
1) Set up a two-boiler system. 1 to 2 inches of water should be in a saucepan. In the pot, place a heat-safe measuring cup.
2) Fill the glass measuring cup halfway with crayons and wax. You can melt one color at a time.
3) Melt the crayon and wax over medium heat, stirring frequently using a Popsicle stick or a disposable chopstick. This aids in the equal melting and blending of the wax and crayon.
4) Remove the hot measuring cup from the water using an oven mitt or a pot holder with precaution. Place it on a heat-resistant surface.
5) You can add a few drops of candle fragrance or essential oil after the wax has melted which is optional. Thoroughly mix the wax to ensure even distribution.
Step #4 Pouring the Wax
1) Fill a candle holder with the melted wax/crayon mixture. If you want to make a layered candle, wait for 20-30 minutes until the first color layer is set. But if you’re going to make a solid-colored candle, fill it almost to the top.
2) For the layered candle, allow the candle to harden before adding the next color layer so that it doesn’t blend into the first.
3) Before using the candle, allow it to harden completely. Put the candles in the freezer for two to three hours covering them with a lid.
Step #5 Decorate the Candles
Decorate the outside of your candle jars using paint or markers with beautiful designs.
Tips and Tricks for Making a Crayon Candle
1) Store the crayons in the fridge before use for more vibrant colors.
2) Make sure your crayons are completely melted into liquid before pouring them into the jar. Else, the wax won’t solidify properly.
3) Pour your melted crayons slowly and carefully into the jar, filling it to just below the rim so that you don’t spill the wax on the outside of your candle.
4) Allow a minute or two for the hot DIY crayon candles to cool, before keeping them in the freezer to solidify. You can also keep them aside at a safe spot in your house to solidify them at room temperature.
-Yogesh Chavan at Mirraw
How can I calculate the burn time of my candles?
If you’re a candle maker or just a candle lover, you’re likely concerned about the idea of burn time when it comes to your candles. Burn time refers to the amount of time your candle will stay lit and melt the wax, thus creating an elegant and aromatic throw in your space. Typically, the higher the candle’s quality and the better ingredients and materials used to make it, the better the burn time will be. However, it’s important to know how to determine the burn time of a given candle. Here’s how you can calculate the burn time of your candles.
Step 1: Weigh the Candle
To start the process of calculating your candle’s burn time, weigh your candle on a food or kitchen scale. This is your starting weight and will be important to the final calculation!
Step 2: Burn the Candle
Trim your wick to ¼ of an inch—as you always should—and then note the time on the clock. Write down the time so you don’t forget! Then, light the candle to start its burn. After three or four hours, snuff out the candle. Make sure you write down the time you ended the candle’s burn as well!
Step 3: Weigh the Candle Again
After you burned the candle for that set period of time, weigh the candle again. This is your final weight, which you will use in the last step.
Step 4: Calculate!
It’s time to calculate! Subtract the final weight from the starting weight to determine the total amount of wax burned during your allotted time period. Then, divide the total time your candle was burned by the amount of wax burned during the time period. This gives you your rate of burn. Then, multiply the rate of burn and the total weight of your candle. The resultant number will be your total burn time!
-Joy R. at NaturalAnnie Essentials
What are fragrance notes and how can I choose the perfect combination?
Fragrance notes are essentially the layers of scent in any fragrance. There are three separate levels of every fragrance and they are called notes: top notes, middle “heart” notes, and base notes.
Top notes are the scents you smell right away and they are designed to draw you in. It’s the first impression you get when you smell a candle. If the top notes of a candle aren’t a fragrance you like, you’ll set the candle down and move on to the next. The most common fragrance oils used for top notes are citrus, lavender, berries, or clary sage.
Heart notes last the longest and are important because without this fragrance the scent would be unappealing. Heart notes support the top notes and the base notes and they blend well together. Heart notes are well-rounded and warm scents like vanilla, jasmine, rose, and some fruits.
Base notes are made up of fragrances that last longer than others. They stick around longer than the other notes so they have to be made of very strong oils. Sandalwood, musk, and amber make great base notes.
When you start blending your own fragrances, we suggest starting with fragrance oils that you are familiar with. Use blotter sticks to dip in your oils and then you can hold the sticks together and get an idea of how your creation will smell when blended. The farther in you dip your stick, the more fragrance it will emit. Keep a notebook of the fragrances you have tried together and write down your reaction to the scent so you can remember what you liked and didn’t like.
–Annette Belnap at Candle Warmers Etc.
What’s the difference between essential oils, fragrance oils, and natural fragrances?
The topic of oils can be complex. How are they made and what are they made of? And is there one best type of oil to use for candles?
Vellabox, a national candle subscription box, sheds some light on the topic.
Candle fragrance oils usually fall under one of these categories: essential oils or fragrance oils.
Essential oils
Essential oils are 100% potent oils from plants and natural ingredients. They have gained increasing popularity for meditation and aromatherapy.
These oils are more expensive than fragrance oils because the production process is pretty tedious–carefully hand-picking plant roots, leaves, fruit, or flowers and pressing the plant aroma to capture the oil.
Because essential oils can only be derived from naturally occurring sources, the scent variety is limited. Some common essential oils used in candles include lavender, lemon, cedarwood, eucalyptus, and rose.
Fragrance oils
After essential oils, the fragrance oil is a spectrum with varying degrees of natural and synthetic ingredients, both made from chemical compounds in labs.
They are found in many everyday products like:
- Scented candles
- Scented soaps
- Perfumes
- Room sprays
- Lotions
- & more
According to the International Fragrance Association, natural fragrances are made from a mixture of natural aromatic compounds, floral extract, and essential oils. Although they’re made in a lab, the chemical structures of the ingredients are not altered in the process.
Synthetic fragrance oils are made from chemical compounds that mimic certain scents. To achieve a wider variety of scents and to provide candles at a more affordable price point, you may choose to use synthetic fragrance or some sort of synthetic and natural blend.
Best Type of Oil to Use for Candle Fragrance?
There is a common misconception in the fragrance world that “natural” means healthy and “synthetic” means toxic. This is not always true, especially when talking about candle fragrance.
What’s more important than oil being natural is if it is safe to breathe in and free of any harmful toxins. Even 100% essential oils can cause irritation or adverse reactions to certain people while a non-toxic synthetic version may be a more sensitive, safer option for them.
Here is our breathe easy checklist when sourcing fragrance oils to scent your candles:
- Phthalate-free
- Paraben-free
- Cruelty-free
- Prop 65 Compliant (free from over 800 chemicals that the California Air Resources Board considers harmful)
What does Vellabox use?
Vellabox believes in using only the safest oils that will burn clean, smell great, and not irritate. We use a mix of both premium fragrance* and essential oils to create complex elevated scents. (*Premium fragrance is considered the highest grade of fragrance oil and deemed safe to use in all fragrance oil usages by the IFRA.)
In addition to clean oils, all of the candles we make and feature from other artisan brands are made with 100% natural wax and cotton wicks for an all-around non-toxic candle you can feel good about burning in your home.
We hope that this info will help you in your candle-making journey. Happy & healthy burning!
-Lydia Wachsmuth at Vellabox
How can I make a mosquito-repelling candle?
The easiest way to make a mosquito-repelling candle is to utilize water and citronella essential oil. Citronella is proven to deter mosquitoes and is a common ingredient in DIY bug repellents.
To get the most out of the citronella oil, we like to use floating candles. The heat from the candle in the water will make the essential oil work even better.
Here are the ingredients you will need:
- Floating Candles
- Glass Jars
- 25-30 drops Citronella Essential Oil per jar
- Fresh Lemon Slices
- Fresh Lemongrass, Rosemary, or Basil (optional)
- Water to Fill Jars
Directions:
- Add lemon slices to your jar. I do about 3-4 slices in an 8 oz jar.
- If you would like, add in some fresh lemongrass, rosemary, and basil. A little of each for looks and added repellent. For this recipe, I only used lemon which works great too.
- Next, fill in with water. Fill so that there is space at the top for a floating candle.
- Add in the citronella oil to the top.
- You can add some food coloring on the top of these for aesthetics. I am using natural Lemon food coloring to get that pretty yellow look.
- Place the floating candle on top.
- Light the candles and place them around your table.
The water combined with the oils is great to add to an outdoor table area or porch where people will be gathered. I like to place many of them around. It keeps mosquitoes, gnats, and flies away.
The EPA recognizes citronella essential oil as a biochemical, which means it is a proven non-toxic mode of insect repellent. Since they formally recognize it, this means it has proven successful in repelling insects!
-Alexis Rochester at Chemistry Cachet
How can I know which kind of candle wax to choose?
For those starting out, the most important choice I would say that needs to be made will be choosing the right wax for your needs. Choosing the right wax can help your candle making project go smoother. Without using the proper wax you may not achieve your desired results. Years ago it was a pretty straightforward process the type of candle you were making would dictate the type of wax used. For containers, it would be a melting point between 120-129, votives 130-135 F and for pillars and other freestanding candles, it would be a wax with a melting point above 140.
However, this is 2022 and the choices almost seem endless and can at times be overwhelming. If you follow a process it can help make the choice a bit easier. The first decision will be what type of candles are you making: containers, Pillars, free-standing, or tapers. With each of these different types of candles, you should use a wax designed for that application.
Once you determine the type of candle you wish to make you can start to narrow down which wax is designed for that application. With containers, you have a myriad of options including Paraffin, Hybrids (paraffin with a mixture of a natural component), Natural wax, or a blend. Each of these types of waxes will help achieve the end-users results. Each wax will offer pros and cons to its use.
If the proper paraffin wax is chosen it will generally offer the best performance with fragrance throw. Paraffin waxes also are a little more forgiving with process and fragrance loads.
Natural waxes seem to have the most consumer acceptance right now in the marketplace. There are many different natural waxes on the market, such as Soy, Coconut, Beeswax, Palm, and blends containing these and other natural ingredients. Natural waxes generally have a lower melt point than paraffin which can cause issues during warmer months and warmer climate areas. Natural wax will require a specific process to be followed to achieve the best results and will vary depending on the manufacturer’s instructions.
Another great option for candle makers would be a “hybrid” which is a blend of Paraffin and Natural waxes and takes the positive attributes of both types of waxes. The hybrid can be of any combination of paraffin and natural waxes. These waxes are generally forgiving, good performing waxes and offer the advantage of having some natural element to them.
No matter what level of candle making you wish to achieve, choosing the right wax is imperative to get the process right. When it does come to choosing the right wax, you will need to match it to the type of candle you want and the one that will achieve the results you wish to achieve.
– William Binder at Candlewic
What are the main requirements of a candle label?
When labeling a candle for sale, there are a specific set of requirements one must fulfill. An important detail to note is that all the following information does not need to be present directly on the candle itself if there is also outer packaging. The outer packaging, usually in the form of a custom printed box, can display this required information while the candle itself can be minimally labeled.
The first requirement of a candle label is a “statement of identity” which clearly indicates the product type (candle, wax melt, etc.). Many candle makers also indicate what type of wax the candle is made from, such as 100% soy wax. In this section, it’s also recommended to include the scent name, whether it is literal or fanciful.
You’ll also need to indicate the net weight of the candle in standard and metric units. Keep in mind that the net weight is only that of the wax and wick, not the vessel itself. The net weight must be displayed on the bottom 30% of the label, whereas the rest of the information does not have specific requirements for placement.
Next, you’ll need to include your company name and location on the label as well as mandated by the Fair Packaging and Labeling Act (FPLA). Most candle companies take this opportunity to incorporate their logo and another branding to showcase this information. Clearly state city, state, and zip code on the primary label.
One extremely important feature of your candle label is the safety or warning label. This warning label is commonly placed on the bottom of the candle itself, as well as on any outer packaging. The warning label must include the word WARNING as well as the following:
- Burn within sight.
- Keep away from flammable objects.
- Keep away from children and pets.
The safety label must be text only or an abbreviated or pictographic version on smaller candles and votives. The National Candle Association has pre-designed safety labels on their website with all the pertinent information you need.
-Lauren Patterson at Frontier Label
What’s the best way to glue my candle wick?
Candle making at home could mean you do not have access to industrial manufacturing tools and components that candle factories or professionals do. Not to worry! We have a quick, easy, and affordable method to glue your wick into your candle container.
The best way to glue your wick when making candles at home is to use the wax in your candle making kit. Assuming the wick is attached to a sustainer (a small metal circle at its base), pour a tiny bit of your molten wax into the container provided. 1mm should be about right and place the wick and sustainer immediately in the middle of the container before the wax sets.
Allow the wax to set before you try any further candle pouring. It is important to keep your wax at an optimal temperature for pouring candles. Depending on the wax supplied, this can vary between 50 and 60 degrees + or minus a little.
When you attempt further pours on your candle, you do not want the wax to be too hot, as this will melt the existing base of wax, and it will keep your wick in place. If you pour the wax too hot, and the wax keeping your wick in place melts, you simply need to stop, reset your temperature. And make sure the wick is still in the middle of your container.
Wax, which is poured too hot, tends to shrink, leaving dips or holes in the finished product. Wicks supplied in your candle making kit can be waxed or unwaxed. The waxed option is great, as it supports the wick when standing up in the container and helps it stay straight and in the middle without flopping or moving. It also helps with the first light since the wax is combustible. If you have unwaxed wicks, you should get tools or advice on how to keep the wick straight.
-Stephanie Barnet at Shearer Candles
How can I get a smooth finish on soy candles?
A few things to remember before pouring your wax:
- The temperature of your wax is crucial for obtaining a smooth finish. You can adhere to the temperature requirements based on the type of wax that you are using (wax manufacturers will usually list these requirements in the product details section).
- A heat gun is a handy tool that can help you smooth out the top surface of your candle which helps the candle burn evenly.
-Valencia and Eli Morr at Peacesake Candles
How can I avoid my candle from smoking?
Every candle ingredient plays a role in creating a “low-smoke” candle, including the wax, fragrance, wick, and wax additives. Balancing ingredients to allow the perfect amount of oxygen to your flame is the key to perfection.
Regardless of all other aspects of candle making, If you start with bad wax, you may never make a low-smoke candle. Low-cost wax is usually made of low-quality materials, including anything from imported “unknowns” to solid gasses. Your supplier will rarely be of assistance in this area as wax refiners don’t know much about candle making. You may be able to get a little advice if you’re working with a processor instead of a refinery but in any case, you should test each available wax poured into a complete candle, burned start to finish, to see which one offers the qualities you seek.
Surprisingly, some fragrances, no matter how high-quality, encourage soot/smoking. In this case, testing takes priority over purity & quality. If you suspect the fragrance has a smoking problem, meaning all other possibilities have been ruled out via testing, you can ask bigger suppliers for a scent reformulation. If it’s not realistic to ask for a reformulation (small scent-supplier-reseller), you should move on to a different fragrance. It’s not worth potential continued problems to try forcing it to work.
The wick is the final puzzle piece. You see claims of “natural wicks” and “smokeless wicks” or “soot-free” wicks. First, regardless of how great “natural” sounds, cotton, paper, and wood are some of the worst smokers so if that’s where you’re starting, prepare to struggle. And second, where there’s the combustion, there will be smoke so there’s no such thing as a smokeless wick. There is only ingredient control, oxygen control to the wick, and wick-trimming.
To find the best wick you can either ask your wick supplier to test for you or you can test the wicks yourself. When you test you learn so that’s the best option. To do your own testing, you should start with all potential wicks, putting each one into a candle and burning it to the very end. It’s good practice to get the advice of the wick supplier for which wick is best used for candle size and wax type, to eliminate extra tests.
There are no shortcuts for the perfect low-smoke candle. You must commit to testing. After you’ve optimized as far as you can with testing, the rest will be in wick-trimming. Finally, train & remind users to trim the wick. You would be shocked how few people know to trim their candle wicks or to even trim them more than once during extended burn-times. Often that causes more smoking problems than the candle formula. Not even the perfect candle is capable of low soot when the flame is two inches high!
-Lisa Clark at UnEarthed Candles
What are the benefits of using soy wax for candle making?
In our 20+ years of candle-making experience, having worked with both paraffin wax and soy wax and researching other natural waxes such as beeswax and palm wax, we’ve learned there’s no other wax that compares to sustainability, longevity, and scent quality of soy wax. Soy wax is better for you and the environment: it’s clean-burning, soot-free, non-toxic, and carcinogen-free so you can breathe easily. Soy wax is eco-friendly and sustainable because it’s made from hydrogenated soybeans, a renewable resource that supports farmers; whereas paraffin wax is a petroleum byproduct, a fossil fuel that’s a non-renewable resource.
Due to its lower melting point, soy wax lasts up to 50% longer than paraffin: because soy wax doesn’t get as hot, it doesn’t burn off as quickly as paraffin. Soy wax is all-natural so there’s nothing chemical to get in the way of the scent: you smell the pure fragrance. Working with the same fragrance in both soy and paraffin waxes taught us the huge difference in the quality of scent: scented soy wax softly fills your space as opposed to punching you in the face like scented paraffin wax can. When I’ve burned Frazier Fir made in paraffin wax, it would choke me when I walked into the room where it was burning because it was so abrasive and overbearing; however, I can burn our Frazier Fir made in soy wax all day at our booth during the holiday season and enjoy every second of it.
In regards to actual candle making, everything comes down to weight. Soy wax is easier to work with because it comes in shavings or flakes which are easy to weigh precisely. Paraffin wax comes in brick sheets so it can be more difficult to weigh out. Soy wax is also biodegradable: should any melted wax spill (and it will), clean-ups are easy. Because of its lower melting point, soy melts faster than paraffin: for candle making, this means you can begin mixing scent and pouring sooner. One thing to note: fragrance oil can take up to 2 weeks to fully cure in soy wax, so you’ll want to let scented soy candles sit before you burn them. Like fine wines, scented soy candles get better with time.
-Stacey and PJ at Lit Up Candle Co.
What is tunneling and how can I avoid it?
One of the most frustrating problems, when you spend money on a luxury candle, is when the wax tunnels. Tunneling means only part of the candle melts down the middle and excess wax is left to waste around the outside of the container. And one thing we dislike at Valley Mill is waste.
Even though it is a very common problem, there is a very simple fix. When burning a candle, make sure to allow a full melt pool to develop before extinguishing the candle. Allow the wax to melt completely across the surface, to the edge of the container, before blowing it out. It is very important to ensure this, particularly, the first time lighting the candle due to the wax’s ‘memory’. The wax memory means the first time you melt soy wax; it creates a pattern for how it melts during future uses.
The time it takes to achieve a full melt pool varies, depending on the size of the candle and the type of wick. For our wooden wick candles, we recommend burning the candle for roughly 3 hours before extinguishing it.
One of the most common issues we are asked about is why a wooden wick candle won’t relight after the first burn. This can be caused by tunneling, but the most common fix is simply to trim the wick.
Once a wooden wick has been lit and burnt for a few hours, it leaves behind black, charred wood. Like on a normal wood fire, charred wood won’t burn properly due to the lack of oxygen. If you try to relight a wood wick that has not been trimmed, you will likely find that it either does not burn properly at all or will only light for a few seconds before extinguishing itself. Not only will an untrimmed wick struggle to relight, but it may also cause excessive smoke or not melt the wax properly, becoming another cause of tunneling.
The charred section of the wick should be easy to remove; either break off the black wood or use scissors or nail clippers on sections that are harder to trim. It’s also important, however, to make sure not to trim the wick too much. It may become submerged in melted wax and will make the candle even more difficult to light in the future.
This also goes for standard string wicks too. Trim the wick so that it burns properly, reduces excessive smoke, and doesn’t become so long that it falls into the melted wax. However, don’t trim it too much that it becomes submerged in wax and cannot be relit.
-Sian Martin at Valley Mill
What kind of fragrance oils should I use for my candles?
In order to appropriately answer this question, you need to first ask yourself some other questions:
What is the purpose of my brand?
-Luxury candles: you’ll want to use a high level (10-18%) of expensive fragrances, or perhaps essential oils.
-Value Brands: use low levels (2-4%) of inexpensive fragrances.
-Something in-between: there are several fragrances that deliver tremendous cold and hot throws for a very reasonable price.
What is my wax base?
-Paraffin waxes tend to give better cold throw (the smell of the candle when not let). This is because of the petrolatum component in most paraffin wax blends. It’s a softer wax that allows the fragrance to dissipate into the air.
-Soy waxes seem to be the preferred wax for many consumers. It burns cleaner and cooler and is usually water-soluble for easier clean-up in the case of spills. Most fragrances work well in soy, though some fragrances use carriers that don’t work well with soy. Benzyl Benzoate is one common carrier that burns well in paraffin, but not in soy.
-Beeswax is an expensive natural wax with its own honey fragrance notes. This can affect your fragrance.
-Coconut Waxes are generally blended with paraffin or soy since they are so soft, Coconut can give your fragrance a boost in much the same way as petrolatum.
-Blends generally refer to soy/paraffin, but can include the above and include some waxes not listed here. Wax blends can give the best of all worlds. A soy/paraffin blend, for example, can give the fragrance “pop” of paraffin while offering the cleaner burn of the soy.
Will my candle be free-standing, or in a container?
-Adding fragrance (a liquid at room temperature) to wax (a solid at room temperature) will obviously soften your candle. You can add more fragrance if your candle will be supported within a jar. For votives, pillars, and tapers, you will need to either use less fragrance or use a much harder wax, like beeswax.
What kind of wick will I use?
-Cotton wicks tend to work well with candles, though fragrances tend to wick differently through different types of wicks and using different types of waxes.
-Wooden wicks don’t create near the brilliance of a flame from a cotton wick, but can generally tolerate a much higher percentage of fragrance oil. More fragrance means more crackle in a candle with a wooden wick.
There are many other things to consider, such as the desired price point, whether or not the candles will be shipped, and where the end-user will be using the product to name a few.
In the end, the most important thing that a candle-maker needs to understand is the need to test, test, and test again. Successful candle companies understand that careful consideration of the details will help them stand out from the crowd.
-Eric Sparrow at Milkhouse Candles
What is candle sweating and how can I avoid it?
What is sweating?
Sometimes, especially in warmer weather, you may notice a thin layer of oils sitting on the surface of your candle. Rest assured, sweating does not affect the performance of your candle, scent throw, or duration of burn. Sweating can be caused by warm weather, direct sunlight, or changes in temperatures. Due to these changes in temperature, the natural oils in the wax start to separate and come to the surface of the candle.
How do I fix it?
Before lighting, you can simply wipe off the excess oil using a paper towel or tissue.
How can I prevent sweating?
Keep your candle away from drafts, direct sunlight, or rooms where the temperature fluctuates. Other than that, light it up and enjoy! 🙂
-Andreea Apostol at Terradomi
What’s the difference between candles and wax melts?
Candles have been part of our lives from the beginning of time. Used for light, scent, and atmosphere, they have grown to be one of the more affordable luxury items that people can enjoy. The technology is simple: a vessel filled with wax and a wick. Not a new kid on the block, a sometimes lesser-known relative is the wax melt.
Candles are a great way to create a welcoming atmosphere in your home, with a scent that evokes positive memories or brings you joy. One of the concerns that some people have about the use of candles is the need to attend to an open flame. If you are burning the candle in a room that you are in near-continuously, this probably isn’t a big deal. But if you want to have a candle going in a space that you are in, people may choose not to risk it. This concern only grows if there are children in the house. As comes our friend, wax melts, which is a great option.
Wax melts are made from a similar wax base, which can be scented and decoratively shaped. The wax is designed to melt at a lower temperature. This allows them to be placed in a “melter”, which is a low-temperature heated dish, which melts the wax. This releases the same fragrance into the room, without the fear that you have an unattended flame. Wax melters can also be a piece of decor, to match any design sensibility from rustic to modern.
The primary downside to wax melters is that it requires an additional purchase of a melter to be able to use them. While melters aren’t incredibly expensive, this fact makes them a bit more difficult to give as gifts than a candle.
You can’t go wrong with a candle or a wax melt. The hardest part is finding a scent that matches the mood that you want to set in your home. And despite what my husband says, there is no such thing as too many candles. I just make sure to correct him by saying “I don’t have enough candles OR wax melts
-Tenisha Dotstry at Fair Winds Candle
How do I know how many wicks to place in my candle?
Do you want to make a candle, but don’t know how many wicks to use? You’re not alone and even professional candle makers have challenges when choosing the perfect wick setup. In this guide, I will explain how I would suggest wicking a candle for an absolute beginner.
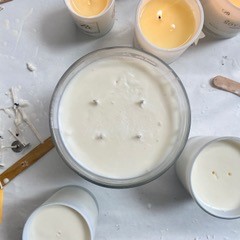
It would be ideal to start with a jar 3” or less and 1 wick. This will show how one wick performs on its own. Once you’ve poured your one wick candle let it harden overnight. Now you’ll perform a test burn. When the wick is lit, the wax should ideally pool to the edges within an hour or so.
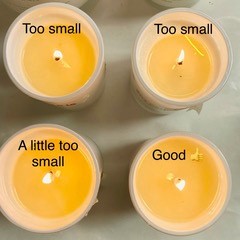
There are 3 possible outcomes of this test burn:
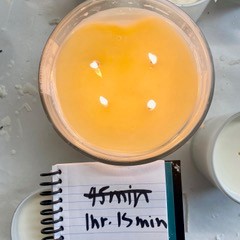
-It’s perfect! It burns (pools) the wax to the edges in 45 min. to an hour or so. Awesome, well done!
-It pooled to the edges in less than 45 min. The wick may be too large for this jar. The jar may get too hot, crack, and/or make the jar black. Solution: size down your wick and repeat your test burn with a smaller wick.
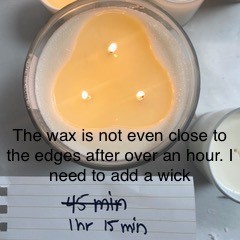
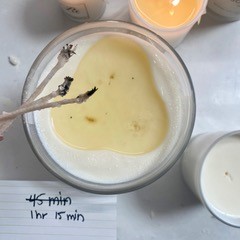
-It didn’t pool to the edges after an hour. The wick may be too small for the jar. A wick too small will cause your candle to leave wax on the edges and tunnel down or even put itself out. Solution: size up your wick and repeat your test burn.
Now larger candles won’t be so daunting. Now that you know how big a pool of wax one wick makes, all you have to do is see how many of those pools would be required for a larger jar. For example, if your 1 wick candle was 3” in circumference and the larger jar you want to wick is 9”, start with 3 wicks then do a test burn. The same possible outcomes above will determine where you go from here.
Here I used 3 wicks (the same wick size as my 1 wick candle) for our new XXL 50 oz jar. As you can see it is not burning to the edges within an hour or so. At this point, I stopped the test and used my “hack” to insert new wicks.
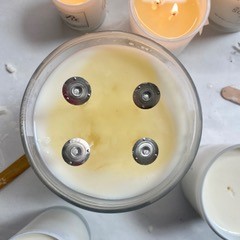
I re-wicked my XXL candle jar using the same wick but I added a fourth one. I’m happy with the result.
My general rule is to use 1 large wick for jars smaller than 3” in diameter, 2 medium-sized wicks for a jar 3-4” in diameter, and 3-4 medium or large wicks for jars larger than 4”. To be clear, this is very general and the number of wicks used depends on how large a pool each wick makes. The more wicks you use, the more potential there is for them to not burn evenly. We prefer to stick with 4 wicks or less.
BONUS! THE TEST BURN HACK
Test burns are important, but kinda a pain. My “Hack” makes it easy to test a jar without having to burn the candle all the way down.

We usually would glue our wicks down, but with this hack, you will wick upside down. This will allow you to pull out and replace the wicks of your test burn candle.
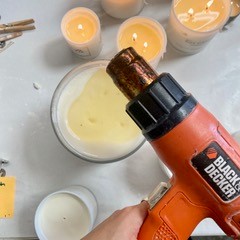


After an unsuccessful test burn, I pulled out the old wicks. I used a heat gun to even out the top layer of wax. I could have also filled it with more wax. Then I poked holes where I wanted my new wicks and placed the wicks in the wrong way. The candle was good to re-test in about an hour.
Don’t worry if your candle isn’t perfect on the 1st try. You’ll get better the more you play.
*Please note that this is only for test candles. The wick will not be stabilized at the bottom and should not be left unattended.*
-Jocelyn Levine at Rx Candles
How can I choose the best fragrance for my candles?
When developing your candle business, you need to understand that you are entering the fragrance industry and therefore your customers need to relate to your brand in an olfactive signature memorial way. The most important aspect (other than the safety of your product) is the fragrance or scent.
Unfortunately smelling the fragrance from the bottle or on a perfume blotter is different than smelling the same exact fragrance in a wax.
A candle has a hot and cold scent throw. People buy candles based on cold scent throw and then they expect the same fragrance to be present in the burning candles. Some brands do disappoint here and that is understandable as candle making is widely deemed as a craft (the reason why many candle making brands cannot survive) where in fact candle making is a science, art, perfumery, and a very know-how craft. Many designers hire a perfumer to design a fragrance for the candle application. Melting wax and pouring the fragrance in the melted was seems very easy but getting the fragrance to perform in the wax requires serious product development and expertise.
I do not want to disappoint but not all fragrances are suitable for candle making and therefore when you choose a fragrance for your product you must take that into consideration. The best way to avoid potential incompatibility problems is to find suppliers who are specialists in candle fragrance supplies.
When developing your candle you need to take into product development your brand’s DNA, your ethics, your culture, your ideal customer, and design a fragrance based on your brand’s value so as to build a warm and unique association with your brand.
-To help you decide think about the following:
-Emotional connection with your brand
-Think how fragrance can be associated with emotions such as happiness, nostalgia, energy, etc
-Sustainability
-Is your fragrance sustainable?
Uniqueness
How unique your fragrance is? Think about bespoke options so that you can clearly differentiate your brand and stand out from the crowd. Take professional custom fragrance workshops or hire a perfumer to assist you.
Testing Compatibility
Testing the fragrance takes time and expertise. Be prepared to be disappointed until you get it right. Hire a professional to perform product development on your behalf which saves time and money.
The most important recommendation is that you need to follow your own nose and work with professional reputable suppliers, consultants, and perfumers who will guarantee that your product is different, safe, high quality, and sustainable.
-Zaga Colovic at Beauty Handmade
How do oil candles work and how long do they last?
Oil Candles and Lamps, also known as Liquid Candles, have been used throughout the ages and are now gaining more popularity due to functionality, sustainability, and ambiance. Refillable Oil Candles last forever and are generally made of borosilicate glass which is very elegant, yet strong.
Refillable Oil Candles use a cotton or fiberglass wick to draw fuel. When you light the wick, a chemical reaction called combustion occurs creating a gas. The flame you see is the reaction between the gas produced and oxygen.
Wicks should be set ever so slightly above the wick holder as too much wick exposure will result in smoke, an indicator of incomplete combustion. Setting the wick no higher than 1/16”, will ensure maximum combustion providing a clean burn and conserving fuel.
The wick is the highway for the fuel. Please be sure the wick is completely saturated before lighting it. If you light the wick before it is completely saturated, you will burn the wick and experience smoke. Wick Maintenance is very important and easy. If you notice your flame is not performing as it once did, it would be a good time to trim the end of the wick of excess soot build-up. Simply, push the wick up and trim the scorched area, untwist, and reset. The biggest tip is to never let the candle run dry of fuel. This will severely limit the life of the wick, and you will need to trim it more often.
Average burn times using a small, round cotton wick are approximately 6 hours per ounce of fuel. This will vary based on the height of the wick, wind, and the brand of lamp oil. Lamps oils differ widely in their performance characteristics. Look for non-toxic, non-petroleum, biodegradable, odorless, and eco-friendly fuels, like Firefly Fuels, for the best performance.
-Susan Tyson at Firefly Fuel
How can I involve my kids in candle making?
Making candles can be a fun and rewarding experience. It’s a project that involves science and where creativity can shine but it can also pose some dangers. So how can I involve my kids in candle making in a safe and appropriate way?
First, decide what type of candles you want to make. Then determine the level of involvement that is appropriate for your child’s age and skill set. This first part can be a whole adventure unto itself as there are seemly endless possibilities of types of candles to make. Explore child-friendly sites and books to determine what type of candle you want to start with. Dipping candles is a great beginning project as it simply involves a wick, a pot of wax, and a pot of water. We’ve done these with kids as young as age two. Other kid-friendly candles can be sand candles, milk carton candles, and even balloon candles. All of these provide fun and unique experiences that kids can really get into.
If your child is afraid of the hot wax or you determine it’s best to keep them away from the hot wax, fear not! There are still many ways to involve them. They can help pick out what type of candle you are making. They can determine the color. One thing we have done is to buy plain wax and then add bits of crayon nubs to color it. They love adding the crayon bits and seeing the results. The same premise is with adding flower petals or in the case of milk carton candles, adding some crushed ice for the marble effect.
Once the candles are made, allow the children to decide what to do with them. Will you burn them? Then you will probably need to snip the tops and flatten the bottoms, both appropriate child-friendly tasks. Are they gifts? Have your children wrap them with raffia or ribbon for a personalized touch.
Older children will love making poured candles. This will involve a double boiler so adult supervision is highly recommended. Pouring candles can get real creative very quickly with additions of scents, color, even surprises that will be uncovered as the candle melts. Truly the possibilities are endless. We’ve found it very rewarding. We’ve dabbled in history, in science, and made many a personal gift, the latest being poured coffee candles which our daughter did completely on her own with simple supervision. Be safe and have fun!
-Jen Tousey at This Family Blog
How can I calculate the amount of fragrance oil I need for my candle?
Choosing the right amount of fragrance oil is a delicate process. If you don’t add enough, the candle lighting experience will fall flat. Adding too much oil can overwhelm a person. Causing them to immediately extinguish the candle, cutting that experience short.
There’s a simple formula that you can use to avoid either extreme.
Calculating Your Fragrance Oil
Adding the right amount of fragrance oil involves multiple factors, like the type of vessel, wax, and wick being used. But in short, the authors of The Scented Candle Workshop suggest an oil to wax ratio that ranges “between 6 and 12 percent of the total volume of your vessel.”
Adding less than 6 percent will likely produce a candle that won’t release much fragrance into your space. If you were to add more than 12 percent, you might find that your wax won’t settle properly.
Vessel Volume
Container candles are the most popular form of candles sold in the U.S. It is important to read manufacturer specifications for your candle jar size. For instance, a 14 oz jar might only hold 10 oz of wax.
So your vessel volume is the maximum space within the container that can hold your wax.
Wax Limitations
There’s a limit to the amount of fragrance that can be loaded into the wax.
Whether you are using soy wax, paraffin wax, or a blend, you will want to check with the manufacturer to inquire about that maximum fragrance percentage. In some cases, 10 percent is the maximum.
Once you have all of this information, you are in a better position to calculate the amount of fragrance oil that will be needed for your candle.
The Fragrance Oil Formula
Say for example you are testing out a new fragrance and want to make four candles inside a 14 oz glass jar using an oil to wax ratio of 7 percent.
Remember that in this case, you will need 10 oz of wax for each jar. So 40 oz of wax will be used in this example.
Here’s the formula: (fragrance oil %) x (wax in oz) = oz of fragrance oil
Which translates to: 0.07 x 40 = 2.8
For this example, you would use 2.8 oz of fragrance oil for a 40 oz batch of candle wax.
Obtaining manufacturing information from your supplier should be a straightforward process. If this information isn’t easily accessible, you may want to search for a different supplier.
Although candles are simple to make, they do require quality ingredients, patience, trial and error, and testing.
Repeatedly testing your formula will determine the exact percentage of fragrance oil that will work best for your candle
-Grace Young at HouseFragrance
Why are homemade candles better for aromatherapy than store-bought ones?
All aromatherapy candles are not created equally. Most of the candles which you buy in-store are synthetic in nature and are therefore not true “aromatherapy” candles. It takes a lot of essential oils to successfully create an aromatherapy candle, so they are expensive to purchase. If it’s cheap, it’s probably not made with essential oils.
You can make aromatherapy candles at home easily with either beeswax or soy wax. You can add the essential oil/s of your choice, although essential oils with a “deeper” aroma will last longer. Lighter, volatile oils will disappear rapidly with minimum aromas, such as citrus oils. Try to go for heavier florals, resins, pine-based, or balsam oils.
You can purchase wax, wicks, and oils from reputable suppliers. You’ll also need a fun mold or glass container to make your candle with. You get to create your own designs and can even add in some fun colors! Once you have your basic supplies, you can create more candles as you need to. In the long run, this works out cheaper, is better for the environment, and is more fun than purchasing store-bought aromatherapy candles. You also know that you are creating a true aromatherapy candle, and not bringing harmful chemicals and toxins into your home with a cheap, store-bought version.
If you do buy a store-bought aromatherapy candle, check what it is actually made from before purchasing.
-Sharon Falsetto at Sedona Aromatics
Should I use essential oils or fragrances for my candles?
First stop… A little bit of science
It’s important to know the flashpoint of each oil you are using. Likewise, flashpoints differ depending on what wax you are using.
With most natural wax (soy, coconut, or beeswax) you must stick to using mostly fragrance oils. Essential oil IS possible, but not ideal, in fact, too much can be dangerous. It has a higher flashpoint than the natural wax can support. Whereas paraffin wax can withstand oils with a higher f-point. Some makers even use perfume bases in paraffin candles.
2nd stop: Scent
Essential oils vs fragrance oils? One of the first things I learned is that fragrance oils will only smell for a cold throw. So when lit the scent all but disappears.
On the other end of the spectrum, fragrance oils don’t always smell to their true scent until they have had heat added.
- Essential oil = cold throw
- Fragrance oil = hot throw
This was a frustration of mine, as I wanted our product to smell as good when you open it, as it does when you light it. First impressions count. With the right blending and a bit of trial and error, I found the right balance of both.
For example. One of our biggest sellers during the holidays is ‘Fir and Vetiver’ It has 4 different types of Conifer and vetiver to round it out. It truly is magic. Though, it was smelling a little sour and sharp without the flame to bring out the darker tones. So, by removing 5% of the Vetiver (F.O.) and replacing it with 5% of natural Fir essential oil, it took away the overtones of un-lit Vetiver and great lifted the first experience with the candle, giving it a true allure and setting up the experience for the customer. 5% out of 100% is a drop in the ocean, but it really made it pop and become a seasonal favorite.
Making testers and enjoying the trial and error of trying to get it right has taught me sooooo much.
Note: Please use only essential and fragrance oils that have been certified, made by a reputable company, and made of good natural ingredients. Not just for health reasons, but there will be less black residue as it burns off. Badly made essential oils can combust and ignite the wick. Our rule; If California has tested it and approved it for use and sale, then it’s going to be good to use.
-Kurt Phelan at We Light Candles
How can I color my candles?
If you are looking to add your own personal touch to candle making then you may want to experiment with trying out different ways to color your candles. There are a few different ways you can color your candle. You can use dye blocks, liquid dye, or pigments. It is important to make sure the dye is rated for candle making. A common misconception is that you can use crayons to dye your candles. Even though you may get your desired color by melting the crayons into your wax you may end up with a clogged candlewick. This means your candle won’t burn correctly.
Candle block dye is highly pigmented wax chunks. You can shave the wax off of the block to create your colors. What I enjoy about block dye is you can shave off as much or little as you want so you can create a range of colors from just one block. This is really handy if you are going for a pastel color. Liquid candle dye is easy to work with and very concentrated. A little goes a long way! Liquid dye is great if you want a very vibrant color. Since it is so concentrated you don’t have as much color range compared to the black dye.
Dye pigments are another option. This dye is usually only used when making carved candles. Now that we have talked about different options for dye I will note that all candle wax may not take dye very well. Soy candles are known to develop frosting on the wax. This is very normal for this type of wax, but the white frosting does stand out when you add dye to your candles. Many soy candle makers don’t add dye for this reason. You can combat this issue by allowing your candles to cool in a warm area or warming up your containers before pouring the wax. Paraffin wax takes dye very well so you can try making candles with paraffin or mixing the paraffin with soy to create a more uniform color in your candles.
-Tiana Coats at Winding Wick Candles
How do I melt candle wax and what equipment will I need?
There are a few different ways to melt the candle wax. One of the most popular methods of melting candle wax is to heat water in a saucepan and to place a container inside the saucepan to melt the wax in, which is the double boiler method. You will only need a few inches, or about half a saucepan of water to do this.
You can use a special metal pitcher designed for melting candle wax for this, also a pyrex glass jug, or any other heat-proof container.
Measure out the required amount of wax (a good rule of thumb is to use about double the amount of wax as the container you will be placing it in). Place the wax inside the container of choice and then place the container into the pan of cold water. Heat up the saucepan of water, which will then melt the wax inside.
As the wax melts, stir it with a wooden stirrer to make sure there are no lumps forming and to break them down if they do (wooden stirrers are best as the wax can easily stick to metal and other materials). You may want to use a special candle making thermometer to make sure the wax is reaching the correct temperature (the temperature needed depends on the type of wax you are using, but usually melted wax needs to reach about 180 degrees).
Another popular method of melting candle wax is to use a microwave. This is the fastest way of melting candle wax. To do this you will need to place the wax into a heatproof and microwave-proof containers, such as a glass pyrex jug or microwave-safe bowl. Place the container full of wax into the microwave and heat for about 30 seconds at a time, until the wax is completely melted. Stir the wax inside the container every now and again to take care of lumps forming. The total time needed to melt the wax should only be about 3-4 minutes.
Whatever method you choose to melt candle wax, take the appropriate safety steps, as melted wax is very hot and can easily burn you. Use oven gloves or pads to lift the container of melted wax out of the saucepan or microwave.
-Jae at Make Calm Lovely
After making your very first candle, you might just wanna experiment and try out new scents, wax types, methods, and other candle projects! You can customize your candles and give them your personal touch by using different essential oils or fragrances, incorporating petals to add to the aesthetics, or even changing the container. There is virtually no limit to your candle making experience!


