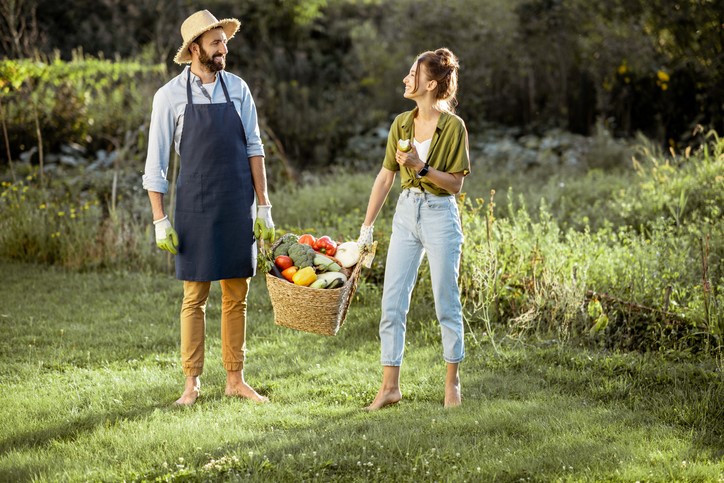
Who hasn’t thought about moving to the countryside and start a self-sufficient lifestyle away from the craziness of the city? For all of you who have thought about it and feel like you want to move forward with the idea of a self-reliant, more sustainable way of living where you harvest your own fruits, herbs, and veggies and eat what you grow, raise goats, do some beekeeping, and even create your own herbal remedies and probiotics naturally, as many other things you can do in a homestead. Keep reading because we have the advice of the experts on how to start a homestead from scratch; check out what they answered to our questions.
Q: In your experience, what should be taken into consideration before you start homesteading?
A: Homesteading is enticing, so many of us want to jump in with both feet. But you can’t start without a plan. You can homestead without a lot of space; even people who live in an apartment can live this lifestyle without a lot of money and without a ton of knowledge… but without a plan, you’ll have a tough time making it a reality. And take your time. After setting up your plan, do things one step at a time, or you’ll burn out quickly. Above all else, have fun. Live Simply,
By Danielle McCoy from The Rustic Elk
Q: What are the basic things you’ll need to start a homestead?
A: The first thing you need to start a homestead is a plan. You need an idea (preferably written out in some way), so you know what to do and when. Like a business, a homestead needs a solid plan of what you want to accomplish and when. It will help avoid being stressed and feeling overwhelmed. Start with a vision board, then set annual, quarterly, monthly, and weekly goals. Make those goals realistic and attainable. Then slowly do one thing at a time, learning new skills as you go.
By AnnMarie Lewellyn from 15 Acre Homestead
Q: When is the best time to start a herb and veggie garden, and what should we start growing first?
A: Gardening is a year-round activity! Spend winter planning your garden, including ordering and starting seeds. Grow what you like and what can be stored for later because if it works out well, you’ll end up with a bounty that you don’t want to go to waste. I’ve had too many radishes, where a little goes a long way, whereas things like herbs, squash, and peppers can be frozen for future use, and garlic, onions, and winter squash can also be stored in a cool, dry place for use months later.
Spring veggies including peas, broccoli, radishes, carrots, lettuce, and other greens like kale can be planted from seed or transplants directly in the ground. For herbs, annuals such as basil, dill, and cilantro are best planted in the spring when the chance of frost has passed, unless you’re growing them in containers that you can bring inside. We love having fresh winter herbs!
Summer veggies should be planted after the last chance of frost has passed, typically after Tax Day (April 15), at least in the South. This includes tomatoes, squash, peppers, okra, eggplant, and beans.
In the fall, you can plant many of the same spring veggies again! Of course, you want to choose plants that are suited for colder temperatures and can even handle a light frost. If October 28 is your predicted first frost date in your area, for example, start radishes with 25 days to maturity from seed by Sept. 23.
Biennial herbs, such as parsley and caraway, live for two seasons but only bloom during the second season, so plant them in the fall for them to flourish the following spring. Garlic should also be planted in late fall for harvesting the following summer.
For rosemary, grow it in a pot outside your kitchen door, or plant it – container and all – in the garden. Just lift the pot out of the ground in autumn when temperatures begin to drop and bring it indoors.
By Jessy Yancey / Managing Editor at Tennessee Home & Farm
Q: What do you need to do to achieve organic produce when growing fruits, herbs, and veggies?
A: Growing organic fruits, herbs and veggies is simple! To do so, you must not use chemical fertilizers, herbicides, or pesticides in your garden. There are plenty of traditional methods for growing organic produce that use natural products for fertilizer and pest management. You can also keep it as simple as planting seeds and weeding your garden by hand or with a handy tool like a wheel-hoe cultivator. Common garden insects, like potato beetles, can be picked off plants by hand. Gardening organically helps you spend more time outside, connecting with nature and the source of your food. It can also help to connect with another organic gardener in your area to learn from them. By being committed to growing organically, you’re helping keep your local soils and watersheds free of chemical pollutants and filling your body with healthy, nutritious food that won’t put you at risk for the long term health effects associated with non-organic agricultural chemicals.
You can learn how to grow food organically by visiting organic farms/homesteads and participating in an educational exchange through WWOOF-USA. With 1,500+ host farms in all 50 states, the Virgin Islands, and Puerto Rico, you can find a farm that will suit your interests.
By Jenna Pollard, Membership Program Manager, Farmer and Homesteader at WWOOF USA
Q: When is the best time of the year to start a veggie garden if you live in a cold-weather region?
A: The best time to start a vegetable garden differs from region to region. It also depends on what vegetables you plan to grow and what garden methods you use to grow them. A general rule of thumb for most warm-weather backyard gardeners is to plant a couple of weeks after the average last frost date for your area. A simple Google search will tell you what USDA Zone you live in as well as projections of that zone’s first and last frost dates. Many seed packets and plant containers will tell you if you’re growing a warm-season or cold-season variety and when a good time to plant them will be. The use of row covers, high tunnels, and greenhouses can also influence when to plant your garden as these systems can extend the growing season into those frost-prone months.
By Tim Kinnard from The Kinnard Homestead
Q: How do you prepare for spring gardening, and how do you know when to start?
A: Preparing for spring gardening is amassing what seeds you would like to plant and in what quantity. This occurs in the late winter. You start seeds in a greenhouse and transplant the plants into the garden after the dangers of frost have passed. You need to know what ZONE you are in for planting. We did a 7 minute video on it, which can be viewed here.
At Quiet Valley, we talk about the historical ways of doing things in addition to modern techniques. We use a combination of both for our garden. Farmers in the 19th century consulted Almanacs for the best planting times and techniques.
Homesteading is easier today because we have science to help us look at our soil quality, and we have access to many products which may help us manage our gardens and foodstuffs in a better way.
By Tiffany Black from Quiet Valley Living Historical Farm
Q: How do you use the raised row gardening method for growing vegetables?
A: Raised row gardening does not require anything more than the most basic of tools. There is no need for a rototiller as the garden is completely no-till and uses cover crops in the fall to both protect and energize the soil.
Raised Row Gardening is all about simplicity. Allowing you to maximize yields, all while minimizing daily, weekly, and even annual work chores.
It uses the concept of raised beds, where growing is confined to a specific area. But instead of “sides”, the soil in a Raised Row garden is simply tapered down on the edge of each row.
The growing space is the only space where a raised row gardener concentrates their time, effort, and energy. This allows the gardener to conserve on resources such as water, compost, and fertilizer. Resources that are often spread out over an entire traditional garden, making it less fertile, and harder to maintain.
By Jim and Mary Competti from Old World Garden Farms
Q: When you want to start a vegetable garden with raised garden beds, how do you prepare the beds and the soil for successful veggie growing?
A:
SITE PREPARATION
Raised beds for vegetable gardening are open on the bottom, to give your plants access to the native soil beneath. To prepare your site for a new bed, mow any grass that’s present on your mower’s lowest setting. Loosen the soil by inserting a digging fork and rocking it back and forth across the entire width of the bed. It’s not necessary to turn the soil completely unless your beds will be less than 18 inches tall.
SOIL
When growing in raised garden beds, it’s very important that you don’t just fill them with topsoil and call it a day. Unless you’ve tested your soil, it’s likely to be heavy and lacking in nutrients. Instead, plan to screen your topsoil and mix it with equal parts screened compost (homemade or purchased). Compost will help buffer your soil and bring the pH closer to neutral—where most garden vegetables like it.
To increase absorption and lessen compaction, you can also add peat and/or vermiculite. These are particularly important for smaller containers, where compaction can create moisture problems. Coconut coir is a good alternative to peat for smaller planters and beds.
For best results, we also recommend adding a complete organic fertilizer to feed your veggies throughout the season. Work this into the upper strata of your beds before planting.
Finally, if your soil is acidic to begin with—which can happen over time—add lime. Five pounds of lime per hundred square feet will raise your pH by 1 point. Don’t lime, however, if you plan to grow potatoes in your beds the first year. This will promote scab.
If your beds are especially tall and you want to save on soil costs, consider layering the bottom few inches with leaves, grass clippings or other materials that break down quickly. This will help increase the organic content of your soil over time and enable your beds to retain moisture more effectively.
By Shannon Cowan from Eartheasy
Q: If you want to raise goats in your homestead, what kind of space do they need, and how do you properly care for them?
A: Goats are one of the most versatile and entertaining animals that you can have on your homestead. They are such fun and actually require less space than you may think.
Goats come in a wide range of sizes, from small pygmy and dwarf goats that can weigh as little as 25 pounds to large Boer goats that can weigh well over 200 pounds. The size of the goat will determine how much space they will need. For a more moderately sized goat that weighs 75-100 pounds, you can raise up to six goats on one acre of well-maintained pasture. The larger the goat, the more space they will need.
If you’re interested in raising goats, you’ll want to properly care for them. Aside from enough space, your goats will need access to a barn or shed. Goats and wet ground don’t mix well, so they’ll need somewhere to escape the rain and inclement weather. It’s a common misconception that goats will eat ‘anything’. Goats are very curious and explore the world with their mouth and lips. Your goat’s diet should come from mostly pasture or grass hay. Keep grain levels to a minimum to prevent illnesses and keep your goats healthy. You’ll also want to provide a goat-specific mineral blend for them. Avoid feed or mineral blends that are designed for all livestock species, or even goats and sheep. Goats have unique nutritional needs that differ from all other livestock species.
Use goat fencing to fence your goats in. A secure and safe fencing that goats cannot get their head through is a must. Horned goats are notorious for getting their head through a fence and then are unable to get their head back out, leaving them stuck. Goat fencing will keep your goat (and their head) on the proper side of the fence.
By Shelby DeVore, Animal Expert and Avid Gardener, Founder of Farminence
Q: In your experience, what are the Do’s and Don’ts when raising and caring for goats?
A: Do your research before you buy goats to see which breeds’ temperament will suit you. Each goat has its own distinct personality, and some personality traits seem to be more common in one breed than in another.
Don’t just get one goat – They get bored and lonely. You need at a minimum two goats. They cuddle, eat and sleep together. A lonely goat will become depressed and get into trouble (climb on cars, eat your garden, or escape).
Build a good fence before you bring home goats. Goats can climb, jump or crawl over or under anything.
Build a sturdy shelter for protection from rain, wind, heat, and cold. Goats hate the rain; they can overheat and catch pneumonia when wet and cold.
Provide enough, clean, dry grain and hay for your goats. Goats do not like to eat any food that is old, wet, dirty, moldy, or has been on the ground. Goats also eat a lot, so plan for a sufficient budget to feed them before you bring them onto your farm. Goats lose weight fast, and it is hard to put it back on.
Pull out all poisonous plants. A hungry or curious goat will nibble on them, and you will have trouble.
Goats have a very distinct herd hierarchy, a pecking order. They pick on lesser goats, especially if they are new to the herd. Goats will ram and head butt each other. When you introduce a new goat into a herd, try to introduce two together, so they have a buddy. Keep goats of the same size together, except when they are still with their mom so that the smaller goats don’t get hurt.
Don’t buy a buck unless you want to breed. Bucks are stinky and sticky about 6 months out of the year. You cannot pasture them with the milking goats, because their smell will make the milk taste bad. And remember, they cannot live alone.
If you have dairy goats, do not skip a milking. You cannot go on vacation and leave them un-milked. They will be in pain and they will develop mastitis. Plan on you staying home or finding a knowledgeable farm sitter before you bring goats onto your farm if you want to continue to have a life off the farm.
Learn how to trim feet (every four to six weeks). Learn how to do a fecal and learn basic worming and medications.
Do not delay medical treatment. Goats need to be watched and treated fast if they get sick. Learn what is normal in your goats. Build a great relationship with your vet from day One. Have all emergency medications on hand. When you need them, it’s too late to order them.
By Julia Shewchuk from Serenity Acres Farm
Q: As a beginner homesteader, how do you start a chicken coop at home?
A: Starting a chicken coop at home is easy enough these days, with lots of plans online for mobile or stationary coops. If you have the cash you can even buy one that can be moved every few days, so the birds have fresh pasture. Build one for the amount of birds you want. You may want to expand when you find your neighbors want to buy eggs from you because they taste so good.
If you have a barn or shed already built, you can just make a doorway, some roosting bars (7” per bird), and nesting boxes (one per 5 birds) and buy an electric netting fence from Premier One or Farm Tek. We manage to fence in 4 different pasture areas from one door of our stationary chicken coop. Make sure the fence is hot, and the coop is fox proof by digging the boards down at least 6 inches using ratwire to protect the bottom if the boards aren’t tight together.
Chickens need a proper laying ratio in order to lay eggs consistently. Of course, they love veggies too but never give them potatoes, they’re poisonous to chickens, and onions can give the eggs an off flavor too.
If buying chickens from day olds, order from a reputable company. Research the breeds that suit your climate and make sure you have all the necessary supplies to raise chicks. Buy Storey’s Guide to Chickens. It’s the chicken bible.
Good LUCK!
By Lisa Wheeler Duff from Oak Spring Farm
Q: What is the proper way to care for baby chicks, what do they eat, and how often are we supposed to feed them?
A: Baby chicks need to be kept safe and warm for the first few weeks of their life. Before they grow feathers, they are unable to regulate their body temperature, so they need a little help staying warm in the form of a brooder box fitted with a heat lamp to keep their nursery a nice toasty 90 degrees or so the first week, dropping the temperature five degrees a week.
The box should be situated in a convenient spot in the house, but away from family pets or small children, and should have a wire top on it to prevent the chicks from hopping over the sides. Soft bedding like pine shavings or hemp makes a nice foundation on the floor of the box – and the bedding should be changed every few days or whenever it gets wet or there’s an odor. Newspaper should not be used as a base because it is too slippery for the chicks to get a good grip on it. Instead, rubber shelf liner makes a nice textured surface for the floor of the brooder.
Chicks should be fed a high protein chick feed for the first eight weeks. This is the period of their fastest growth rate, so ensuring they eat a balanced diet of commercial feed is optimal. They should be offered fresh, room temperature water and dry feed at all times while they’re in their brooder, day and night. Once they are eight weeks and able to move outside into their coop, they can be fed during the day only.
Baby chicks can be given limited healthy treats like chopped herbs or dandelion greens, oats or dried grubs or mealworms in addition to their feed. Adding natural supplements like brewers yeast, garlic, probiotics and sea kelp can aid in chicks immune, respiratory and digestive health, and adding a splash of apple cider vinegar to their water a few times a week helps to balance their pH levels and boost immune system health. They also need “grit” in the form of a dish of coarse dirt or small stones to help them digest the food they eat, since chickens don’t have teeth.
By Lisa Steele, Author, Chicken Keeper, Master Gardener, Founder of Fresh Eggs Daily
Q: What is the best advice you can give a beginner to start beekeeping?
A: Do your research! Bees are wonderful, but they are also a huge commitment, so make sure you understand exactly what you’re getting into and have a support network ready to help you if needed. The best thing you can do is join a local beekeeping club (or find a local beekeeper who is willing to mentor you), that way, you can quickly find out more about your local conditions. You could also try to find a local beekeeping course to give you a hands-on headstart. There are also lots of resources available online, including podcasts, which is a quick way to increase your general knowledge of bees and many great books on the topic; read everything you can! I’ve linked to several resources in a blog post here.
Make sure you go with an experienced beekeeper a few times before you get your own bees so that you fully understand what is involved with common honeybee pests, problems, and solutions, regularly inspecting bees for disease, when bees need some extra help with finding food, and how you are going to eventually harvest honey (and double-check that you actually enjoy being around bees and are not dangerously allergic). When you decide to go ahead and get your own hive(s), remember it’s quite difficult to move a hive (the bees get lost if you move it) so choose your hive location carefully! Most of all, have fun! Bees are fascinating, there is always more to learn, and they are a great addition to any homestead.
By Liz Beavis from Eight Acres
Q: What do you need to grow your own pumpkins, and which cares must be provided for them to grow healthy?
A: Pumpkins can be both easy and hard to grow! Many of us have experienced finding “volunteer” pumpkins growing from seeds left behind by last year’s jack-o-lanterns, and sometimes these unexpected plants will grow vigorously and produce a splendid crop of pumpkins. But pumpkins, in general, can be finicky about getting enough water and plenty of warmth and sunshine, so picking a spot in full sun and keeping an eye on soil moisture can help give you a good crop.
One very important thing to keep in mind about pumpkins is how large the plants can get—their vines can easily sprawl to twenty or more feet in all directions, and so they need plenty of space. If your space is limited, consider a “bush-type” variety versus the “vining-type.” They still get fairly large, but at least you won’t have a Jack and the Beanstalk situation in your yard.
Seed selection is important. Consider what you will use the pumpkins for, as there are special varieties that make the best pies and soups and others that will give you the perfect jack-o-lanterns. There are also many decorative varieties—and many of these are delicious as well as beautiful. Some varieties are resistant to powdery mildew, which is a common problem late in the growing season.
Plant your pumpkins in “hills” that you create with a hoe, spaced about six feet apart on all sides for the vining-types. Ideally, include some compost in the hill as fertilizer. Usually, three or four seeds to a hill work well, and then you will eventually need to thin them to one or two healthy plants per hill.
It’s important to control weeds, especially until the pumpkins start to “run” (that’s when their vines rapidly stretch out in all directions.) It’s usually best to pull or use a hoe to uproot any weeds entirely. Once the pumpkin leaves cover the bare ground, there will be less weed pressure, but you’ll still want to keep an eye on the situation. If you can mulch the entire area with straw, you will deal with fewer weeds, and much less moisture will evaporate from the soil.
Pumpkins thrive in hot, sunny conditions as long as they have the water they need—and, as pumpkins are mostly water, they need more than many other crops. A good soaking at least once a week will help them thrive, and if you have very sandy soil, even more than that may be necessary.
By Angie Treinen from Treinen Farm Corn Maze and Pumpkin Patch
Q: What is the easiest way to make raw milk cheese at home?
A: The answer is what kind of raw milk cheese? There is a huge variety. Do you want a cheddar or a soft cheese? There are simple kefir cheeses….
The world of cheese is vast and filled with all sorts of cultures and flavors. The most simple farmers’ cheese can be made by taking a gallon of fresh raw milk and heating it to body temp of 100 degrees F. No hotter. This retains the nutritional dense components of cheese.
Then mix in lemon juice or vinegar until the cheese separates into curd and whey. When fully separated, then strain the curds through a cheesecloth and ring out the whey. Let it hang for an hour or two. You have farmer cheese.
Take the cheese curd out of the cloth and drizzle olive oil and add some good salt with herbs. Totally yummy!
That’s just the simple recipe. It gets more complex from there.
By Mark Mcafee from Organic Pastures
Q: When taking horses out for grazing, what is the best way to control and track the grazing?
A: I don’t have a lot of expertise with horses but fieldmargin has some great capabilities for tracking and managing grazing. You can set up ‘herds’ for your animals, we have users with stables who set up a herd per horse or you can put several together in a group if they are grazing together. You can track which horses are where and fieldmargin automatically calculates grazing days so that you can see how many days a given field has been grazed. When you take your animals out, the system starts tracking rest days so that you can see how long your field or paddock has had to recover. It also creates a herd history so you can check back on each animal and see when it grazed were and attach notes to record any treatments administered.
By Camilla from Fieldmargin
Q: How do you preserve the food that you grow and which ingredients do you need to make kombucha?
A: Growing your family’s own food is amazing. But you soon realize it all comes at once, in a bigger quantity than you can eat at once, so you need to preserve that food, to enjoy in other seasons. Fermenting is my favorite way to do that.
Fermenting fresh-grown food actually increases the food’s nutritional value by adding a wonderful dose of healthful probiotics (microorganisms crucial to our health). Fermenting adds a pleasant, sour flavor to food, and it’s the easiest and most cost-effective way to preserve food. Find some delicious fermenting recipes here.
But there’s no need to stop with fermented food. You can ferment drinks as well. Our family loves kombucha, a fermented sweet tea that we flavor with fruit and herbs we grow ourselves, as well as so many other options. All you need is tea, sugar, and a SCOBY. I explain, and share all my favorite products I use for making kombucha right here. Or snag a FREE downloadable chart that breaks down your exact measurements of tea and sugar to make the perfect DIY kombucha.
However we preserve our summer harvest on any given year, we are sure to do at least a little fermentation and dry some herbs and freeze some fruit for all-year-long delicious kombucha.
By Michelle Visser from Souly Rested
Starting a homestead can be easy if you follow our experts’ advice, plan ahead and do one thing at a time; it can be fun, and you’ll learn a ton of new stuff while you connect with nature and create a self-sufficient lifestyle.


