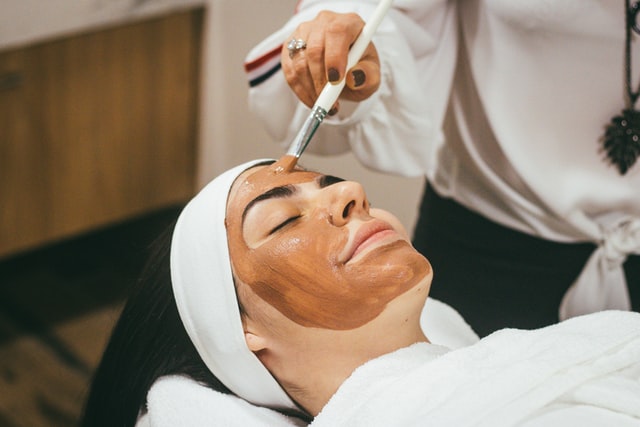
We can all agree that our daily personal care and beauty products are essential to keep us feeling fresh, tidy, and pretty in most cases when we talk about makeup and cosmetics, it can seem like they are harmless from the outside. Still, the reality is that many of those products that we use contain a bunch of harmful chemicals that we are not even aware of.
The best option to avoid putting all those chemicals on our skin and hair is to make them ourselves! We asked the experts’ advice to know the best and easiest ways to create our personal care, beauty, and cosmetic products with natural and organic ingredients from the comfort of our home, learn how to prevent and treat a pimple in your nose, reverse aging and vanish premature wrinkles.
Discover the many uses of lavender, tea tree, chamomile, the benefits of aloe vera, and essential oils and forget about spending tons of money on products that may have some toxic effects on the long run.
These are the recipes and advice they gave us:
What is the best makeup remover recipe that you can make at home?
I love making my own makeup remover because it is affordable, all-natural and most importantly – it does a great job. It works on the oil dissolves oil principle, and it can help you remove all your oil-based makeup and the excess sebum and grime of the day.
Another great thing about this DIY makeup remover is that it is suitable for all skin types (yes, even for oily and acne-prone skin). Plus, unlike many store-bought alternatives, it is very gentle, non-irritating and non-drying.
To make your own makeup remover, the first thing that you will need is castor oil. Castor oil is antimicrobial and anti-inflammatory, and it is one of the best choices for cleansing the skin. However, this oil could dry out your skin in time, which is why you shouldn’t be using it on its own but mixed with another oil.
This other oil could be any quality plant oil you have on hand. Some of the best choices would be jojoba, grapeseed, safflower, sweet almond or avocado oil. You can also use coconut oil, which I often use. Just be careful about it and patch-test it first – in some cases, coconut oil can clog pores and cause breakouts.
You will also need some witch hazel, which is a great face cleanser and natural astringent.
So, mix 1 teaspoon of castor oil, 2 teaspoons of coconut (or any other) oil and 2 tablespoons of witch hazel. When your mixture is evenly combined, there are two ways to go about it:
- You can stuff a bunch of cotton rounds into a clean jar and pour in your mixture, making sure all pads are soaked nicely. Then you just use these to remove your makeup.
- Apply your makeup remover with your hands directly to your dry, makeup-covered face. Let it sit for a few seconds, then gently massage it into the skin.
Then soak a clean, soft washcloth (or a microfiber cloth, if your skin is sensitive) in hot water. Wrap it around your fingers and remove your makeup with it in gentle circular motions. Repeat a few times until all the oil and makeup is off.
I like this second method more – it takes off all of my makeup every single time.
Whichever method you use, finish by washing your face with a gentle face wash and continue with your skincare routine as you normally would.
By Jovana from Be Spotted
What is the easiest recipe for a DIY skin cleanser?
Making a natural cleanser doesn’t need to be complicated. Sometimes, all you need are a few ingredients to make something spectacular. Today I’m using olive oil, shea butter, and a little vitamin E to make a DIY skin cleanser.
These three natural ingredients come together to make a wonderfully rich and creamy anhydrous cleanser. The best part? We don’t need to add a preservative!
So what’s so special about these three ingredients? Besides being cheap and readily available, each of them plays their part in making this cleanser a knockout.
Olive oil has been used as a cosmetic ingredient for thousands of years. It’s packed full of antioxidants, making it particularly suited to any and all anti-aging formulas. Olive oil also contains antibacterial properties, making it the perfect addition to this excellent cleanser.
Shea Butter adds the creaminess to this creamy cleanser. It has a mild, smokey scent and melts naturally when applied to the skin. Shea butter is found in many different products and will add moisturizing benefit to our formula.
Vitamin E is an important ingredient in almost any all-oil skincare recipe. Because we use no water in this formula, we don’t need to use a preservative. However, oils can still go rancid. Adding Vitamin E protects our oils from going rancid for longer.
Natural Shea Butter and Olive Cleanser Recipe (suitable for all skin types)
Ingredients/Equipment
- 50g Shea butter
- 50g Olive oil
- 0.5g or 1 capsule vitamin E
- Bowl and spoon for mixing
- Container for storing the cream
Method
Squash/Mash the butter until you have a soft, smooth paste. You may find this easier to start by pressing the butter against the bowl with the back of a spoon.
When the butter is good and soft, slowly start to blend in the olive oil. If it’s too difficult with a spoon, try using a small electric whisk or pestle and mortar.
Once the butter and oil are fully combined, and you have a nice creamy consistency, stir in the vitamin E and transfer to a clean container.
If you want a thinner cream, reduce the amount of butter and add more olive oil. For a thicker cream, reduce the amount of oil and add more butter.
How to use it
Anhydrous cleansers are purely oil-based and are best used on wet skin.
After splashing your face with water, massage the cleanser into your skin using deep, circular motions. This will act as a solvent, helping to collect up any grime or excess oils within the skin.
Remove the cleanser with a warm muslin cloth or damp cotton wool pads.
Make it unique
Once you’ve got the hang of making this creamy cleanser, you can personalize it to suit you and your own unique skin.
Think about adding a few drops of essential oil, such as lavender, sweet orange, tea tree or lemon. Essential oils are not just aromatics, as they can bring about some wonderful aesthetic changes to your skin.
Be adventurous and use a different kind of butter. Over the years I’ve used mango, avocado, illipe, capuacu butter, and many more, all with great results.
Think about switching up oils to change the density and feel of the cream. For example, avocado and grapeseed would result in a heavy, rich cleanser, whilst an evening primrose, rice-bran, and rosehip offer a lighter alternative.
Just experiment a little and have fun!
By Angela from Savvy Homemade
What is the best recipe for a facial skin moisturizer with oils?
I think the best recipe is just the oils! We have a 7 oils blend that is fabulous, with primrose, rosehip seed and kukui oil and more, but you can use many oils to make a very simple facial moisturizer. You can even just use any of these oils alone, kukui oil, primrose oil, rosehip seed oil, or even just olive oil or almond oil. It can all be as simple and easy as that!
By Lily Morgan from Lily Farm Fresh Skin Care
How do you make your own natural toothpaste at home?
It’s easy to make toothpaste at home using just a few natural ingredients. You’ll need:
- 2 Tablespoons powdered bentonite clay
- 4 Tablespoons water
- 1 Tablespoon coconut oil
- 1/4 teaspoon stevia powder
- 1/8 teaspoon sea salt
- 10 drops peppermint essential oil
- 10 drops orange essential oil
Just mix all ingredients together in a non-metal bowl. Store in a small glass jar for about 1 month. You can check the full recipe here.
By Micaela from Mindful Momma
How do you make your own hydrating tinted lipstick at home?
Like most of us, you have probably been wearing lipstick for years, but have you ever stopped to look at the ingredient list on the back? I can’t even pronounce half of those words.
Well, it turns out that the majority of drugstore lipsticks are made with mostly petroleum-based ingredients. That can’t be good for you!
You might be surprised to learn that making your own all-natural hydrating lipstick is actually super easy to do. All you need are a few basic ingredients that you can find at most pharmacies and drug stores.
This base recipe calls for equal parts of a cosmetic butter, a moisturizing oil and a binder. To customize your lipstick, you can add some Vitamin E oil for extra moisture and healing, your favorite essential oil for scent and some sort of colorant.
All natural colorants you can use include beetroot powder, turmeric and cinnamon. Blend them together to get your perfect shade. Natural food coloring also works well.
If you don’t mind using a bit of non-natural color, go ahead and stir in a little chunk of your favorite lipstick, blush powder or eye shadow.
You will also need an oven-proof dish such as a Pyrex measuring cup, a microwave or a double boiler, and some cosmetic tins or lip balm tubes. These can be found online or feel free to recycle your old lip balm tubes and little cosmetic tubs.
Basic Recipe:
- 1 tsp Cocoa Butter, Avocado Butter or Shea Butter
- 1 tsp Almond Oil, Jojoba Oil, Grapeseed Oil or Coconut Oil*
- 1 tsp Beeswax or Soy Wax (vegan)
(* Coconut oil is not for everyone. While most people don’t have any issues, some have reported increased dryness with long term use. If your skin tends to be more on the dry side, stick with Almond Oil or Grapeseed Oil.)
Combine all ingredients in the oven-safe dish and microwave on high, 30 seconds at a time until completely melted. Stir to combine.
If using a double boiler, add water to the bottom pot and bring it to a simmer. Place your ingredients in the top pan and stir until melted.
Now add your optional ingredients. (Begin adding just small amounts at first and gradually add more until you get the desired scent or color.)
- 2 or 3 drops of Vitamin E Oil
- Your choice of colorant
- 1 or 2 drops of Essential Oil
Pour into your containers, cover and place in the refrigerator to set. Your homemade lipsticks will keep for a long time in the refrigerator. If you ever notice an ‘off’ or rancid smell, discard it.
by Annette Browning from FiberArtsy.com
How do you make your own massage oil with essential oils?
Do you regularly enjoy massages? In today’s high-stress lifestyle, indulging in a massage can bring needed relaxation to mind and body. It is a great way to de-stress and revive your body. Adding essential oils into a massage can greatly enhance the benefits. Essential oils are wonderful for combating daily stress too!
While a professional massage can be a welcome treat, it can be costly and time-consuming. Going the DIY route may be a better option, especially since you can make homemade massage oil with just a few ingredients.
If you have a partner that is willing to give massages, that is great! Self-massage can be just as powerful especially when you are enjoying aromatherapy benefits too. It is important to take some time on self-care and recharge so you can be the best you!
To make homemade aromatherapy massage oil, you will need a base of carrier oils. Carrier oils come from nourishing plant and nut oils. The oils can nurture and protect your skin, keeping it soft and supple. Fast absorbing and rejuvenating carrier oils are the best to use for massaging, like jojoba oil or sweet almond oil. Other options include grapeseed oil and fractionated coconut oil.
What is really exciting is that you can tailor the aromatherapy massage oil to your desired outcomes depending on what essential oil or oils you pick. For example, if you want a relaxing massage, use calming oils like lavender or chamomile essential oil. Or, if you want more energy, use stimulating oils like peppermint or eucalyptus.
You will also want essential oils that you enjoy smelling since the massage oil will leave the skin with the essential oils’ scent. Breathing in the essential oils promotes a balancing effect on the mind and body.
Lavender essential oil is a fabulous starter oil if you are new to aromatherapy. It has a host of healing properties and is very gentle. Lavender essential oil is suitable for all skin types and is widely available. Be sure to look for 100% pure lavender essential oil (no perfume or fragrance oils, these are not the same as essential oils).
To make lavender massage oil at home, here are the ingredients you will need:
- 2 tablespoons Sweet Almond Oil
- 2 tablespoons Jojoba Oil
- 24 drops Lavender Essential Oil
- 2 oz (1/4 cup) glass bottle
Add all the ingredients into the glass bottle using a funnel. Place the cap on the bottle and shake to blend the oils together. Label the bottle, and your homemade body oil is ready for use!
One of my favorite ways to use this massage oil is a bedtime foot massage. While it is nice if you have a partner that gives you a foot massage, it is definitely something you can do for yourself and still gain the benefits. Spending just a few minutes at night on a quick lavender foot massage can help you relax and get a better night’s sleep.
I hope that you can see that massages don’t have to be done at a spa for you to reap the benefits of massage therapy and aromatherapy. You can easily make lavender massage oil at home with only a few ingredients. Use it to pamper yourself or your loved ones, enjoy!
By Jennifer Lane from Loving Essential Oils
What is the easiest soap recipe for a beginner to make at home?
There are two main categories of soap making- melt and pour soap and cold process soap. Melt and pour soap is like making a cake with a cake mix, while cold process soap is like making a cake completely from scratch. Melt and pour soap is the absolute easiest way to make soap at home, but cold process soap can absolutely be suitable for a beginner.
Melt and pour soap making involves buying a premade base that is melted down to a liquid. The base can be customized with colors, fragrance, oils, exfoliants, and more. It’s poured into a mould and hardens within several hours. It’s ready to use right away and is a quick, low-cost way to try soapmaking. It’s a good option for kids as well.
Cold process soap making is more challenging than melt and pour, but something a beginner can absolutely tackle. It can be customized more than melt and pour, but it also requires more research, tools, and prep.
Cold process soap begins by combining a blend of oils with a lye water solution to start the process of “saponification.” The lye and oils come together to create a soap “batter” and can be customized with color, fragrance, and more. Once poured into a mould, the soap needs to cure for 4-6 weeks and is ready to use. Because cold process soap involves working with sodium hydroxide lye, it’s important to wear safety gear such as goggles and gloves.
It’s important to start slow when jumping into cold process soap. It can be tempting to try a recipe with multiple colors, swirls, and toppings. But keeping it simple and building your skills will ensure success.
Once you have that batch under your belt, it’s time to introduce color, technique, and additional ingredients.
By Amanda from Bramble Berry
How do you make a natural hair conditioner to keep your hair hydrated?
I’ve been making my own natural hair products for more than 10 years now, which has stopped my hair shedding and scalp dryness when nothing else has helped (including vitamins and dietary changes).
A natural hair conditioner is extremely simple to make at home – without any of the toxic chemicals, you’ll find in commercial conditioners, such as Parabens, SLS, PEGs, and endocrine-disruptors.
These chemicals are known to be skin, lung, and eye irritants, some are carcinogens, and others mess with your hormones. A good home detox must include hair products.
My favorite conditioner recipe is a mix of 8 drops of pure castor oil with 2 tablespoons of Coconut oil/Argan oil. This recipe does not only detangle and hydrate your hair, but treats any scalp problem, including dryness, itchiness, and dandruff.
Castor oil (especially Jamaican Black Castor Oil) works great for all hair types and colors, and you can leave it on overnight and wash it off with a natural shampoo in the morning.
Another ultra-effective recipe (especially for curly hair) includes mixing 2 cups of coconut oil/olive oil with 1 teaspoon of raw honey. Once you wash it off with a natural shampoo, it will leave your curls shiny, light, fluffy, and moisturized.
You can add a few drops of essential oils to these recipes, to make them smell amazing, or to supercharge their scalp-healing abilities. The two best essential oils for the hair are Tea Tree oil and Rosemary oil.
It is very important to wash off these conditioners with a chemical-free natural shampoo because commercial shampoos strip the moisture and protective components off your hair and scalp and damage it in the long run.
You can easily make your own shampoo by filling an empty shampoo bottle with equal parts of distilled water and unscented liquid castile soap. Add 2 tablespoons of pure Aloe Vera gel, and a few drops of essential oils that you like (Lavender/Peppermint), and you’ve got a great natural shampoo that will clean and detox your hair and scalp.
By Meital from Natural Alternative Therapies
How do you make your own anti-aging cream at home with natural ingredients?
I love making my own skincare products at home, It’s easy, quite a bit of fun and you can be assured the products you produce are 100% nasties free.
This home-made anti-aging cream will work just as well as all your fancy store-bought ones only without the chemicals & hefty price tag.
It’s light, silky & ultra-hydrating with Rosehip Oil (improves skin texture and even reduces the appearance of acne scars or stretch marks), and Jojoba Oil (helps to promote healthy, glowing skin without clogging pores), plus wrinkle busting, super restorative Carrot Seed Oil. It also has organic green tea which is chock-full of antioxidants to start reversing the aging process & get to work on those wrinkles.
Start using this & watch your wrinkles melt away……….You’re Welcome!!
Natural Wrinkle Busting Cream Recipe
- 1/8 c organic green tea
- 12gm rosehip oil
- 12gm jojoba oil
- 12 drops carrot seed oil
- 1/4 teaspoon vitamin E
- 1/2 teaspoon emulsifying wax
- Scent with your choice of essential oils or leave it plain
Place your organic tea in a clean, sterile glass bowl or jar & place it in a gently simmering pan of water. Measure out the rosehip & jojoba oil & wax, combine all three items in another sterile glass bowl or jar & place in the simmering pan of water to melt.
When the wax has melted, remove both jars from the simmering water & pour the liquid into your melted oil & wax, mix & blend well with a stick blender, whisk, or a fork!
Be sure to blend well for a minimum of three minutes to combine your cream, once your cream is well combined add the Vitamin E & carrot seed oil & any essential oils you may want to add – blend well to combine & then let cool.
I preserve mine with .5ml of Leucidal liquid, so it keeps forever, but an unpreserved batch will keep in the fridge for many months & you get the added soothing effect of cool lotion – great for treating puffy eyes.
Enjoy & Happy Skincare Making!
By Kailah from MG Naturals
What is the best recipe to detox and purify your skin with a homemade face mask?
Environmental pollution such as smoke, exhaust fumes, and dust particles can stress-out our skin. In addition, our skin has to cope with what we put on or secrete out, including our sweat, sunscreen, and make-up. While healthy, youthful skin is very robust and copes well with daily life, we all have those days where our skin needs a little help.
When overwhelmed, our skin feels more sensitive than usual. It may become red, itchy, extra dry, or greasy. We may experience break-outs, or it may appear dull and lifeless. While our first instinct may be to give it a good scrub and deep clean to ‘wake it up’, a better approach is to gently bring it back into balance with a clay mask.
Clay, the natural and gentle detoxifying agent.
Bentonite is your deep detox ‘go-to’ clay as it acts like a magnet, attracting dirt particles and environmental pollutants and pulling them up to the surface where they can be washed off.
Kaolin is much gentler and used to cleanse and form an occlusive, smooth layer across the skin.
When we wear a clay mask, we produce a microclimate at the skin’s surface. Toxins and pollutants are pulled towards the clay while soothing extracts and additives work on a cellular level to rebalance the complexion.
Clay masks don’t necessarily require a gum to bind them together, but it certainly helps make the product feel softer, spread more readily, and wash-off more elegantly. Xanthan is a natural and vegan-friendly option.
Infusing the mask with Shiitake Mushroom, Manuka Honey Powder and Turmeric creates a product that is anti-inflammatory, anti-bacterial, hydrating, and soothing. In addition, Shiitake extract increases the mask’s detoxifying powers by harnessing the chelating powers of mushrooms.
This simple yet powerful skin detox is suitable for all skin types, but as with any natural product, a patch test is advisable in case of allergies or reactions.
Creating the powdered mask
- 1 Tbsp Kaolin Clay
- 1 Tsp Bentonite clay
- ½ Tsp Xanthan gum
- ½ Tsp Shiitake Mushroom Powder
- ½ Tsp Manuka Honey Powder
- ½ Tsp Turmeric Powder
Blend the ingredients together and decant them into a jar for storage.
Using the mask.
Take ½ Tablespoon of the dry clay powder and put that into a mixing bowl. Slowly add water or your favorite hydrosol or the fresh honey and mix to form a paste. Once smooth, apply to the skin as desired. Leave for 20 minutes and then rinse off.
Your skin will feel soft, cleansed, and vibrant.
Customizations and notes.
Swapping powdered for fresh honey is fine but should be added when you wish to use the mask rather than into the dried powder. You can add as much honey as you like.
This mask dries completely and as such may feel a little tight for those with very dry skin. If you want to avoid that tight-skin feeling, replace ½ -1Tsp of water or hydrosol with the equivalent amount of your favorite vegetable oil.
By Amanda Foxon-Hill from New Directions Australia
What is the best body scrub you can make at home for soft and glowing skin?
Using a body scrub regularly can seriously improve your skin, and it also happens to be one of the easiest products to make yourself! So we thought we’d let you take matters into your own hands and DIY it.
Common ingredients you’ll find in body scrubs include honey, sugar, salt, coffee, olive oil and other moisturizing oils, oatmeal, essential oils, and spices. You probably have a lot of these ingredients already!
This Oatmeal and Brown Sugar body scrub recipe below will help you get started on your own easy at-home DIY body scrub. Remember that substitutions are totally possible, so mix and match and make it your own.
Oatmeal and Brown Sugar Body Scrub
There is some belief that the caffeine in coffee can help reduce the appearance of aging skin. Whether or not this is true, exfoliating can help that area and reduce the appearance of bumpiness.
If your skin is sensitive, oatmeal is a good substitute for coffee. It lightly exfoliates while also soothing for the skin. The olive oil adds moisture while also helping this mixture stay together and apply easily
Ingredients:
- ¼ cup olive oil
- ½ cup brown sugar
- ½ cup ground oatmeal or coffee grounds (the coffee is more invigorating—choose oatmeal for sensitive skin)
- A few drops of your favorite essential oil.
Directions:
Combine ingredients and store the mixture in a dry place for up to 4 weeks. To use, wet skin first, and then apply in circular motions, gently exfoliating. Rinse. If you have extra sensitive skin, just leave out the sugar.
Remember that exfoliating and using body scrubs can help create smoother and more youthful skin. Just be aware that using this scrub in your shower requires some clean-up afterwards.
By Nikki from Annmarie Skin Care
As you can see, learning to make your own personal care, skincare, makeup, and beauty products with natural ingredients can be super easy and fun, you can still buy a few products, like the Korean face masks that are all-natural, just make sure to check the ingredients before buying. Start with some easy recipes, and as you achieve greater knowledge, skills, and confidence you can start trying some more elaborate recipes, and you’ll be a pro in no time!


